Showing posts with label recipe. Show all posts

Sunday, February 16, 2014

Spicy Asian Noodle Soup to Cure What Ails You

Now that everyone's over the initial excitement of being snowed in or polar vortex-ed in or the whole "there's two inches of snow on the ground, shut down the city!" debacle going on down south, I'm jealous, #SouthUSProblems, we're all leaving the house and interacting with each other again. We all know what happens when masses of people start hanging out together in indoor spaces with no ventilation. That's right, flu and cold season is officially upon us!

Thanks to my mother's somewhat questionable habit of always leaving our milk and leftovers out on the kitchen counter all night serving it to us the next day without hesitation, I have an platinum strength immune system and an iron stomach. In short, I don't get sick apparently. Even when I spend all night cuddling and being coughed upon by my extremely sick boyfriend. Hooray.

Anyway, bragging over. Watch, the universe will decide to teach me a lesson in egoism and make me sick tomorrow. I wanted to give you a soup recipe that I'm convinced will cure you or at least make you better enough to go back to functioning. Inspired by Vietnamese Pho and all those other super delicious Asian soups with those amazing toothsome noodles and spicy light flavors, this is our new go-to sick-baby* soup:

Spicy Asian Noodle Soup
- Yields about 4 sizable servings
Ingredients
  • 1 Tbsp oil (olive, grapeseed, sesame, your choice)
  • 1 generous tbsp grated fresh ginger
  • 2 cloves garlic minced
  • 1 jalapeƱo seeded and minced
  • 6 cups water (include a vegetable bullion cube) or vegetable stock
  • 3 green onions thinly sliced, reserve a tablespoon or two for garnish
  • 3 Tbsp reduced sodium soy sauce 
  • 1 generous tsp rice vinegar
  • 2 baby bok choy chopped
  • 1/2 red pepper sliced thinly
  • 1 carrot sliced thinly
  • 7 oz extra-firm tofu cubed
  • Generous serving of soba noodles (Mine comes in packages of 3, I used one package)
  • Couple tablespoons chopped cilantro
  • sriracha sauce, for serving
Instructions
  1. Begin preparing the soba noodles. Follow package directions and boil in a separate pot. Drain and set aside in a bowl with a little oil to keep the noodles from sticking together.
  2. In a large pot, heat oil over medium heat until hot. Then, add ginger and garlic and saute until fragrant, 2-3 minutes. 
  3. Add jalapeno, vegetable broth, and green onions to the ginger and garlic and bring to boil. Then, reduce to simmer.
  4. Add soy sauce, rice vinegar, vegetables, and tofu, and simmer until veggies are heated through, 2-3 minutes. Then remove from heat.
  5. Pile desired amount of soba noodles in the bottom of individual bowls, ladle soup on top and garnish with reserved green onions, cilantro, and desired amount of sriracha sauce.
  6. Eat and be cured.

Honestly though, I'd make this even if we were spry and healthy. It's that good. Enjoy and get better!

*Um, I feel the need to add a disclaimer, sick-baby as in that giant baby of a boyfriend/girlfriend/friend/roommate/adult who's sick, not an actual sick infant… 


Thursday, December 20, 2012

Morningstar Grillers Chili and a Yogurt, Honey, Nutmeg Mask

Two recipes today! I'm sorry, no photos right now because I'm lame like that. While I read tons of food blogs with gorgeous, mouth-watering pictures of their recipes, I am absolutely terrible (and lazy) at construction the perfect photographic set-up for the meals that I make. However, I will be making the chili again so I'll try to remember to take a picture and update this post with it.

Anywhoo. The recipes are for a really simple but pretty freaking yummy chili using Morningstar Grillers and a riff on the nutmeg and milk microdermabrasion I wrote about in my previous post. While I really liked the results of the microdermabrasion, it bothered me how runny it was. I would have to do it in the shower and it made such a huge mess. You ain't lived until you've nearly slipped and died on milk and nutmeg all over the bottom of your bathtub. Besides, picking nutmeg out of your hairline gets annoying after a while. 

So the solution was to create a more mask-like concoction. I came up with this when I went to go wash my face with honey one night and thought, "What would happen if I mixed yogurt, honey, and nutmeg together?" The answer? Magic. Yes, magic happens. I'm not lying. It turned into a face cleanser/scrub/mask that creates magically clear, smooth, soft skin. 

The thing is, most people don't realize that dry, flaky skin can benefit from a good hearty scrub rather than a super-moisturizing mask. When my forehead was going all, "I hate you, I hate life, zits, zits, zits," this mask calmed it right down. "Hey there boy, relax a bit."

So here's the recipe for the magical, and apparently talking, mask.

Yogurt, Honey, and Nutmeg Mask

1 tbsp yogurt
1/2 tbsp honey
1/2 tbsp ground nutmeg

Add to bowl and mix together very well. Apply to a dry, makeup-free face using gentle circular motions. Leave on for 5 minutes or more. Rinse off with warm water. Apply moisturizer if necessary. (I use olive oil.)

And onto the recipe of the edible kind...

Grillers and Red Bean Chili
makes 4 - 6 servings.

1 onion, diced
1 tbsp tomato paste
3 cloves garlic, minced (more or less to your preference)
32 oz. can fire-roasted diced tomatoes (I use Muir Glen)
15.5 oz. can fire-roasted crushed tomatoes (Muir Glen also)
2 tbsp chili powder
1/2 tsp cumin
pinch cayenne powder
Salt to taste
1 bag Morningstar Grillers
1 big can red kidney beans
Optional garnishes: chives, cilantro, parsley, chopped avocados

In a dutch oven or heavy pot, saute the onions in olive oil until soft and translucent. Add the tomato paste and garlic and cook for about 30 seconds more. Then, pour in the two cans of tomatoes and bring to a boil. Lower to a simmer and season with chili powder, cumin, cayenne powder, and salt to your taste. Simmer partially covered for about 20 minutes or longer if desired. Add the Grillers and beans (as much beans as you like) and cook until warmed through. Garnish and serve!

I served it with elbow macaroni which was what Guitar Boy requested. It's called chili mac? Eh. It's not really my thing. I've only ever really eaten it by itself with a hunk of crusty bread. But you can serve it however you like. A note on Morningstar Grillers: I try not to use faux meat a lot but when Guitar Boy gets those pleading sad puppy eyes, I can't say no. However, it's my philosophy that when I gave up meat, there's no reason why I should try to revisit it in faux form, you know?

Can you believe Christmas is almost here? My Christmas spirit has not yet shown its spangly red and green head, but I think it's because we completely slacked on getting a tree. Holiday fail, I know. There are certain people in my life who will be aghast to find this out... In any case, Happy Merry Christmahanukwanzicah! 

Monday, December 3, 2012

Face Mapping and Nutmeg Dermabraison

Hello there. Winter is coming here. Though it doesn't really feel like it. For as much as I hate snow and winter, if it's going to be this cold and gloomy, it might as well snow. Might as well make it all pretty-like, you know? I'm tired of looking at the corpses of stray dead leaves over my lawn and being paranoid if my yard has gotten too unruly for the neighborhood. At least with a dusting of snow, it can look like a tiny vignette inside of a snow globe and I'll just bitch about the finger-biting cold and not about the finger-biting cold and the drab scenery.

Anyway, rant aside, I wanted to discuss the other fun part of winter: dry skin. My skin pretty much feels like all the moisture has been zapped out of it. My face especially. It's look ashy, a bit puffy, and I'm finding flaky dry spots here and there. Pimples have come out full force all across my forehead so I'm going to have to figure out what to do there. 

By the way, is anyone familiar with the acne face map? It is believed in Chinese medicine that the location of acne on your face is related to various imbalances and upsets in your body and health. I've always known that acne on the jawline is related to hormonal changes, but finding it on my forehead and between my eyes is definitely new. According to this acne face map: for acne between my eyes: I either have a weak heart, I'm drinking too much alcohol, or smoking too much tobacco. Since I don't smoke and I'm pretty sure my heart's going strong, I guess wine might be the culprit. For acne on my forehead: I could be having digestive problems (yep,) small intestine issues, liver issues, irregular sleep schedule (double yep,) too much worrying (triple yep,) too much sugary foods (quadruple yep,) toxin build-up, hair products, bangs, and wearing dirty hats. 

I'm a strong believer that stress and other mental incapacities have a direct effect on one's body and health. For years, I've experienced terrible migraine-like headaches that only grew worse as time went on. I took medicine, went to the doctor, got testing and was concluded that I may or may not have tumor in my pituitary gland. Fun stuff, right? When things in my life changed and I was placed in a situation away from certain people and things that were stressing me out, my headaches melted away. It was pretty close to miraculous. 

So aside from using natural products to wash my face and care for my skin, I really need to ramp down my stress level, quit eating so much sugar (I'm so stressed, cookies look so damn good to me right now,) and reduce the amount of wine I'm drinking. I will also be doing this:

Nutmeg Microdermabrasion Scrub

1 tbsp whole milk (or hemp milk, almond milk, rice milk, but not soy unless it is GMO-free)
1/2 tbsp nutmeg (ground or freshly ground if you can do it)

Mix together well in a little bowl. With clean, dry hands, and preferably a clean face, scoop the mixture up and massage it in little circles on your face. Try to use an upward motion to counteract all that gravity does. Leave on for 2 to 10 minutes depending on whatever floats your boat. Then, rinse well. Moisturize if needed.

Why nutmeg and milk? Nutmeg is similar to honey that it has antibacterial and anti-inflammatory properties which makes it good for oily skin and acne. It's also nourishing which helps dry skin by removing the top dry skin layer and nourishing the new layer beneath. Milk has lactic acid that works as a gentle peel for dead skin that refused to be removed as well as moisturizing benefits. It makes your skin baby-butt soft and helps replenish some of the lost moisture in your skin. So really, this is a great scrub for all skin types.

For some people, they say they feel a burning sensation when they use it. I didn't feel it at all. However, if you do feel it, it's not a bad thing but just leave it in for much less time, obviously. Rinse it right away or just do a minute if it's not burning badly. Do not use cinnamon as it will burn. 

My skin was still a little tight and dry afterwards, but it's just because my skin gets really dry once winter comes around. It was definitely extremely soft. I'm going to try this again with heavy cream to amp up the moisturizing benefits so check back to see my experiences with heavy cream.

Like all scrubs, resist the desire to use it everyday. Just try to keep it to once a week to prevent any irritation. Also, you will experience the desire to bake a pumpkin pie. I don't recommend resisting that desire.

Special thanks to Crunchy Betty for the idea.

Sunday, September 9, 2012

Vegetable Scrap Stock

I'm baaaaack. I know it's been a couple of weeks since my last post and that is my own fault. There'sbeen a variety of things going on including a period of time where I did not have my laptop, a move, and a period of time where I've failed to have internet connection. Can I just tell you that having no internet connection is really one of the hardest things to experience? Don't get me wrong; on vacation, not having internet is one of the best things to happen, but when you need to, erm, work, it gets frustrating fast. 

So as my apology and olive branch to those of you who might've been getting annoyed that I haven't been updating, I shall offer up my method for making vegetable stock. It's simple to do and perfect to make for these rainy, cold days we've been experiencing in the good old Cleveland-Akron area. Obviously most of you can't make this immediately because this depends on using vegetable scraps from all those days of making dinner, but it's a great recipe to have on hand once you do decide to start saving all this ends of zucchini and skins of onions.


Vegetable Stock Made From Scraps
The yield varies with the amount of scraps you have.

What you need:

  • Washed vegetable scraps that you've kept in a bag in the freezer. They can be corn cobs, green onion ends and tops, onion skins, carrot peelings, tomato seeds and juice, parsley or other herb stalks/stems, any ends or peelings from tomatoes, zucchini, yellow squash, peppers, celery, asparagus, green beans, kohlrabi, swiss chard or other greens stems, and other produce that's still okay but you're not thrilled about eating it in it's whole.
  • Do not use anything from: beets, eggplants, cabbages, mushrooms*, or anything with a strong, undesirable flavor or color. Note: onions will turn the stock dark so eliminate if you want a clear stock. Also, do not use any produce that is rotten. If you won't eat it in its original state, don't eat it any way else. 
  • Salt, pepper, and various herbs such as parsley or oregano. I've heard rosemary can make it bitter but haven't experienced that myself.
*Do save the mushroom scraps in a separate bag because they make a delicious mushroom stock.

To make the Vegetable Stock:


  • In a large stock pot, pour in the still-frozen vegetable scraps. Fill with enough water to cover.
  • Bring to a rolling boil and season with salt, pepper, and a bit of herbs either dried or fresh. Just throw the fresh in whole since it will be strained. Use a light hand since this is your base for whatever you make it with be it soup, stew, risotto, or whatever else.
  • Lower it to a simmer and let it simmer for about an hour and a half. Longer won't really do much so don't waste your time. Then, let it cool.
  • Cover a colander or a strainer with some cheesecloth or even a double layer of paper towels just in case you weren't able to get all the dirt out when you originally washed the vegetables you got the scraps from. Then, place it over a large bowl and pour the soup through it. You may need more than one bowl, you may not.
  • Squeeze as much water out the vegetable scraps as you can. Either compost or toss them when you're done.
  • Divide and pour the stock into cups, pints, and/or quarts either in ziplock bags or bottles or whatever, and freeze. (Or be like me and pour most of it into a gallon sized ziplock and guesstimate whenever you cook with it.)
  • To use: either let it defrost in the fridge or in a bowl of or under warm water until melted. Use as normal stock.
I filled up an average-sized soup pot to make my first batch of stock. It yielded enough for two soups and a batch of risotto. I was kind of wary about it because I had added green bean ends and they have a very strong flavor. However, it disappeared and all I had was this very fresh-tasting stock that added a depth of flavor to the dishes I made with it. You may taste your stock and think the flavoring is subtle. I certainly did; but when I used it, I realized that homemade stock really was the way to go. Plus, I save a ton of money since I didn't even need to go buy new vegetables for the stock. 

I keep all my scraps in a large ziplock bag in the freezer. Whenever I'm prepping for dinner, I bring the bag out and throw my scraps in it as I go. When I'm done, I put the bag back in the freezer. Easy!

So start saving your scraps and the next time you get a blah type of day, it's the perfect time to start simmering your own easy homemade stock.

Wednesday, August 15, 2012

Roasted Vegetable and Mushroom Soup

Everyone knows Kitchen Sink Soup. You just gather up all the vegetables you have that you have too little of to make a real meal or that are on their way out and you dump them into a giant vegetable soup. It's always yummy and perfect for those rainy days where it's too gloomy to consider leaving the house. Well, today was one of those days for me, but mon dieu, I had no such odds and ends veg-wise to make a Kitchen Sink Soup!

All I had were a sweet potato that began to sprout pretty little purple vines, a 12 oz. box of baby bella mushrooms, two scallions, a kohlrabi, and a golden beet. I also had froze some of my homemade vegetable stock that I made over the weekend (instructions coming soon!) I really wanted to try out the stock so I started to formulate an idea.


I roasted all the vegetables, threw in some seasoning, melted down the frozen bag of stock, and pureed them together into a soup, leaving the mushrooms whole. At the last minute, I threw in some spaghetti I had already cooked and kept in the fridge. I expected a meh soup. Nothing to write home about but still edible. When I was done, I was kind of shocked. This soup was actually good. I mean, really good. A nice complex flavor. One vegetable wasn't overpowering the others. Everything melded really well. Best of all, it tasted nice, cozy, and warm. Perfect for this gloomy August day. 

Now, let's hope that these rainy days we've been having this August isn't the norm. I've been angling for another beach day this weekend and the weather better cooperate!

Get together:
  • 1 large sweet potato
  • 1 large golden beet
  • 1 alien-looking kohlrabi (purple or green, it doesn't matter)
  • Salt and pepper to taste
  • 1/4 cup olive ol
  • 2 scallions, coarsely chopped
  • 2 cloves garlic, minced
  • A couple sprigs of oregano or 1/2 generous tsp dried oregano
  • 1/4 cup fresh cilantro
  • 1 to 1 and 1/2 quart of vegetable stock
  • 1 12 oz. box of baby bella mushrooms, sliced
  • 1/2 mushroom bouillon cube (optional) 
  • 1/2 tsp cumin
  • Pinch cayenne pepper
  • Salt to taste
  • 1/2 a lime, juiced
  • Enough spaghetti for 2, prepared
Now, to make 4 servings of soup:
  • Preheat the oven to 425 degrees.
  • Peel and coarsely chop the sweet potato, golden beet, and kohlrabi into 1/2" cubes. Add them to a large roasting pan, salt and pepper generously, and drizzle with olive oil. Roast for 35-40 minutes, tossing the vegetables halfway.
  • Meanwhile, prepare and chop the scallions, garlic, and oregano. Set aside.
  • Clean and slice the baby bella mushrooms.
  • Add the scallions, garlic, and oregano to the roasted vegetables in the last 10 minutes of cooking, tossing well.
  • Remove the roasting pan from the oven but do not turn it off.
  • In a blender, add cilantro and all the vegetables, scraping every last bit out of the pan. Pour in about half a quart of vegetable stock or enough to cover the vegetables. 
  • Move the mushrooms to the roasting pan, season lightly with salt, and drizzle with more oil if needed. Roast in the oven for 20 minutes.
  • While the mushrooms are roasting, puree the vegetables in the blender. Pour the puree into a pot and add more stock to thin it out. Don't make it watery, just make it slightly thick enough to have texture.
  • Add the mushroom bouillon cube and season with cumin, cayenne pepper, and salt. Bring up to a gentle boil over medium heat. Taste and add more salt and pepper if needed.
  • When the mushrooms are roasted, soft with slightly crispy edges, remove from the oven and add to the soup. Squeeze 1/2 a lime over it. My lime was particularly juicy so it was enough, yours may be stingy so use a whole lime if needed.
  • Ladle into individual bowls and add spaghetti whole. Cut up the strands with your spoon and enjoy.
This is super easy to double up to have a larger pot. Even though it sounds labor intensive, it's really not. A short cut I did was roasting the mushrooms with the other vegetables and just picking them out when they were done. It allowed time for the vegetables to slightly cool so I could handle them in the blender. Alternatively, you could add the stock and the vegetables including the cilantro to the pot and use an immersion blender to puree. Then, add in the mushrooms and continue as directed. 


I know it sounds like a weird soup, but it's well worth it. The sweet potato's sweetness played really well with the kohlrabi's cabbagey turnipy flavor and the beet's earthiness. The roasted mushroom added that "final" punctuation that ends the play of flavors on your tongue. The spice from the cayenne pepper, the smokiness from the cumin, and the tang from the lime really helped bring it together. This is definitely a soup I'd make again!

Saturday, August 11, 2012

Holy Kohlrabi!


I have heard of kohlrabi, seen kohlrabi, could probably likely identify it if needed to, but it never occurred to me to actually try it. So when I was at the Farmer's Market last week, I found myself in a talkative mood. Sometimes you just want to get in and get out and woe betide the one who tries to strike up a conversation with you. You don't get that? Maybe it's me.

I was looking for something unusual to bring home. Kale was stricken from the kitchen due to Guitar Boy, ("I don't like the texture," he wailed at me once,) and if I had to look at another zucchini, I might find myself ramming it down someone's throat. Tomatoes, well, yeah, tomatoes are nice, but tomatoes, tomatoes, tomatoes. So my eyes alighted on a deep purple alien ball: "Kohlrabi, .50" as I was purchasing a pint of Italian plums. (You cannot get between me and my plums, so don't even try.)

"Oh, kohlrabi," I said outloud.

"Yes, kohlrabi, you'd love it, it's awesome." The lady at the stand jumped in.

"How do you eat it?"

"You peel it, then slice it thinly, and just sprinkle some salt on top. It's great, you'll love it." She snatched up a spiky royal-colored one and plopped it in my bag. 

"Oh, like a radish?" My moment of enlightenment.

"Yes! Try it and you'll be coming back for more."

"Er... okay, wow, thanks!" and I walked away.

So why wasn't I overly thrilled for being offered a kohlrabi? I have a mild dislike of radishes (understatement.) Being handed this enormous extraterrestrial vegetable that promised to be an oversized, probably more pungent, radish wasn't making me skip for joy.

I find radishes bland with a peppery aftertaste. There's no excitement there. Then, as they sit out, they become slightly rubbery which tended to happen in my household growing up. My mom harbored an unhealthy love for these red and white balls, serving them with buttered bread and salt. Sometimes, she'd throw them into salads. I ate around them, always. She would just have a bunch of slices lying around and nibble at them throughout the day, blech.

But my philosophy is, well, you can't say you hate something without even trying it. So, literally an entire week later, I finally remembered the kohlrabi in my crisper and brought it out to the counter. I stared at it, took a picture or two because, well, it's pretty and unusual so why not. Then, with a peeler, I attacked one side of it. I got the purple peel off, then continuing to use the peeler, I cut out ultra-thin slices. A sprinkle of salt. I ate a piece. Then, another. Then, another. Then I toasted a slice of bread, spread it with a dab of dijon mustard and a kiss of honey and piled loads and loads of sliced kohlrabi on top. Sprinkle of salt, dash of pepper, and a squeeze of lemon.

Holy Kohlrabi!


In my mind, this kohlrabi has proved itself far and beyond the lowly radish. I offer no sorrow for those pitiful things because... kohlrabi.

It turns out there's so much more you can do with kohlrabi other than thinly slice them and dress them with a dusting of salt. I don't know why you want to try because this is kind of perfection on its own, but like one gets sick of zucchini after the upteenth recipe, it's nice to have a backup. You can pickle them, roast them, shave them into salads, turn it into a ceviche, deep fry them, steam them, and probably throw them into a stew with much too thick gravy (guilty.) I can't picture things like cucumber or radishes being cooked (ew, limp, warm radishes,) but kohlrabi has a promise of releasing luscious sweet sugars to caramelize and send the vegetable to a whole new level of food.

I will get around to trying one of the cooked recipes for kohlrabi, but until then, I'm content with a slice of bread and salt. 

By the way, I did go back for more, just like she said.

Wednesday, August 8, 2012

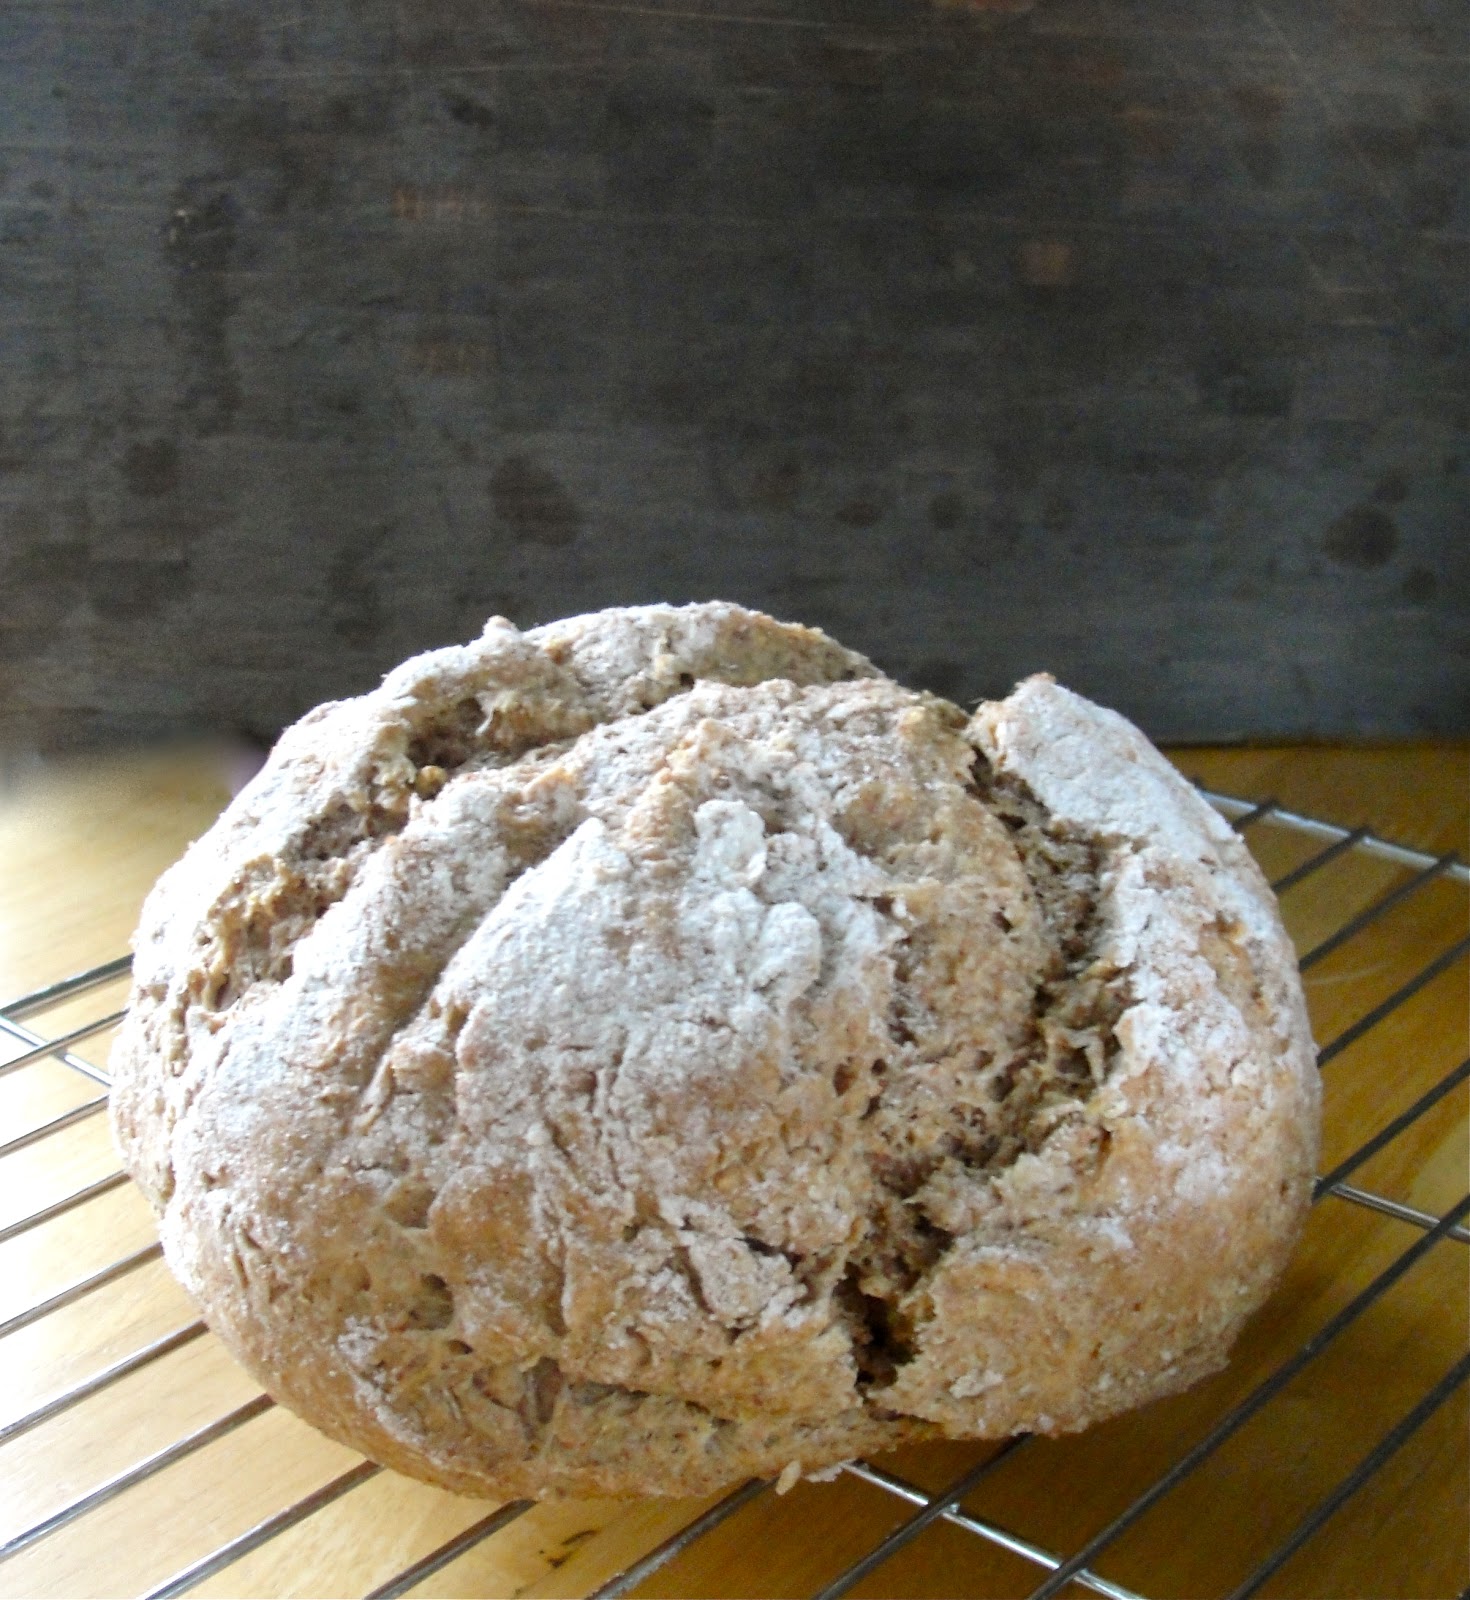
Pieczenia Proziaki: Polish Soda Bread

Pieczenia proziaki is Polish bread made with baking soda rather than yeast. As a result, it's really quick and easy to make with just a very light amount of kneading. It's not even worth getting out the electric mixture for this, it's that simple.


Strangely enough, even though my parents immigrated from Poland, they've never made this when I was growing up. They know of it but not the recipe. It took some stealthy research to come up with one; that and some frequent testing. Though there are several ways to present it, I chose to make the round loaf as opposed to the small round flat breads just because the only directions I could find for it were way too vague. Sadly, I don't speak or read Polish. It's something my mom has berated me forever about though I think it's my parents' fault for not teaching me. Gotta love that old-fashioned Catholic guilt.

Alas, that's the joy of being your parent's child, right? 

Like all breads, it requires your touch and judgement to know the correct proportions. Here are the basic measurements of the ingredients, but as you'll see in the directions, you may need more or less of an ingredient to come out to the same result. You know, bread is like that, but don't let it deter you because this is pretty forgiving no matter what you do.

 Pieczenia Proziaki- Makes one 6" loaf

Gather up:
  • 1 1/2 cup all-purpose flour (I use whole wheat)
  • 1/2 tsp baking soda
  • 1/2 tsp salt
  • 1/2 to 1 cup sour cream
  • 1 tsp honey (or sweetener of your choice: sugar, agave nectar, etc.)
Now, make it:
  • Preheat oven to 425 degrees, prepare a kneading surface by dusting with flour, and prepare a baking pan by dusting with flour as well
  • In a large bowl, sift or whisk together the flour, baking soda, and salt. (I just whisk with a fork.)
  • Create a well in the center of the flour and pour in the sour cream starting with 1/2 cup and honey
  • Using a wooden spatula, slowly mix flour into the sour cream. If it looks a little dry, add a little more sour cream.
  • Once the dough is coming together with about 1/3 to 1/4 of dry flour still loose, dump the dough and flour over the kneading surface and begin to knead gently. Use a light hand and move quickly because unlike yeast, the baking soda can cause the gluten in bread to tighten up too fast and make it tough.
  • Knead to achieve a slightly sticky but elastic dough. You don't want it to be leaving bits of dough on the surface because it's so sticky, but you don't want it to be completely dry. You may need to add more sour cream or more flour as you knead or you may already have the perfect consistency without adding either. (I've been known to use nearly a whole tub of sour cream with good results if that makes you feel better.)
  • Shape into a ball gently and place onto the baking pan. Using a sharp knife, make an X into the surface quickly and decisively. Then, dust the surface with more flour.
  • Bake for 30-40 minutes until golden and the crust is firm. It will sound hollow when tapped. My method is to use two towels to flip the loaf upside down in one hand and to tap the bottom. If it sounds hollow, it's done.
  • Let cool on a rack immediately. 
  • Serve with butter and salted radish slices because well, it's Polish.

Here's why it's forgiving. If you use too much sour cream, it's okay because it'll still taste good. The slices will be extremely moist and a bit crumbly so use this as a bread for soup and stew. We still use it to make peanut butter toast regardless. If you had more flour than sour cream, you'll have firmer slices that can be toasted and topped with your favorite spread. First, just experiment the way you like then go from there. Don't try to aim for a firm or soft bread on your first try. Test it out as is.

If you don't want to use sour cream, you can use whole yogurt, greek yogurt, or even one of those Activia yogurt drinks in a pinch (been there, done that.) Buttermilk and kefir works as well. Here's why regular milk won't work. The fermented dairy has the acid that baking soda needs to help make the bread rise. I'm eager to try this with creme fraiche or mascarapone cheese for a sweet bread because, man, that sounds good. I would have to whip or soften them first so they can blend into the flour well.

This loaf is magical. Why? Because it pretty much disappears when I'm not looking, (glares at Guitar Boy.) He has been known to take enormous bites out of the loaf itself leaving me with weird crooked slices for my freaking peanut butter toast in the morning. (Glares again.) I really need to make several and freeze them next time. I bet you this can be easily doubled for a larger loaf. Just bake for a little longer.

Next time, I'm going to try and add some flax seeds or chopped herbs. Smacznego!

Thursday, August 2, 2012

Oil Cleansing Method: Washing Your Face with Oil, Really!

Okay, you know I greatly enjoy watching people's reaction when I tell them I wash my face with honey, but seeing their reaction when I tell them I occasionally wash my face with oil is even better. It's kind of the same as when you tell them the shirt they just gushed over was bought at Walmart. (I don't condone Walmart so my face would be one of sheer horror.)

I have to say, for as strange and totally-against-all-valid-reason as it is spreading sticky oil across your face, the outcome is amazing. It melts off all your makeup and makes your skin glow. You can literally see the difference in just one day. No, really. Don't believe me? Then, you have to try for yourself.

Again, I discovered this through Crunchy Betty's fabulous website. She's pretty much my go-to for any crunchy procedures or questions I might have. But I wanted to give you my experiences and my own tips on how to wash your face with oil. (image source)

Oil Cleansing Method, otherwise known as OCM:

First, you need three things- castor oil, a carrier oil, and a washcloth.

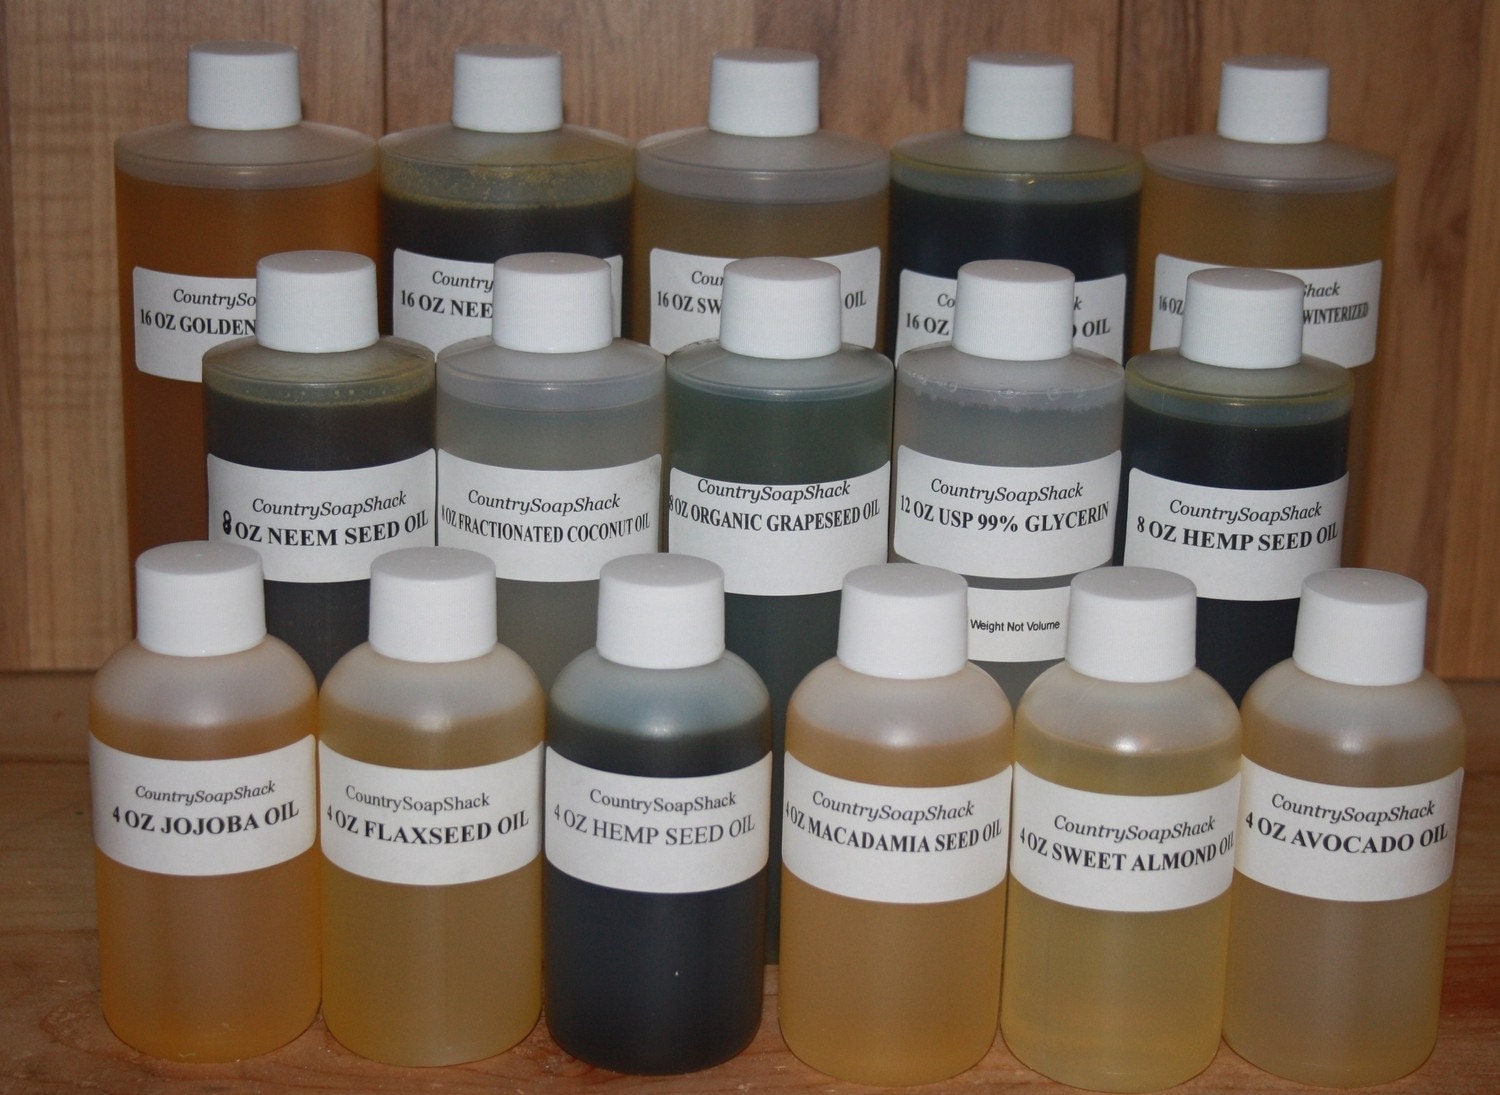
1) Castor oil is the most important part. It's the oil that does the cleansing. I randomly bought this oil through an Etsy seller called CountrySoapShack when I was trying to make my own shampoo so it was kind of like fate that I had this oil on hand. Otherwise, I've heard that they're pretty easily found in Target and the like in the... wait for it... laxative aisle. Don't run away screaming just yet. The whole point is that we should put things on our skin that's pure enough to ingest right? Right? Just try to get past this and get your precious skin-loving oil. 


2) As for carrier oils, it's what it says, but it also adds extra benefits your skin needs. I currently use extra virgin cold pressed olive oil. Cold pressed is generally the purest type of oil since heat pretty much kills a lot of the beneficial properties. (Remember what I wrote about raw honey? Heat is yo' enemy!) You can also use other oils such as this list I've excerpted from Crunchy Betty below:
  • Jojoba (all skin types, but very desirable for acne-prone skin)
  • Sweet almond (all skin types, especially oily)
  • Grapeseed (all skin types, especially oily)
  • Avocado (dry and aging skin)
  • Sunflower Seed (all skin types)
  • Olive (all skin types)
  • Apricot Kernel (dry, aging, and normal skin)
  • Argan (all skin types, especially aging skin … very pricey)
  • Tamanu (all skin types … very pricey)
Now, I've heard rumors that some people may not have the greatest results with olive oil. Jojoba and grapeseed tend to have the best reputations among OCM fans. Luckily, grapeseed oil can be found next to the olive oil in good grocery stores and jojoba, well, there is the magic of the internet. 

3) Washcloth. That's self-explanatory. Get yourself a nice and clean one.

Next is to figure out the ratio best for you. Think in thirds and halves. For normal skin, use equal parts castor and carrier oil. For dry skin, use 1/3 castor oil to 2/3 carrier oil. For oily skin, use 2/3 castor oil to 1/3 carrier oil.

I have have normal skin with the exception of a dry T-zone; so I use about 1/2 and 1/2 using slightly less castor oil. You can experiment and figure out the best ratio for yourself.

Now that all that preliminary information is out of the way, onto the actual method:
  1. With a dry face, makeup and all, mix together the castor and carrier oil in your hands. Massage gently onto your face getting every last bit including eyes and jawline and wherever else you have problem areas. Be sure to take at least a minute to massage it all in.
  2. Hang out for 5 minutes. Here, I'll brush and floss and dilly dally around.
  3. Turn on the faucet to the hottest water you can handle. (I know I said heat is your enemy, but here, it's necessary to help remove the oil.) Wet your washcloth well then wring it out so it doesn't drip. Place it over your face and keep it on until it begins to cool.
  4. Optional: repeat two more times.
  5. Using the wet washcloth, gently scrub the oil and makeup off your face, rinsing and rewetting as needed.
  6. Voila. You have a clean and make-up free face!
  7. Moisturizing is generally not necessary but if you feel tight, use some of the carrier oil if you like.
I like doing the washcloth process three times just because... I don't know, it feels right. Holding the hot washcloth over your face opens up your pores so the oil can get in there and clean out the gunk stuck in there. It's really quite exciting because your blackheads all but disappear when you do this. I do moisturize my T-zone still but I think it's because I've gotten lazy and haven't been as vigilant with my ratios and ended up using more castor oil than I should. I just mix a few drops right in my hand each time I do the OCM. 

Now, do you have to do the OCM every day? Some people do. I don't. I use the honey wash every day and maybe once or twice a week, I'll do the OCM. Usually when I know I have to wash my hair the next day because then I can just be sloppy and get the oil as close to my hairline as possible. I'm pretty positive if I committed to the OCM every day, I would have the skin most people would kill for. In between that and the honey wash though, I think it works out for me. 

Also, when you do the OCM, your skin is going to look so good in the morning, you'll feel just dandy not washing it in the a.m. I think it's better that way too: Less washing, more skin health! (image source)

My bathroom is turning into a kitchen pantry right now and I'm loving it. How about you?

Thursday, July 19, 2012

The Vegetarian Protein Myth Plus Naan "Pizza" Recipe

I'd like to delve into what I consider one of the most commonly misinformed myths about vegetarianism and veganism. That is protein intake. It wasn't until I was watching the esteemed Dr. Caldwell Esselstyn of the Cleveland Clinic and Dr. Colin T. Campbell in Forks over Knives when I discovered the truth about protein.

Typically the most effort I would make in consciously adding protein is throwing in some beans while cooking and daily slices of peanut butter toast. Since I rarely indulge in dairy items, I do not consider them a reliable source of protein for myself. So just by looking at the big picture, it seems like I'm not getting protein regularly at all. So how the heck am I getting up in the morning and having enough energy to do anything at all? I'll be honest, I had worried a bit about it before, believing I needed to double up my efforts and really pay attention to my nutrition intake. Due to, well, laziness, I never really made any measures to do so. Beans can only go into so many dishes until you decide, "Enough!" (image source)

I had heard someone on Forks over Knives, (can't remember who but suspect I was listening to Rip Esselstyn, Dr. Esselstyn's knowledgable son,) explain that as long as we were consuming the proper amount of calories per day, we were covered on the protein front. Meaning, every whole foods- vegetables and grains- contained protein in varying levels. If I simply ate a good variety of whole foods, I was getting enough protein. Fruits, however, does not have a great amount of protein so rely on them for other nutritional benefits. Especially now in the summer when most of them are at their peak deliciousness.

As for the commonly known belief that vegans have to eat rice and beans in order to gain a "complete" protein, meaning consuming all nine essential amino acids found in the correct proportions so the body can build protein. Well, it's not true. Our bodies are pretty darn smart and they can figure out how to function once given the right tools. So if you consume a variety of foods creating a sort of "amino acid soup," your body will simply dip in, collect what it needs, and go about constructing the important building blocks for staying healthy. (source)

This leads me to our next revelation, meat-eaters as a whole are taking in too much protein. Our bodies weren't meant to eat meat in the large quantities we do today, consuming it multiple times a day at each meal and snack time. Grab a beef jerky once in a while? Chicken snack wraps? Bacon and sausage in the a.m.? Turkey sandwich for lunch? It's easy to forget just how much meat a person can eat in a day when it seems so common in everyday life. Too much animal protein, along with all its saturated fats and cholesterol, can wreak havoc on a human body. With whole plant foods, you're at least eliminating all the harmful components found in animals and reaping the benefits of plants, e.g. fiber, vitamins, minerals, antioxidants, etc.  


"Cleveland Clinic’s nutrition experts say that too much protein in your diet, which can be caused by low carb diets, can cause your body to go into a dangerous metabolic state called ketosis as your body burns fat instead of glucose for energy. During ketosis, the body forms substances known as ketones, which can cause organs to fail and result in gout, kidney stones, or kidney failure. Ketones can also dull a person’s appetite, cause nausea and bad breath. Ketosis is prevented by eating at least 100 grams of carbohydrates a day." It is a contributor to obesity and it has also been shown to increase risk of certain cancers. (source)

In short, your body knows what to do as long as you give it good, healthy, whole foods. If you're wondering, even though all whole plant foods have protein in varying levels, here are a few that are protein powerhouses.
I believe in not telling people what to think and how to eat, but giving them the tools and sources with which they can educate themselves. The information above was found in these sources, as well as the documentary: Forks over Knives. If you are interested in learning more, please visit these links and decide for yourself what is the best lifestyle for you.

Sources:
If you made it through all that, pat yourself on your back! I hope that it didn't come across as too preachy and allowed you to open yourself up to learning more about alternative diets. I just want to inform people and let them make the decisions for themselves. Anywhoo. Onto the recipe!

Tomato and Greens Naan "Pizza" 


I make this "pizza" a lot when I need to make a quick and hot side dish to a salad or any other meal. It's really simple to make and usually ends up being the most delicious thin on your plate. It serves two as a side dish or one as a lunch or light dinner.

Gather up:
  • 1 piece of whole wheat naan (Found in grocery stores in the bread section.)
  • Hummus (I used roasted red pepper but you can use your favorite.)
  • 1 fresh, ripe tomato, sliced
  • Several basil leaves, torn
  • Salt and Pepper to taste
  • Drizzle of olive oil
  • Handful of mixed greens (Lettuce, kale, arugula are all good options.)
  • 1 lemon for juice
To make:
  • Preheat the oven to 425 degrees.
  • Spread the naan edge to edge with a generous amount of hummus. Add slices of tomatoes in a single layer. You may not need the whole tomato because too many can make it watery.
  • Sprinkle with torn basil leaves. Season with salt and pepper and drizzle with olive oil.
  • Transfer to a pan and bake for about 10 - 15 minutes until edges are browned and tomatoes are warm and soft. Check often to prevent burning.
  • While the naan is baking, mix together the salad greens with a hearty squeeze of lemon. Season with a sprinkle of salt and pepper.
  • When the pizza is done, mound the salad greens on top of the pizza and cut into wedges.
  • Serve immediately.
I got the idea of putting salad greens on top of the pizza from my trip to Italy. There, a popular dish is a large pizza simply made with tomatoes and basil and very little cheese, topped with fresh crisp arugula. Delicious and refreshing, perfect for a hot summer day!

Monday, July 16, 2012

FAQs about Vegetarian Diet and Cooking

I've had a few questions about my diet and the recipes I posted and the way I cook, so I thought I'd answer the most frequently asked ones here so everyone can learn a little bit more about the blog.

What is your diet?

I like to tell people I'm a pescatarian with a vegetarian diet. It means I'll eat seafood and fish once a month or so if even that, but the rest of my meals are vegetarian or vegan (though not on purpose.) I do consume dairy such as milk, cheese, and eggs, but pretty rarely.


What do you prefer to cook with?

Most of my meals turn out to be vegan simply because I choose not to cook with butter, cream, or cheese. I made that choice because I wanted to cut the overall calories and to really amp up the benefits of all the veggies in my dish. Alternatively, I'll use olive oil, citrus fruits, and tons of spices and herbs to flavor and give my dishes a freshness that really, well, can't be beat. A variety of vegetables really punches up the overall meal because you're experiencing so many different flavors on a single plate. 

Are your recipes low in calories or fat? Can I find the ingredients you use?

The recipes I post are healthy, cheap, and easy dishes that anyone can make. Since I cut out a lot of saturated fat found in dairy products, and try to bulk up with vegetables and legumes, they are almost always low in calories and very low in fat aside from the olive oil used in cooking. (Olive oil is a good fat! So is avocados, yum!) Most of my ingredients can be found in your kitchen or at the grocery store and farmer's market with little effort; and since I've been pretty upfront about my tiny budget, they are all affordable. One caveat, since I just cook for myself and Guitar Boy, most of the dishes yield enough for two people, though doubling the recipes should be simple in all cases.

Why should I be a vegetarian?

I'm not here to lecture you about the merits of vegetarianism. Although, I would like to educate you on the points of the diet if you are open to learning more. After all, you can simply close out of my blog if you don't agree with my views. However, I do hope that you will give it a chance if you are not already a vegetarian and see the other side of eating well. As for why I believe someone should be a vegetarian, there's a long, long list that many people like me all agree on. While I did initially stop eating meat because I couldn't bear to know that I was eating a cow or a pig, I learned many more things about the positive effects of vegetarianism that only cemented my belief in it. Other benefits of vegetarianism:
  • Environmentally friendly: It takes significantly less energy to produce a crop of vegetables than it does to raise livestock.
  • Health: It reduces risk of heart disease, stroke, cancer, and extends life length.
  • Affordable: Cutting out meat adds more buck to your bank
  • Reduce toxins in your body from hormones and antibiotics found in livestock.
  • It's easier than ever now to be a vegetarian!
There's tons of more reasons and I will delve deeper into the benefits of vegetarianism individually so more people can at least see the two sides of eating meat and not eating meat. Your best tool for yourself is education. Educate yourself and only then will you be able to make the best choice.

Have you seen Food Inc., Forks over Knives, Food Matters, etc.?

Yes, yes, yes! All wonderful and extremely informative documentaries. Remember what I said about education? This is a great start. If you are interested in learning more about the food industry, Food Inc. is a must. A good follow up to Food Inc. is The Vanishing of the Bees. They both expose the darker sides of the food industry, government involvement (or disinvolvement, rather,) and pesticide use. Forks over Knives is a well-researched, easy-to-watch documentary on the benefits of a plant based diet. Full of scientific studies and carefully researched facts and advice, this is a credible look at plant based diets. Food Matters is another great one if you are still learning more about plant based diets and their effects on diseases. (image credit)


Anything else? If you have any questions for me, feel free to comment below or send an email to me at Beatrice@BirdcageBohemia.com 

I love hearing from people, so don't hesitate to write me!


Monday, July 9, 2012

Oven-Roasted Tomato Basil Pesto and Ohio City Pasta

So it's finally cooled down in Crackron- I mean, er, Akron, enough to turn on the stove. I was so excited to cook again. No, really, so excited. So I ended up making a semi-elaborate meal to celebrate and spoil Guitar Boy with. 


(Read: elaborate in any incarnation over here means utilizing something other than a chopping board and a skillet to create a dish. Case in point: the Ninja blender finally, finally came out of its box.)

I took the Ninja on it's maiden chopping voyage with a pesto recipe. Well, it's really kind of like a bastardized sorta-kinda-not-really pesto, but still pesto because it looks like pesto, smells like pesto, and acts like pesto. 

And there's the rumble of angry Italian mothers coming and ready to paddle my behind.


And to make them even angrier... there's a weird ingredient in here. Just trust me though.

So I bring you oven-roasted tomato basil pesto. I shall offer this up to appease the angry Italian mothers and tell them it is divine, creamy deliciousness. They'll believe me. I think.

Get together for just over 1/2 cup worth's:
  • 2 roma tomatoes, quartered
  • 4 cloves garlic (more or less to your preference)
  • Heaping tsp peanut butter (You read that right. See below for more information.)
  • 1/4 cup Parmesan cheese or whatever you have in your pantry
  • 3/4 cup to 1 cup fresh basil leaves
  • up to 1/4 cup olive oil plus more for roasting
  • 1/2 lemon, juiced
  • Salt and pepper to taste
Now to make it:
  • Preheat oven to 450 degrees. In a small roasting pan, layer the quartered roma tomatoes skin side down and drizzle olive oil to cover. Sprinkle with salt and pepper. 
  • Take the garlic cloves paper skin-on and place into a square of aluminum foil. Drizzle olive oil to cover and sprinkle with salt and pepper as well. Wrap the garlic up tightly in the foil. 
  • Roast both in the oven for about 15 to 20 minutes until tomatoes are softened and the edges slightly burnt. 
  • Take out and set aside until cooled.
  • Peel the burnt skin off the tomatoes and add to the food processor. Squeeze the garlic out of the papery skin. It's okay if it's not completely softened, we still want a bit of a bite. Add to the processor. Blitz the processor a few times to break up the tomatoes.
  • Add in this order: peanut butter, cheese, and basil leaves. Squeeze the lemon over the top. Begin pureeing.
  • While pureeing, drizzle the olive oil into the processor until it starts to become smooth and easy to puree. Be careful not to add too much that it becomes oily and runny. Stop and check and taste every so often.
  • Taste and add salt and pepper as needed.
  • Voila, you have oven-roasted tomato basil pesto-but-not-pesto.


Now, for those of you who raised an eyebrow at my use of peanut butter. In my defense, I'm not a fan of going out to buy a single ingredient. Besides, pine nuts, the ingredient found in pesto, are expensive. I added a teaspoon of peanut butter just to give the sauce a little bit of body and to add a slightly nutty background flavor. Also, I used the kind that is just dry roasted peanuts with sea salt, no added sugar or flavorings. It's not so much that you can sit there and say, "Oh, I taste peanuts!" because that wouldn't be so good. If you are wary, add a little bit at a time and taste, then add more and taste, you'll see the difference and improvement. However, if you rather be all traditional, by all means, throw some pine nuts in there! It's your dish after all!

I served it with this fabulous, delicious tomato basil pasta from Ohio City Pasta that I got at the farmer's market. I simply sauteed candy onions (find it at the farmer's market!) with mushrooms, then added the linguini with three spoonfuls of the pesto and a little pasta water to thin it out. 

The pizza slices you see on the plate will be another post, or else you'd be reading one uber-long post! Hungry yet?

What's your favorite pesto recipe? Traditional or off-the-wall?

Tuesday, July 3, 2012

Spicy Lemon Ginger Vegetable Stir Fry

I didn't care about buying a wok when we moved and had to stock our kitchen from scratch. However, Guitar Boy was obsessed with finding one. It had to be a big one and it absolutely had to have a glass lid "so I can see what's cooking inside," he said to me every time we looked at one. Every time. I cared more about getting an immersion blender.

Well, we have a wok thanks to Bed Bath and Beyond and their coupons. And I still don't have an immersion blender. Though the wok has been nice, I still think an immersion blender would've been a better buy, but alas, I make do. (See my tomato soup recipe for my ingenious, if I may say, use of a potato masher.)


Dinner last night was a quick and healthy stir fry. Typically we use vegetarian oyster and mushroom sauce or just a run-of-the-mill stir fry sauce from the Asian market but they can be packed with sodium, sugar, and god knows what else. I wanted to avoid using them this time just because we had been eating pretty crappy the day before (read: two giant doughnuts each and pizza and cheese and much too sweet Ohio wine and crap and more crap and more crap.) So I really amped up the spices and flavors in this one to make up for the lack of that ooey gooey deliciously overly processed sauce.

Also, you don't absolutely need a wok for this recipe. Woks are nice for having a ton of surface area that can cook all the vegetables all at once, but a large skillet over high heat will do just as well.

Also, again, you can use your favorite vegetables. I used whatever I had on hand, but you can switch it up with your favorite add-ins. The ingredients in bold is what makes up the flavor and sauce so they shouldn't be swapped out.


Get together for 2 main dish or 4 side dish servings:
  • 1 onion, sliced thinly
  • 3 carrots, sliced in half-moons
  • 1 large Hungarian sweet pepper, chopped coarsely
  • 1 small (8 oz?) box of sliced baby bella mushrooms
  • Splash of dry white or rice wine (optional)
  • 2 tomatoes, chopped coarsely
  • 3/4 to 1 tbsp ginger, minced
  • 3/4 to 1 tbsp garlic, minced
  • Pinch or dash or heaping spoonful of cayenne pepper (whatever floats your boat)
  • 1/2 lb swiss chard, rolled up and sliced into 1/2 inch strips
  • Enough Rice or Pad Thai noodles for two large servings, prepared 
  • 2 or 3 packets or 2 or 3 tbsp of your favorite soy sauce (add more or less to your preference)
  • 1 lemon, juiced
  • 5 or 6 large basil leaves, torn
  • Salt to taste
Other vegetables you can use: broccoli, peas, corn, snow peas, water chestnuts (not a veg, I know,) bell peppers, red onions, shallots, cauliflower, kale, collard greens, napa cabbage, broccolini, portobella mushrooms, celery, eggplant (Japanese or traditional,) and anything else that strikes your fancy. Just eyeball the amount and go for it.

And to make it:

It's best to have everything all chopped and prepared in advance because stirfry cooking is over high heat and fast.
  • Prepare the noodles according to package directions.
  • Heat up sesame oil over medium high to high heat in the wok. Peanut and canola oil work too. Do not use olive oil. Add in the onions, carrots, and pepper and let cook a minute or two until soft and onions become slightly translucent. Then, throw in the mushrooms and stir and let cook for a few more minutes.
  • Optional: Add a splash of dry white or rice wine to deglaze or just flavor, let it reduce down.
  • Add in the tomatoes, ginger, garlic, cayenne pepper, and swiss chard and let it simmer and cook down slightly- about 3 minutes.
  • Continue cooking until the swiss chard (or your favorite green) is tender, tasting and adding more cayenne pepper if desired. 
  • Lower the heat to low, stir in the noodles and season with soy sauce and lemon juice starting with 1/2 a lemon. Taste and add more lemon juice, soy sauce and/or salt if needed. (Soy sauce has sodium so salt by tasting.)
  • Sprinkle basil over the top and serve!
 Do you make stir fry a lot? What's your go-to set of ingredients? When we're low on prep time, we turn to frozen broccoli, peas, and mixed vegetables to make a fast and healthy dinner.