Showing posts with label affordable. Show all posts

Sunday, September 9, 2012

Vegetable Scrap Stock

I'm baaaaack. I know it's been a couple of weeks since my last post and that is my own fault. There'sbeen a variety of things going on including a period of time where I did not have my laptop, a move, and a period of time where I've failed to have internet connection. Can I just tell you that having no internet connection is really one of the hardest things to experience? Don't get me wrong; on vacation, not having internet is one of the best things to happen, but when you need to, erm, work, it gets frustrating fast. 

So as my apology and olive branch to those of you who might've been getting annoyed that I haven't been updating, I shall offer up my method for making vegetable stock. It's simple to do and perfect to make for these rainy, cold days we've been experiencing in the good old Cleveland-Akron area. Obviously most of you can't make this immediately because this depends on using vegetable scraps from all those days of making dinner, but it's a great recipe to have on hand once you do decide to start saving all this ends of zucchini and skins of onions.


Vegetable Stock Made From Scraps
The yield varies with the amount of scraps you have.

What you need:

  • Washed vegetable scraps that you've kept in a bag in the freezer. They can be corn cobs, green onion ends and tops, onion skins, carrot peelings, tomato seeds and juice, parsley or other herb stalks/stems, any ends or peelings from tomatoes, zucchini, yellow squash, peppers, celery, asparagus, green beans, kohlrabi, swiss chard or other greens stems, and other produce that's still okay but you're not thrilled about eating it in it's whole.
  • Do not use anything from: beets, eggplants, cabbages, mushrooms*, or anything with a strong, undesirable flavor or color. Note: onions will turn the stock dark so eliminate if you want a clear stock. Also, do not use any produce that is rotten. If you won't eat it in its original state, don't eat it any way else. 
  • Salt, pepper, and various herbs such as parsley or oregano. I've heard rosemary can make it bitter but haven't experienced that myself.
*Do save the mushroom scraps in a separate bag because they make a delicious mushroom stock.

To make the Vegetable Stock:


  • In a large stock pot, pour in the still-frozen vegetable scraps. Fill with enough water to cover.
  • Bring to a rolling boil and season with salt, pepper, and a bit of herbs either dried or fresh. Just throw the fresh in whole since it will be strained. Use a light hand since this is your base for whatever you make it with be it soup, stew, risotto, or whatever else.
  • Lower it to a simmer and let it simmer for about an hour and a half. Longer won't really do much so don't waste your time. Then, let it cool.
  • Cover a colander or a strainer with some cheesecloth or even a double layer of paper towels just in case you weren't able to get all the dirt out when you originally washed the vegetables you got the scraps from. Then, place it over a large bowl and pour the soup through it. You may need more than one bowl, you may not.
  • Squeeze as much water out the vegetable scraps as you can. Either compost or toss them when you're done.
  • Divide and pour the stock into cups, pints, and/or quarts either in ziplock bags or bottles or whatever, and freeze. (Or be like me and pour most of it into a gallon sized ziplock and guesstimate whenever you cook with it.)
  • To use: either let it defrost in the fridge or in a bowl of or under warm water until melted. Use as normal stock.
I filled up an average-sized soup pot to make my first batch of stock. It yielded enough for two soups and a batch of risotto. I was kind of wary about it because I had added green bean ends and they have a very strong flavor. However, it disappeared and all I had was this very fresh-tasting stock that added a depth of flavor to the dishes I made with it. You may taste your stock and think the flavoring is subtle. I certainly did; but when I used it, I realized that homemade stock really was the way to go. Plus, I save a ton of money since I didn't even need to go buy new vegetables for the stock. 

I keep all my scraps in a large ziplock bag in the freezer. Whenever I'm prepping for dinner, I bring the bag out and throw my scraps in it as I go. When I'm done, I put the bag back in the freezer. Easy!

So start saving your scraps and the next time you get a blah type of day, it's the perfect time to start simmering your own easy homemade stock.

Friday, August 17, 2012

The Healing Power of Honey

I had the opportunity to test out honey's healing powers. About 5 weeks ago, I scraped my shoulder on the corner of those fire alarm boxes you see in offices and buildings. It wasn't rusted or anything or else I would've ran screaming for the next health center offering tetanus shots. However, I did want to pass out because I don't do well with blood or seeing exposed expanses of white flesh thanks to ultra-sharp metal corners. Anyway, it happened because I bent over to pick up something and got up way too fast.

So I thought this would be a great opportunity to try out all that I've learned about honey and its antibacterial, healing properties. For millenniums, honey has been nothing less than "liquid gold" when it came to health, healing, and happiness. Almost everyone knows that honey was used as embalming fluid in Ancient Egypt, but it doesn't end there. As far as 8,000 years ago, humans have been hunting for honey. (source) Not to mention, for at least 2,700 years that we can find, honey had been used for medical purposes whether through topical application or consumption. (source)

Here are the three valuable properties of honey in terms of healing:
  1. It's hygroscopic, which means when exposed to air, it naturally absorbs moisture in from the air. In treating open wounds, honey is useful as it could help prevent scarring by keeping the skin moist, encourage the growth of new tissues, and allow easy removal of any dressing by preventing dressing from becoming stuck to the skin.
  2. It's antibacterial. Researchers began to document the healing properties of honey in the early part of the 20th century. This ceased with the development of antibiotics but recently the development of resistance to antibiotics has led to a resurgence of interest into the healing properties of honey. The effective antimicrobial agent in honey prohibits the growth of certain bacteria. It contains an enzyme that produces hydrogen peroxide which is believed to be the main reason for the antimicrobial activity of honey. Cuts, abrasions and scalds can be covered in honey to prevent bacteria from entering the wound and promote healing.
  3. It's a source of antioxidants. Honey contains natural antioxidant properties that can destroy biologically destructive chemical agents which have been linked to many diseases such as cancer. Not only could honey's antioxidants help to eliminate free radicals in the body, they are also part of the nutrient supply for growth of new tissue. These precious honey properties help protect the skin under the sun and help the skin to rejuvenate and stay young-looking. (This could explain my inexplicable tan lines in that area, haha!)
If you're squeamish like me, you may not want to look at these photos. They're not dramatic or particularly gory, but sometimes I can get grossed out or lightheaded from the simplest wound. But this is a picture of my scrape a day after it happened:


Here's what I did to naturally heal it. I didn't just stop with honey but also used extra virgin olive oil and cocoa butter*.
  • For the first week, I applied honey to the wound once in the morning and once at night and kept it covered with a bandage. 
  • For the second week, I simultaneously applied honey and extra virgin olive oil to the wound twice daily and continued to keep it covered with a bandage.
  • For the third week, Guitar Boy demanded I let it breathe so the bandage was exiled. I alternately applied olive oil and raw, pure cocoa butter on the wound for the first few days, then just continued applying cocoa butter for the rest.
  • For the fourth week, I applied cocoa butter to it about three times daily. Usually whenever it felt dry.
  • Here I am, on the fifth week. I apply cocoa butter, olive oil, and/or honey whenever I remember which tend to just be once a day at nights. 
*In test treatment of 1st and 2nd degree burns, cocoa butter promoted 100 percent regrowth of new skin by 8 to 9 days after injury, much more quickly than untreated burns. (source)

Guitar Boy says it looks 100 times better and the picture doesn't do it justice. I agree, though the white scar is bothering me. It's a little pink because I haven't been incredibly vigilant about applying sunscreen, but alas, that's the suntanned life for me. However, I recently read somewhere about the application of ginger juice to help turn scarred white skin into normal colored skin. I plan to look into that on a couple of old scars on my legs since I don't feel like my scrape is ready for it.

Here's the picture of it now:


Do you think there's a big improvement? If I never applied the honey, olive oil, and cocoa butter, I would've likely bandaged it for a week, then let it alone for the rest of time. I'm pretty sure it would dry out, scab over, and end up with scarring even worse than what I have now. What do you think?

Thursday, August 2, 2012

Oil Cleansing Method: Washing Your Face with Oil, Really!

Okay, you know I greatly enjoy watching people's reaction when I tell them I wash my face with honey, but seeing their reaction when I tell them I occasionally wash my face with oil is even better. It's kind of the same as when you tell them the shirt they just gushed over was bought at Walmart. (I don't condone Walmart so my face would be one of sheer horror.)

I have to say, for as strange and totally-against-all-valid-reason as it is spreading sticky oil across your face, the outcome is amazing. It melts off all your makeup and makes your skin glow. You can literally see the difference in just one day. No, really. Don't believe me? Then, you have to try for yourself.

Again, I discovered this through Crunchy Betty's fabulous website. She's pretty much my go-to for any crunchy procedures or questions I might have. But I wanted to give you my experiences and my own tips on how to wash your face with oil. (image source)

Oil Cleansing Method, otherwise known as OCM:

First, you need three things- castor oil, a carrier oil, and a washcloth.

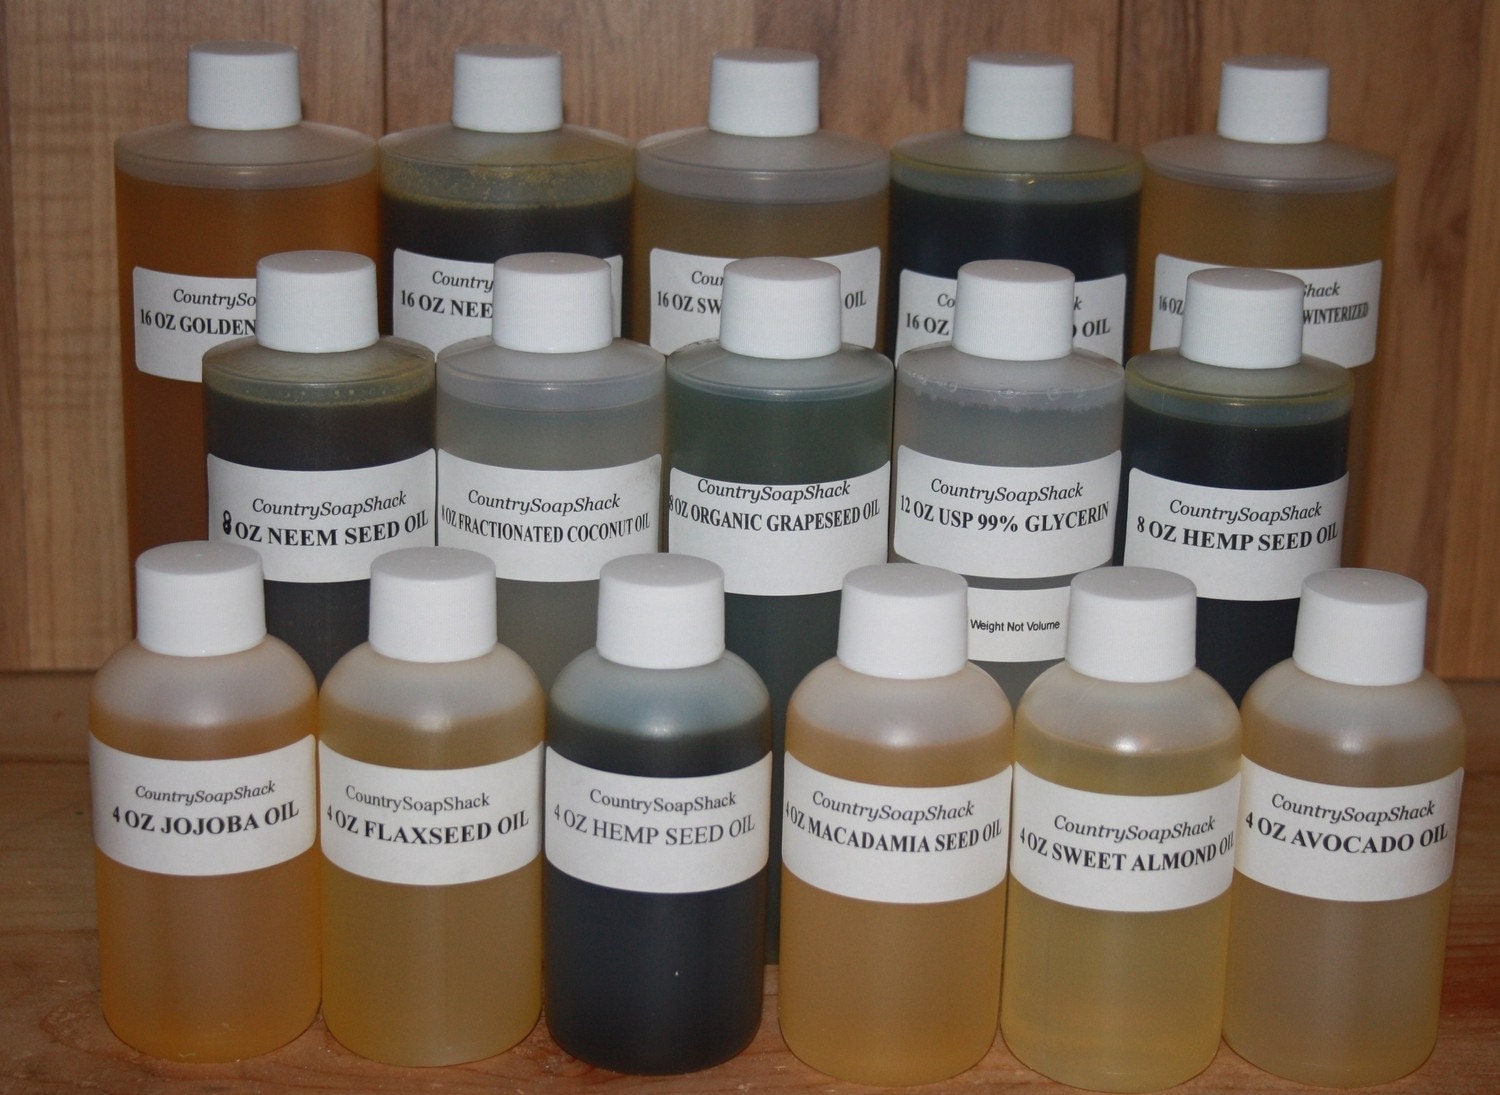
1) Castor oil is the most important part. It's the oil that does the cleansing. I randomly bought this oil through an Etsy seller called CountrySoapShack when I was trying to make my own shampoo so it was kind of like fate that I had this oil on hand. Otherwise, I've heard that they're pretty easily found in Target and the like in the... wait for it... laxative aisle. Don't run away screaming just yet. The whole point is that we should put things on our skin that's pure enough to ingest right? Right? Just try to get past this and get your precious skin-loving oil. 


2) As for carrier oils, it's what it says, but it also adds extra benefits your skin needs. I currently use extra virgin cold pressed olive oil. Cold pressed is generally the purest type of oil since heat pretty much kills a lot of the beneficial properties. (Remember what I wrote about raw honey? Heat is yo' enemy!) You can also use other oils such as this list I've excerpted from Crunchy Betty below:
  • Jojoba (all skin types, but very desirable for acne-prone skin)
  • Sweet almond (all skin types, especially oily)
  • Grapeseed (all skin types, especially oily)
  • Avocado (dry and aging skin)
  • Sunflower Seed (all skin types)
  • Olive (all skin types)
  • Apricot Kernel (dry, aging, and normal skin)
  • Argan (all skin types, especially aging skin … very pricey)
  • Tamanu (all skin types … very pricey)
Now, I've heard rumors that some people may not have the greatest results with olive oil. Jojoba and grapeseed tend to have the best reputations among OCM fans. Luckily, grapeseed oil can be found next to the olive oil in good grocery stores and jojoba, well, there is the magic of the internet. 

3) Washcloth. That's self-explanatory. Get yourself a nice and clean one.

Next is to figure out the ratio best for you. Think in thirds and halves. For normal skin, use equal parts castor and carrier oil. For dry skin, use 1/3 castor oil to 2/3 carrier oil. For oily skin, use 2/3 castor oil to 1/3 carrier oil.

I have have normal skin with the exception of a dry T-zone; so I use about 1/2 and 1/2 using slightly less castor oil. You can experiment and figure out the best ratio for yourself.

Now that all that preliminary information is out of the way, onto the actual method:
  1. With a dry face, makeup and all, mix together the castor and carrier oil in your hands. Massage gently onto your face getting every last bit including eyes and jawline and wherever else you have problem areas. Be sure to take at least a minute to massage it all in.
  2. Hang out for 5 minutes. Here, I'll brush and floss and dilly dally around.
  3. Turn on the faucet to the hottest water you can handle. (I know I said heat is your enemy, but here, it's necessary to help remove the oil.) Wet your washcloth well then wring it out so it doesn't drip. Place it over your face and keep it on until it begins to cool.
  4. Optional: repeat two more times.
  5. Using the wet washcloth, gently scrub the oil and makeup off your face, rinsing and rewetting as needed.
  6. Voila. You have a clean and make-up free face!
  7. Moisturizing is generally not necessary but if you feel tight, use some of the carrier oil if you like.
I like doing the washcloth process three times just because... I don't know, it feels right. Holding the hot washcloth over your face opens up your pores so the oil can get in there and clean out the gunk stuck in there. It's really quite exciting because your blackheads all but disappear when you do this. I do moisturize my T-zone still but I think it's because I've gotten lazy and haven't been as vigilant with my ratios and ended up using more castor oil than I should. I just mix a few drops right in my hand each time I do the OCM. 

Now, do you have to do the OCM every day? Some people do. I don't. I use the honey wash every day and maybe once or twice a week, I'll do the OCM. Usually when I know I have to wash my hair the next day because then I can just be sloppy and get the oil as close to my hairline as possible. I'm pretty positive if I committed to the OCM every day, I would have the skin most people would kill for. In between that and the honey wash though, I think it works out for me. 

Also, when you do the OCM, your skin is going to look so good in the morning, you'll feel just dandy not washing it in the a.m. I think it's better that way too: Less washing, more skin health! (image source)

My bathroom is turning into a kitchen pantry right now and I'm loving it. How about you?

Wednesday, July 25, 2012

Natural Beauty Products: Why Should We Care?

People seem so aghast when I tell them I wash my face with honey and olive oil and wash my hair with baking soda and apple cider vinegar. It's actually fun. The most interesting part is seeing who is into it and who thinks I'm insane. It turns out that I'm always wrong on my estimation of their reaction. Someone who I thought was a diehard hippie scrunched up her face and say, "eeew." (image source)


No, no "eeew." Don't say that!

Here's the thing, this was my lightbulb moment. My sister came home last summer and told me she switched to natural products. You know, the super-expensive kind from health food stores that make you kind of want to cry. Why, when she could find a pretty good equivalent on the shelves of Target? She introduced me to something called the EWG's Skin Deep Cosmetic Database. It lists many commonly found products along with a rating. 0 for no harmful chemical, substance, or additive, all the way up to 10 which means it has an extremely high amount of harmful toxins. They go through every single unpronounceable ingredient in a product and explain why it's bad for you. Anything rated 0 - 2 is considered ideal. 3 - 6 is okay but it's pushing it. And 7 - 10 is pretty harmful.

That's all good. But why should we still care so much? We're not ingesting it. We're just putting it on our faces and skin. Ah, therein lies the rub. The skin is our body's largest organ. It's also, clearly, the most exposed and abused in a sense. It lies on the outside of our skeletal and muscular structures, keeping stuff like our intestines from falling out and protecting what's inside from outside effects. It is also porous. Technically, even though it's pretty darn water-resistant, it's not a like sturdy piece of plastic keeping out absolutely everything. It's a lot more like a very, very, very heavy-duty sponge.

So we may not be putting this stuff in our mouths, but we are still absolutely, certainly putting them into our bodies through our skin and hair. Imagine day after day of rubbing chemicals all over your skin, it's bound to have adverse reactions deep inside. Imagine rubbing this stuff on a baby's bum! Not to mention, most of these chemicals disrupt our skin cell's natural function. In fact, skin cells view these chemicals as the enemy and rally up to fight against them. Instead of your cells working along side the chemicals to heal your skin, they've turned it into a battlefield. That's why many people tend to experience redness, irritation, or even worsening acne whenever using a product. This is also why many people think they have sensitive skin when in actuality, a very small percentage of people truly have sensitive skin. It's all a result of what we rub on our face and body.

Think of retinol, commonly known as Retin-A. It's an extremely potent substance that is typically prescribed. It's the choice for eliminating acne and wrinkles. It works a lot like a mini chemical-peel by removing a layer of skin whenever you put it on. That's why the side effects include redness and irritation. Instead of letting the skin cells do what it does naturally- replenishing the layer and balancing oil production, it's getting all thrown out of whack because we're bombarding them with a ton of things they don't recognize or can't use. Also, you can't use it while pregnant. Think about that.

However, if you use a natural substance like honey or olive oil or even baking soda and apple cider vinegar, your skin is much more apt to recognize them and view them as friends rather than foes. Your skin biologically knows what it needs to do and adding natural aids just gives them that boost or a few extra "tools" they can actually use. Your body is a great system in itself. If it really needed a ton of weird chemicals and extra toxins to survive, we probably wouldn't have made it all these hundred of years ago.

Natural beauty products can be pricy which is the main reason why I turned to homemade recipes. So far, they have worked fabulously and I have no regrets. In fact, I just want to go tell the whole world they need to convert! However, not everyone has the time or inclination to make their own, but there are options. If you know what to look for, you're already taking a huge step towards improving your beauty care. 

Here's a list of common ingredients to avoid as much as possible. You can read a more in-depth overview on EWG's Skin Deep Top Tips for Safer Products.
  • Benzalkonium chloride: Biocide, preservative and surfactant associated with severe skin, eye, and respiratory irritation and allergies, benzalkonium chloride is a sensitizer especially dangerous for people with asthma or skin conditions like eczema.
  • BHA: The National Toxicology Program classifies butylated hydroxyanisole (BHA) as “reasonably anticipated to be a human carcinogen.” It can cause skin depigmentation. In animal studies, BHA produces liver damage and causes stomach cancers such as papillomas and carcinomas and interferes with normal reproductive system development and thyroid hormone levels.
  • DMDM hydantoin & bronopol (2-Bromo-2-nitropropane-1,3-diol): Cosmetics preservatives that decompose and release formaldehyde, which the International Agency on Research on Cancer lists as a known human carcinogen. The preservatives and their decomposition products, including formaldehyde, can trigger allergic reactions.
  • Formaldehyde: A potent preservative considered a known human carcinogen by the International Agency on Research on Cancer. Formaldehyde, also an asthmagen, neurotoxicant and developmental toxicant.
  • Fragrance: It may help sell products from face cream to laundry detergent, but do you know what’s in it? Fragrances are in everything from shampoo to deodorant to lotion. Federal law doesn’t require companies to list on product labels any of the chemicals in their fragrance mixture. Recent research from EWG and the Campaign for Safe Cosmetics found an average of 14 chemicals in 17 name brand fragrance products, none of them listed on the label. Fragrances can contain hormone disruptors and are among the top 5 allergens in the world. Our advice? Buy fragrance free.
  • Hydroquinone: A skin bleaching chemical that can cause a skin disease called ochronosis, with blue-black lesions that in the worst cases become permanent black caviar-size bumps. In animal studies, hydroquinone has caused tumor development
  • Methylisothiazolinone and methylchloroisothiazolinone: Preservatives, commonly used together in personal care products, among the most common irritants, sensitizers and causes of contact allergy Lab studies on mammalian brain cells suggest that methylisothiazolinone may be neurotoxic.
  • Oxybenzone: Sunscreen agent and ultraviolet light absorber, found in nearly all Americans, according to the U.S. Centers for Disease Control and Prevention. In human epidemiological studies, oxybenzone has been linked to irritation, sensitization and allergies.
  • Parabens (Propyl, Isopropyl, Butyl, and Isobutylparabens): Parabens are estrogen-mimicking preservatives, found in breast cancer tumors of 19 of 20 women studied. Longer chain parabens like propyl and butyl paraben and their branched counterparts, isopropyl and isobutylparabens, may disrupt the endocrine system and cause reproductive and developmental disorders.
  • PEG/Ceteareth/Polyethylene compounds: These synthetic chemicals are frequently contaminated with 1,4-dioxane, which the U.S. government considers a probably human carcinogen and which readily penetrates the skin. Cosmetics makers could easily remove 1,4-dioxane from ingredients, but tests documenting its common presence in products show that they often don’t.
  • Petroleum distillates: Petroleum-extracted cosmetics ingredients, commonly found in mascara. They may cause contact dermatitis and are often contaminated with cancer-causing impurities. They are produced in oil refineries at the same time as automobile fuel, heating oil and chemical feedstocks.
  • Phthalates: A growing number of studies link this chemical to male reproductive system disorders. Pregnant women should avoid nail polish containing dibutyl phathalate.
  • Resorcinol: Common ingredient in hair color and bleaching products; skin irritant, toxic to the immune system and frequent cause of hair dye allergy. In animal studies, resorcinol can disrupt normal thyroid function.
  • Retinyl palmitate and retinol (Vitamin A): Vitamin A is an essential nutrient, but excessive amounts can cause severe birth defects if women are exposed during pregnancy New evidence shows that when applied to sun-exposed skin, for instance, in sunscreens, lip products and daytime moisturizers, these compounds can break down and produce toxic free radicals that can damage DNA and cause skin cancer.
  • Triclosan & Triclocarban: Antimicrobial pesticides in liquid soap (triclosan) or soap bars (triclocarban), very toxic to the aquatic environment. often found as contaminants in people due to widespread use of antimicrobial cleaning products. Triclosan disrupts thyroid function and reproductive hormones. 
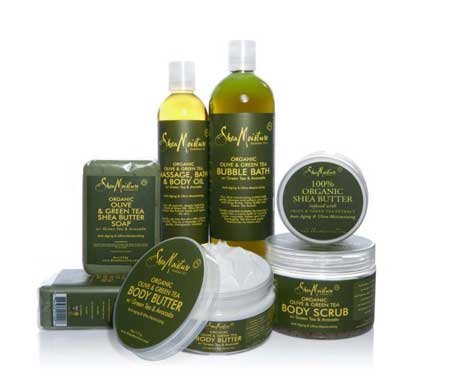
I know it's overwhelming. But thanks to growing education and demand among people, there are more and more products coming out without most of these harmful ingredients. My favorite product is Shea Moisture Olive Oil and Green Tea Lotion with Avocado. I splurged on it after a day in the sun and my skin was feeling sensitive and tight. It was the best decision I made. The entire Shea Moisture line is great and avoids many of these harmful toxins. You can find them at Walgreen's or Target or online. (image source)

If you made it all the way down here, thank you! I know it was long but I hope it was informative for you. If you did one thing to change your beauty routine to make it safer, you're making a huge difference already. It's one less harmful product being bought and one more good thing you can do for yourself. Between you and me, we can really help change the face of beauty care!

Wednesday, July 11, 2012

Wash Your Face with Honey, Sweetie

I've mentioned before in my Meet Beatrice video and Facebook that I've been washing my face with honey. Yes, I am secretly crunchy granola. Hear that sound? That's the sound of a stereotype being broken. Kaboom! But really. I like putting food on my face... and in my mouth... and that's where it ends so don't get too excited. 

And I like that if I accidentally lick my lips, I get a taste of yummy honey and not some chemical-laden cream that requires me to brush my teeth thoroughly. (image credit)


So if you're interested in trying out a honey wash, let me introduce you to my face washing routine. I first learned about the honey wash when I read Crunchy Betty's Honey Challenge post. It intrigued me because it seemed like a miracle wash. Here's a snippet from Crunchy Betty about the properties and benefits of washing your face with honey:
  1. It is antibacterial and antimicrobial. It will get off any lingering nastiness that’s thinking about setting up camp on your face and creating pimples.
  2. It is slightly drying which means it helps soak up any pimples or oiliness.
  3. It is also incredibly moisturizing. Seems like a double standard, doesn’t it? But it’s true. Honey sinks into your skin and moisturizes like you wouldn’t believe. (Remember Cleopatra and her honey baths to look young?)
  4. It imparts all kinds of beneficial enzymes that work at scrubbing your face for you, as well as perform a little anti-aging action.
  5. It’s great for acne, aging skin, normal skin, dry skin … honey loves EVERY SKIN TYPE.
  6. It is healing and helps repair acneic sores and scars.
  7. It’s 100%, absolutely, positively natural, great for your skin, and such a SIMPLE addition to your routine!
How would you say no after reading all that? The one caveat is that it needs to be a make-up free face. It works for me because I use just mascara and eyeliner. (Another secret, I'm completely clueless about make-up.) However, she posted another tip on how to remove eye make-up which was perfect for me. So here's what I do to wash my face at night:
  1.  I pour a dab of cold-pressed extra virgin olive oil into a cotton pad and swipe it over my eyes to remove all the mascara and eyeliner. I love that it doesn't irritate my eyes and I can open my eyes without getting blinded. Bonus: Doing this every night has made my eye area super soft and supple and it has strengthened, thickened, and aided in the growth of my eyelashes.
  2. Optional: Gently tissue off the oil with a soft tissue. I don't do this because I need the moisture and it hasn't impeded my ability to rinse off the wash. It may for you so leave the oil on for your first try and use your judgement for your next attempt.
  3. With slightly damp hands, pour a dab of honey, about under 1/2 tsp, into your hands and rub together. Then massage it into your face all over. All over means all over. I go over my eyes and I make sure to get my jawline because I get quite a few breakouts there.
  4. Let it sit for a little bit. It can be as little as 30 seconds or as long as 5 or 10 minutes. I let mine it while I brush and floss my teeth, so about 5-7 minutes.
  5. Rinse off in warm water. You're done.
Important: The honey can't just be any run-of-the-mill honey. It needs to be as unprocessed as possible, meaning it should be labeled raw. Why? Heat destroys the beneficial properties in honey. Most honey is pasteurized which means it's heated. Raw honey is not heated and therefore retains everything that makes it good. Your best bet is the farmer's market where you can ask the beekeeper how the honey is processed, or a well-stocked grocery store. Just read the label. Since you use so little of it at a time, you can definitely stretch what seems to be a pricy bottle of honey for a far longer time than a pricy tube of top-of-the-line chemically cleanser. Besides, it never ever spoils. If it crystallizes or hardens, just place the bottle in a bowl of warm water to soften. Don't microwave, heat is your enemy! (Right: raw honey I use. Found at HomeGoods of all places!)

I've done this for about two months now. The first couple weeks were magical for me. I loved my skin, it was clearing up and glowed. Then, when I hit the one-month mark, my skin had gotten really dry on my forehead and my skin tone was very ashy and rough. I discovered that I was rinsing with water that was way too hot and that I was washing my face too much. At first, I did the honey-wash every morning and night. Now I just wash my face at nights.

It sounds weird and frankly, dirty, to not wash your face in the morning, but if you think about it, it makes a lot of sense not to. You sleep all night. You're not going out there getting dirt and dust into your pores. You're not eating food. You're not doing anything but resting your face gently against your pillow for hours. So when I started just rinsing my face in warm water followed by a cold water splash in the a.m., my face underwent a transformation. It made a huge difference in the dryness and oil production and now I am much more balanced.

Other tips on the honey-wash: The original method said you could apply the honey directly to a dry face. I hated this because it just pulled at my delicate skin. Adding a bit of water made it go on a lot smoother. Try not to use hot water to rinse, it dries out your skin. I moisturize by smoothing a dab of olive oil around my eyes and my dry spots which are my forehead, around my nostrils, and the corners of my lips. 

Another bonus I've noticed with the honey-wash and olive oil. I had a bit of redness on my nose and cheeks after spending all day in the sun at the beach. There's no solid proof, but I swear on my vegetarian cookbooks that the honey and olive oil (I applied it to the red areas) soothed and dissipated the redness. I've gotten red twice, it seems to have worked twice. Just food for thought. (Hehe, get it?)

I also intersperse my routine with something called the Oil Cleansing Method (OCM,) but as vital as it is, it deserves it's own post so check back soon on my experiences with OCM! Read all about my OCM experience! (image credit)


Would you give this a try? If you do, let me know what you think in the comments!

Friday, May 18, 2012

How to Make a Picture Frame with Cardboard and Fabric

One of my biggest irritations in life is finding a great print in a vintage shop and having to find a frame to go with it. Maybe I'm just overly picky, maybe I'm just being really cheap (likely the second one,) but it's just a pain in the butt to know I'll have to shell out an upwards of sixty bucks just so I can hang the damn thing on my wall. 

Now, getting multiple cardboard cuts on my fingers is totally not a pain in the ass. Not in my world, apparently. So you know where I'm going with this...

So, this is a print I found and bought for the bargain price of $6. Yes, six whole dollars. That's music to my small-budget ears. Of course, it's unframed. I had planned to get a real frame since I came across an arsenal of coupons for Joann Fabric and Michael's. The truth is, I really just wanted to make something, so this print became my guinea pig.

So yes, I made this:


All it took was a bunch of tacky glue, fabric remnants, cardboard, and scissors. And measuring tape, I guess. You know, measure twice, cut once, whatever.

Here's how I did it:

First, you cut out a frame out of a big piece of cardboard, measuring (eyeballing) so it's the same width all the way around and slightly overlapping the edge of your print by like, a millimeter. 


Then, you flip it over and cut out long strips of a light colored canvas-like fabric. I used duck fabric I found in the fabric remnants section. The strips of fabric should be wide enough to fold over to the back and glue down. 

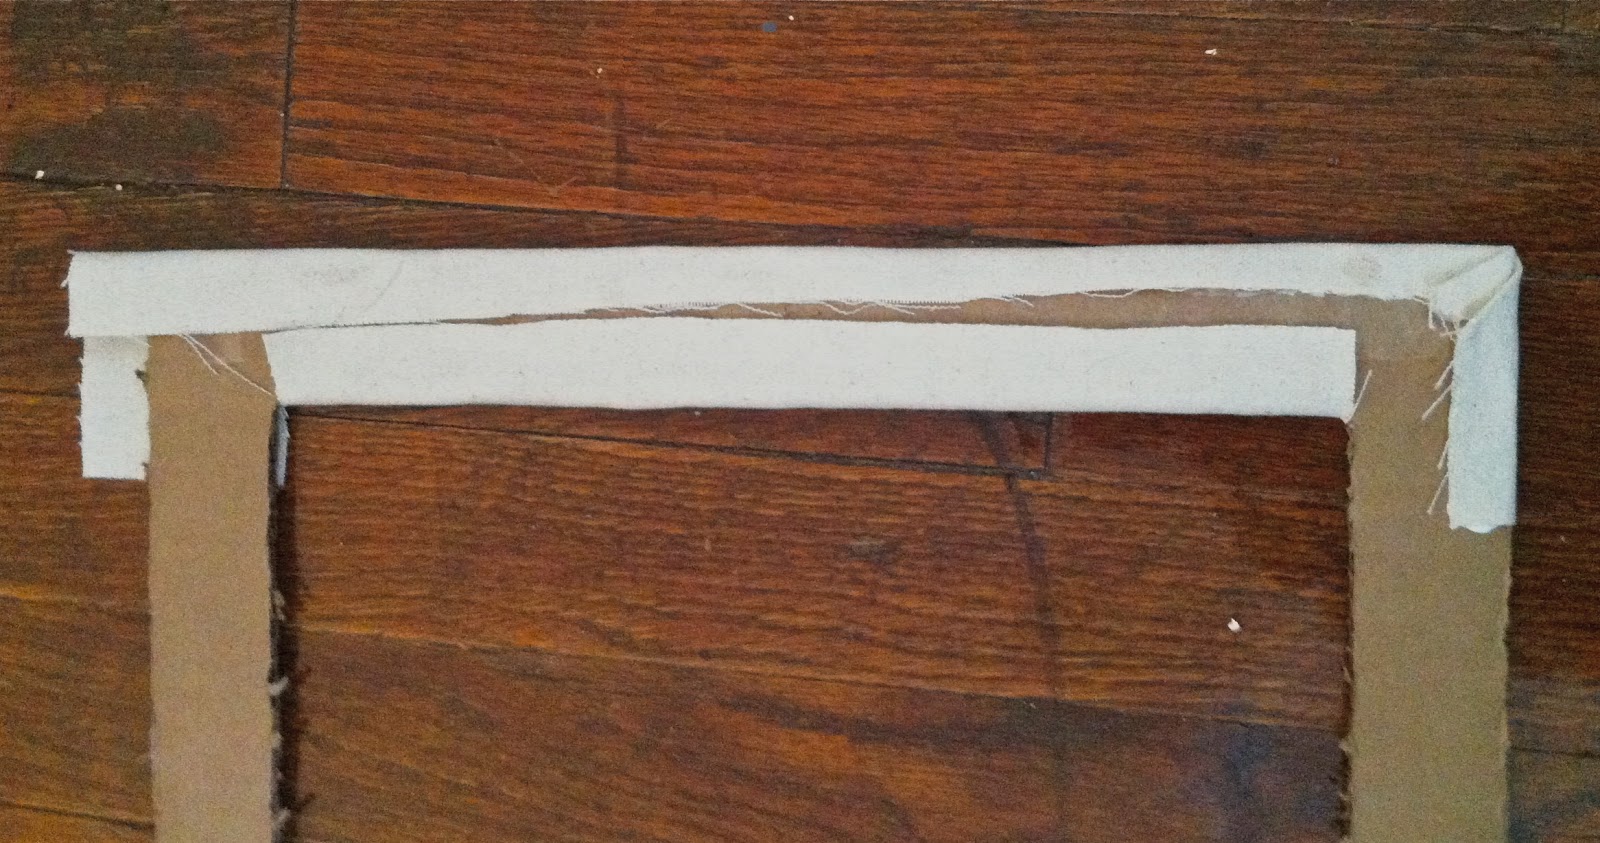
This procedure was done to the two short sides:


You can see I cut the inside corners so I could fold the fabric around the inside edge.

I, then, cut two strips of fabric for the wider sides, but cut them wide enough so I could fold them in a diagonal line from the inside corner to the outside corner shown to the right, and I folded up the bottom, shorter edge and secured it.

I folded the top excess fabric down and stapled it in place. The staples didn't show through to the other side so I just left it, augmenting it with a bit of glue here and there.
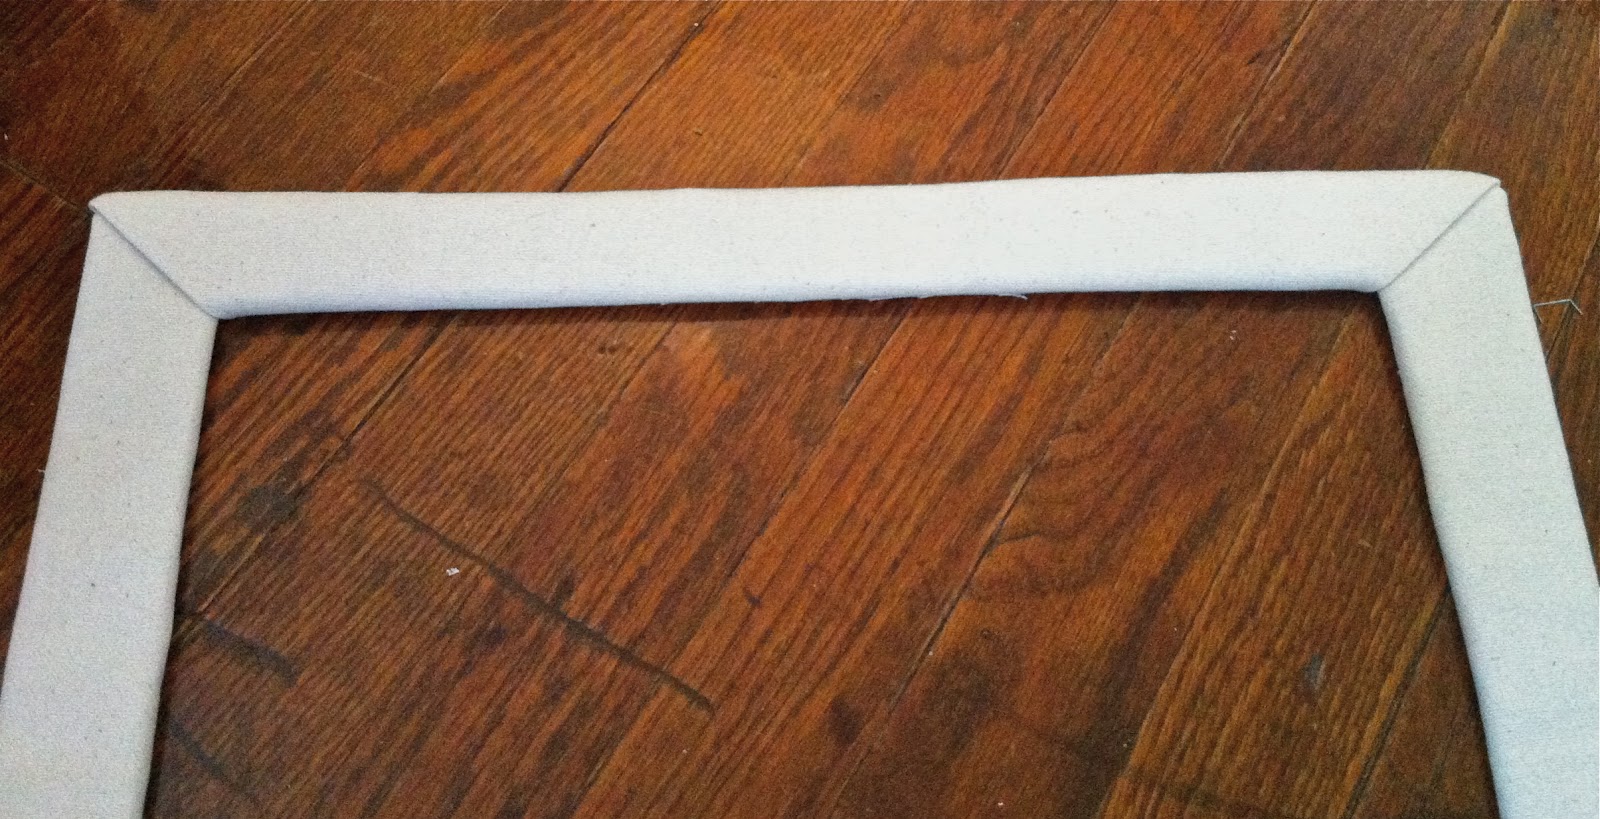
This is what it looks like on the front side:


Once the small frame was done, I cut out another piece of cardboard for the larger part of the frame, overlapping the smaller frame slightly; just like how the smaller frame overlapped the print. Since it was larger, I had to piece together strips of cardboard and staple them together. You probably would have a better looking frame if you were able to find a large piece of cardboard and just cut out a square in the middle. Using a different, contrasting fabric, I repeated the same process I did with the smaller frame. This fabric was a silky dark blue fabric which also provided a visual textural differences as well.

Before covering it with fabric, I stapled, on the back, a twist-tie that will be used as the hanger. It's using common household items at its finest!

Once the larger frame was covered, I put it all together. Typically, one would layer the large frame over the smaller frame over the print. However, when I tested that, I didn't like how it looked. I ended up placing the print underneath the smaller frame, but then, I put the two pieces on top of the larger frame, creating a slight pop-out 3D effect. I literally just taped it all together with packing tape, strategically placing them on corners and at intervals along the sides.

Once it was done, I realized I probably should've ironed the fabric-covered frames before putting it all together. It would eliminate all the folds and creases and evened everything out. Keep that in mind when you're doing this project. 

All in all, the project took me about 2 to 3 hours. It took that long because I kept testing different ways of folding and gluing, so for you, it would probably take a little bit less. The configurations are endless. You can do a single big frame, or make multiple little ones to overlap, or use completely different kinds of fabric. The best part about this is you can make it exactly how you want it and not be limited by the ready-to-hang frames found at the store or feel the pain of emptying your wallet at the custom frame counter.

Will you do this? What would you have done differently? If you do, feel free to share your experience and photos here in the comments or on the Birdcage Bohemia Facebook page!