Showing posts with label farmer's market. Show all posts

Saturday, August 11, 2012

Holy Kohlrabi!


I have heard of kohlrabi, seen kohlrabi, could probably likely identify it if needed to, but it never occurred to me to actually try it. So when I was at the Farmer's Market last week, I found myself in a talkative mood. Sometimes you just want to get in and get out and woe betide the one who tries to strike up a conversation with you. You don't get that? Maybe it's me.

I was looking for something unusual to bring home. Kale was stricken from the kitchen due to Guitar Boy, ("I don't like the texture," he wailed at me once,) and if I had to look at another zucchini, I might find myself ramming it down someone's throat. Tomatoes, well, yeah, tomatoes are nice, but tomatoes, tomatoes, tomatoes. So my eyes alighted on a deep purple alien ball: "Kohlrabi, .50" as I was purchasing a pint of Italian plums. (You cannot get between me and my plums, so don't even try.)

"Oh, kohlrabi," I said outloud.

"Yes, kohlrabi, you'd love it, it's awesome." The lady at the stand jumped in.

"How do you eat it?"

"You peel it, then slice it thinly, and just sprinkle some salt on top. It's great, you'll love it." She snatched up a spiky royal-colored one and plopped it in my bag. 

"Oh, like a radish?" My moment of enlightenment.

"Yes! Try it and you'll be coming back for more."

"Er... okay, wow, thanks!" and I walked away.

So why wasn't I overly thrilled for being offered a kohlrabi? I have a mild dislike of radishes (understatement.) Being handed this enormous extraterrestrial vegetable that promised to be an oversized, probably more pungent, radish wasn't making me skip for joy.

I find radishes bland with a peppery aftertaste. There's no excitement there. Then, as they sit out, they become slightly rubbery which tended to happen in my household growing up. My mom harbored an unhealthy love for these red and white balls, serving them with buttered bread and salt. Sometimes, she'd throw them into salads. I ate around them, always. She would just have a bunch of slices lying around and nibble at them throughout the day, blech.

But my philosophy is, well, you can't say you hate something without even trying it. So, literally an entire week later, I finally remembered the kohlrabi in my crisper and brought it out to the counter. I stared at it, took a picture or two because, well, it's pretty and unusual so why not. Then, with a peeler, I attacked one side of it. I got the purple peel off, then continuing to use the peeler, I cut out ultra-thin slices. A sprinkle of salt. I ate a piece. Then, another. Then, another. Then I toasted a slice of bread, spread it with a dab of dijon mustard and a kiss of honey and piled loads and loads of sliced kohlrabi on top. Sprinkle of salt, dash of pepper, and a squeeze of lemon.

Holy Kohlrabi!


In my mind, this kohlrabi has proved itself far and beyond the lowly radish. I offer no sorrow for those pitiful things because... kohlrabi.

It turns out there's so much more you can do with kohlrabi other than thinly slice them and dress them with a dusting of salt. I don't know why you want to try because this is kind of perfection on its own, but like one gets sick of zucchini after the upteenth recipe, it's nice to have a backup. You can pickle them, roast them, shave them into salads, turn it into a ceviche, deep fry them, steam them, and probably throw them into a stew with much too thick gravy (guilty.) I can't picture things like cucumber or radishes being cooked (ew, limp, warm radishes,) but kohlrabi has a promise of releasing luscious sweet sugars to caramelize and send the vegetable to a whole new level of food.

I will get around to trying one of the cooked recipes for kohlrabi, but until then, I'm content with a slice of bread and salt. 

By the way, I did go back for more, just like she said.

Tuesday, July 24, 2012

Soy Chorizo Chili with Swiss Chard Sauce

Okay guys, it's recipe time again. This time, I had a "duh" moment and realized that I could put our fan in the kitchen so I wouldn't turn into a sweaty puddle by the time dinner was ready to be served. As much as I love our house, I am despising it with a fierce passion these hot summer days. Even if there's a nice cool breeze outside, these concrete walls manage to trap every last drop of humidity all day long, all day. And for some reason, (read: laziness) we have not yet endeavored to buy an in-window AC unit. I only blame Guitar Boy. (Hee hee.)

So, I decided it was time to make a meal meal. Not dinky little dishes that only last a day. And besides, I had a ton of random produce sitting in the fridge going to waste and as Guitar Boy will contest, I am secretly a communist and refuse to throw any food away. In any case, using those said produce, I made soy chorizo chili topped with cubes of fresh avocados and a bright, citrusy swiss chard sauce. Yep, you read that right.

If you're not familiar with soy chorizo, get thee to a Trader Joe's immediately. If you are nowhere near a Trader Joe's, I feel for you. In moving to Akron, we have effectively moved ourselves one hour away from the nearest one. It sucks. Hugely. But anyway, soy chorizo is just that, vegetarian chorizo. I'm not a huge fan of faux meat but this I make an exception for. It's spicy and earthy and has great texture. It's so packed with spices that I don't even bother adding any spices in other than salt. Less work for me! If you can't get your hands on soy chorizo, seek out a faux ground meat alternative like a "sausage" you can crumble up, MorningStar Meal Starters, or even chop up a few spicy veggie burgers. I've done that. It works. No complaints. (image credit)


The best part is that I used one big pot for each step of the dish. Cuts way down on the dishes you have to hand wash. Like I said before, when you have to hand wash all your dishes, the lengths you go to avoid using a dish suddenly becomes very reasonable.

Make the sauce first, cover tightly, and set aside. Then boil the potatoes, drain, and commence with the chili making.

To make the swiss chard sauce:

Gather up to make about 1 to 1 1/2 cup:
  • Generous 1 lb swiss chard
  • 2 cloves garlic
  • 1 green onion
  • Large handful of cilantro (about 1 cup or more, depending on your preference)
  • 2 limes or more if desired
  • Salt and pepper to taste
Method:
  • Fill a large stock pot about halfway and bring to boil. 
  • Rinse the swiss chard and cut into large strips just to make it manageable. Discard the stems (or put into your giant frozen bag full of veggie discards for a future stock.) Chop the green onion coarsely. 
  • Once the water is boiling, salt and add the swiss chard and cover. Bring to a high simmer and let cook for 5 minutes. They may be pretty soft by then, but we're pureeing them so we're not concerned about texture. 
  • Throw in the green onions and let cook for one more minute. 
  • Remove the vegetables from the water and blanch by running cold water over them in a colander. 
  • Then add to a blender, don't worry if you transfer some of the water into it, you'll need it to puree. 
  • Add in the garlic cloves, cilantro, juice of two limes, and salt and pepper. Puree until very smooth and taste. 
  • Add more lime juice and salt and pepper if needed. Cover tightly and set aside.
To make the chili:

Get together to make about 4 small servings or 2 huge ones:
  • 1 lb small potatoes (white or red, I used the tiny white ones from Trader Joe's.)
  • 1 candy onion, diced (from the farmer's market, milder and sweeter than vidalia onions!)
  • 1 large tomato (think mine was about a pound.)
  • 1 package soy chorizo
  • 1 15 oz. can red kidney beans, drained and rinsed (Goya's dark red kidney beans are amazing.)
  • Salt
  • Sour cream if desired
  • 1 avocado, diced
  • 1 lime or lemon, juiced
Take a deep breath, stand by the fan for a minute, then commence making it:
  • Since I kept the water from boiling the swiss chard in the pot, I just brought it back to a boil and used it to boil the potatoes. Boil until a fork goes through fairly easily, about 10-15 mins. Then drain, removing the water from the pot and set aside.
  • Heat up some olive oil in the pot over medium heat, add the diced onions and cook until translucent.
  • Chop the tomato coarsely and add them to the onions. Let them cook until the cubes are breaking apart with a spoon, about 8-10 minutes.
  • Cut the casings off the soy chorizo and add to the pot. Let cook for a few minutes until warmed through and add 1/4 of water if it looks a little dry. Alternatively, add some more tomatoes if you have some. I didn't.
  • Add in the boiled potatoes and red beans and cover the pot, set on low, and let them warm through again. 
  • Salt if needed.
  • Since the soy chorizo is pretty hot and Guitar Boy has a low tolerance for spicy food, I added about 1/2 cup of sour cream to help combat the heat. You can do this or omit if desired.
  • In a small bowl, combine the avocado cubes and lemon or lime juice with a sprinkling of salt.

Voila. To serve, just mound the chili in a bowl, spoon on some of the swiss chard sauce, and sprinkle with some cubes of avocados. Add another dollop of sour cream if you like.

Wednesday, July 11, 2012

Wash Your Face with Honey, Sweetie

I've mentioned before in my Meet Beatrice video and Facebook that I've been washing my face with honey. Yes, I am secretly crunchy granola. Hear that sound? That's the sound of a stereotype being broken. Kaboom! But really. I like putting food on my face... and in my mouth... and that's where it ends so don't get too excited. 

And I like that if I accidentally lick my lips, I get a taste of yummy honey and not some chemical-laden cream that requires me to brush my teeth thoroughly. (image credit)


So if you're interested in trying out a honey wash, let me introduce you to my face washing routine. I first learned about the honey wash when I read Crunchy Betty's Honey Challenge post. It intrigued me because it seemed like a miracle wash. Here's a snippet from Crunchy Betty about the properties and benefits of washing your face with honey:
  1. It is antibacterial and antimicrobial. It will get off any lingering nastiness that’s thinking about setting up camp on your face and creating pimples.
  2. It is slightly drying which means it helps soak up any pimples or oiliness.
  3. It is also incredibly moisturizing. Seems like a double standard, doesn’t it? But it’s true. Honey sinks into your skin and moisturizes like you wouldn’t believe. (Remember Cleopatra and her honey baths to look young?)
  4. It imparts all kinds of beneficial enzymes that work at scrubbing your face for you, as well as perform a little anti-aging action.
  5. It’s great for acne, aging skin, normal skin, dry skin … honey loves EVERY SKIN TYPE.
  6. It is healing and helps repair acneic sores and scars.
  7. It’s 100%, absolutely, positively natural, great for your skin, and such a SIMPLE addition to your routine!
How would you say no after reading all that? The one caveat is that it needs to be a make-up free face. It works for me because I use just mascara and eyeliner. (Another secret, I'm completely clueless about make-up.) However, she posted another tip on how to remove eye make-up which was perfect for me. So here's what I do to wash my face at night:
  1.  I pour a dab of cold-pressed extra virgin olive oil into a cotton pad and swipe it over my eyes to remove all the mascara and eyeliner. I love that it doesn't irritate my eyes and I can open my eyes without getting blinded. Bonus: Doing this every night has made my eye area super soft and supple and it has strengthened, thickened, and aided in the growth of my eyelashes.
  2. Optional: Gently tissue off the oil with a soft tissue. I don't do this because I need the moisture and it hasn't impeded my ability to rinse off the wash. It may for you so leave the oil on for your first try and use your judgement for your next attempt.
  3. With slightly damp hands, pour a dab of honey, about under 1/2 tsp, into your hands and rub together. Then massage it into your face all over. All over means all over. I go over my eyes and I make sure to get my jawline because I get quite a few breakouts there.
  4. Let it sit for a little bit. It can be as little as 30 seconds or as long as 5 or 10 minutes. I let mine it while I brush and floss my teeth, so about 5-7 minutes.
  5. Rinse off in warm water. You're done.
Important: The honey can't just be any run-of-the-mill honey. It needs to be as unprocessed as possible, meaning it should be labeled raw. Why? Heat destroys the beneficial properties in honey. Most honey is pasteurized which means it's heated. Raw honey is not heated and therefore retains everything that makes it good. Your best bet is the farmer's market where you can ask the beekeeper how the honey is processed, or a well-stocked grocery store. Just read the label. Since you use so little of it at a time, you can definitely stretch what seems to be a pricy bottle of honey for a far longer time than a pricy tube of top-of-the-line chemically cleanser. Besides, it never ever spoils. If it crystallizes or hardens, just place the bottle in a bowl of warm water to soften. Don't microwave, heat is your enemy! (Right: raw honey I use. Found at HomeGoods of all places!)

I've done this for about two months now. The first couple weeks were magical for me. I loved my skin, it was clearing up and glowed. Then, when I hit the one-month mark, my skin had gotten really dry on my forehead and my skin tone was very ashy and rough. I discovered that I was rinsing with water that was way too hot and that I was washing my face too much. At first, I did the honey-wash every morning and night. Now I just wash my face at nights.

It sounds weird and frankly, dirty, to not wash your face in the morning, but if you think about it, it makes a lot of sense not to. You sleep all night. You're not going out there getting dirt and dust into your pores. You're not eating food. You're not doing anything but resting your face gently against your pillow for hours. So when I started just rinsing my face in warm water followed by a cold water splash in the a.m., my face underwent a transformation. It made a huge difference in the dryness and oil production and now I am much more balanced.

Other tips on the honey-wash: The original method said you could apply the honey directly to a dry face. I hated this because it just pulled at my delicate skin. Adding a bit of water made it go on a lot smoother. Try not to use hot water to rinse, it dries out your skin. I moisturize by smoothing a dab of olive oil around my eyes and my dry spots which are my forehead, around my nostrils, and the corners of my lips. 

Another bonus I've noticed with the honey-wash and olive oil. I had a bit of redness on my nose and cheeks after spending all day in the sun at the beach. There's no solid proof, but I swear on my vegetarian cookbooks that the honey and olive oil (I applied it to the red areas) soothed and dissipated the redness. I've gotten red twice, it seems to have worked twice. Just food for thought. (Hehe, get it?)

I also intersperse my routine with something called the Oil Cleansing Method (OCM,) but as vital as it is, it deserves it's own post so check back soon on my experiences with OCM! Read all about my OCM experience! (image credit)


Would you give this a try? If you do, let me know what you think in the comments!

Monday, July 9, 2012

Oven-Roasted Tomato Basil Pesto and Ohio City Pasta

So it's finally cooled down in Crackron- I mean, er, Akron, enough to turn on the stove. I was so excited to cook again. No, really, so excited. So I ended up making a semi-elaborate meal to celebrate and spoil Guitar Boy with. 


(Read: elaborate in any incarnation over here means utilizing something other than a chopping board and a skillet to create a dish. Case in point: the Ninja blender finally, finally came out of its box.)

I took the Ninja on it's maiden chopping voyage with a pesto recipe. Well, it's really kind of like a bastardized sorta-kinda-not-really pesto, but still pesto because it looks like pesto, smells like pesto, and acts like pesto. 

And there's the rumble of angry Italian mothers coming and ready to paddle my behind.


And to make them even angrier... there's a weird ingredient in here. Just trust me though.

So I bring you oven-roasted tomato basil pesto. I shall offer this up to appease the angry Italian mothers and tell them it is divine, creamy deliciousness. They'll believe me. I think.

Get together for just over 1/2 cup worth's:
  • 2 roma tomatoes, quartered
  • 4 cloves garlic (more or less to your preference)
  • Heaping tsp peanut butter (You read that right. See below for more information.)
  • 1/4 cup Parmesan cheese or whatever you have in your pantry
  • 3/4 cup to 1 cup fresh basil leaves
  • up to 1/4 cup olive oil plus more for roasting
  • 1/2 lemon, juiced
  • Salt and pepper to taste
Now to make it:
  • Preheat oven to 450 degrees. In a small roasting pan, layer the quartered roma tomatoes skin side down and drizzle olive oil to cover. Sprinkle with salt and pepper. 
  • Take the garlic cloves paper skin-on and place into a square of aluminum foil. Drizzle olive oil to cover and sprinkle with salt and pepper as well. Wrap the garlic up tightly in the foil. 
  • Roast both in the oven for about 15 to 20 minutes until tomatoes are softened and the edges slightly burnt. 
  • Take out and set aside until cooled.
  • Peel the burnt skin off the tomatoes and add to the food processor. Squeeze the garlic out of the papery skin. It's okay if it's not completely softened, we still want a bit of a bite. Add to the processor. Blitz the processor a few times to break up the tomatoes.
  • Add in this order: peanut butter, cheese, and basil leaves. Squeeze the lemon over the top. Begin pureeing.
  • While pureeing, drizzle the olive oil into the processor until it starts to become smooth and easy to puree. Be careful not to add too much that it becomes oily and runny. Stop and check and taste every so often.
  • Taste and add salt and pepper as needed.
  • Voila, you have oven-roasted tomato basil pesto-but-not-pesto.


Now, for those of you who raised an eyebrow at my use of peanut butter. In my defense, I'm not a fan of going out to buy a single ingredient. Besides, pine nuts, the ingredient found in pesto, are expensive. I added a teaspoon of peanut butter just to give the sauce a little bit of body and to add a slightly nutty background flavor. Also, I used the kind that is just dry roasted peanuts with sea salt, no added sugar or flavorings. It's not so much that you can sit there and say, "Oh, I taste peanuts!" because that wouldn't be so good. If you are wary, add a little bit at a time and taste, then add more and taste, you'll see the difference and improvement. However, if you rather be all traditional, by all means, throw some pine nuts in there! It's your dish after all!

I served it with this fabulous, delicious tomato basil pasta from Ohio City Pasta that I got at the farmer's market. I simply sauteed candy onions (find it at the farmer's market!) with mushrooms, then added the linguini with three spoonfuls of the pesto and a little pasta water to thin it out. 

The pizza slices you see on the plate will be another post, or else you'd be reading one uber-long post! Hungry yet?

What's your favorite pesto recipe? Traditional or off-the-wall?

Thursday, June 28, 2012

Earthy, Smoky Fresh Tomato Soup

It's a hot, humid day today, but it didn't really stop me from making some good old tomato soup. Sometimes, when you're feeling down, tomato soup can really perk you up. One day, they're going to discover some sort of compound that legitimately proves why it brings back nostalgic memories of happiness.

I know everyone has their own tried and true recipe for tomato soup, but I like to experiment every time I make it... like a boss. (Haha, no. I promise I won't say that again.) This version has a hint of smokiness thanks to the cumin, an earthiness from a surprising source, and a whole lot of freshness because... it's tomato season! Whoooo hoo!


To serve two main dish or four appetizer, gather up:
  • 1 shallot, diced
  • 1 smallish yellow onion, diced
  • 1/4 tsp cumin
  • 3 garlic cloves minced
  • 6 or 7 well-sized Roma tomatoes, chopped coarsely
  • Pinch cayenne pepper 
  • 1/2 a mushroom bullion cube (Trust me on this.)
  • 1 generous tsp dried oregano or 1 tbsp fresh oregano minced
  • 1 quart vegetable stock (I used Trader Joe's low-sodium)
  • 1 15 oz. can white beans, drained and rinsed (I used Goya's Small White Beans)
  • salt to taste (remember, bullion cubes are salty too)
  • Handful fresh torn basil
  • Your favorite cheese for garnish (I used one of those tubs that have parm, asiago, etc. mixed together.)
And chop, stir, cook:
  • Warm olive oil in a stockpot or dutch oven over medium high heat and add in the diced shallots and onions and let cook until translucent, about 6 minutes. Then, stir in cumin and garlic and cook for 30 seconds until aromatic. 
  • Add in the chopped tomatoes, stir, and cover, allowing it to cook over medium high to high heat until broken down and very soft. Sprinkle the cayenne pepper, add the bullion cube, and season with oregano. 
  • Pour in the vegetable stock and bring to a boil. Reduce heat to medium low and let simmer for 5 minutes. 
  • Then, add in the white beans, stir, and cover partially and let simmer for 15 - 20 minutes, depending on how hungry you are like right now. 
  • Now, my favorite part. I discovered this method when I first moved and had no blender either upright or handheld. Turn off the heat and take a potato masher (I have those wire ones that look like a squiggly line) and mash the beans and tomatoes together. Do a few good mashes just to break down the beans a little bit and let the soup become slightly thicker. You don't need to turn the whole thing into a smooth puree, and besides, you couldn't no matter how good your mashing arm is. 
  • Taste! Then, season with salt. And taste again!
  • Sprinkle basil and cheese on top and serve with oven-toasted whole grain bread.
  • Reminisce. 

Sunday, June 24, 2012

Sweet Summer Corn Spaghetti

I wanted to go all alliteration-y on you and call this Sweet Summer Squash Spaghetti, but there's proportionately more corn than squash in this dish and I cannot tell a lie.

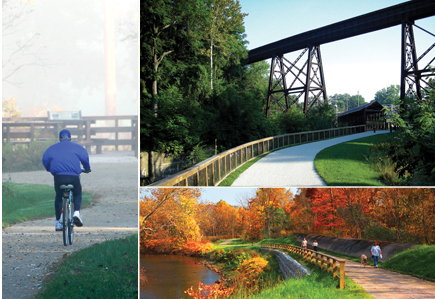
Since we're not telling lies, I'm going to tell you that this dish was pretty simple to make and surprisingly good. Though, it shouldn't be surprising when you get all your favorite produce at this awesome farm off the Towpath Trail named Szalay's Sweet Corn Farm. Guitar Boy and I bike, pick up some goods, and bike back home. It's the good life.
(Photo Credit: http://www.summitmetroparks.org/parksandtrails/TowpathTrail.aspx)

So, here's what you need to have. (This will serve 2 big portions):

  • Enough spaghetti for two (I prefer whole wheat for its taste and health benefits, so why not?)
  • 2 shallots, sliced thinly
  • 2 carrots, chopped
  • 2 celery stalks, chopped
  • 2 zucchini, cut into half and sliced into 1/4" pieces
  • Splash of dry white wine (optional, see method below)
  • 1 - 1 1/2 tsp Mediterranean, Greek, or Italian seasoning (or your favorite)
  • 2 cloves garlic, minced
  • 1/2 a pint of grape tomatoes (give or take depending on your preference,) halved
  • 2 sweet corn, kernels cut off the cob
  • 2 garlic scapes, minced (optional)
  • Salt and pepper to taste
  • Basil and a handful of Parmesan cheese for garnish

And here's how you make it:

  • Prepare a pot of salted water to boil the spaghetti while cooking the vegetables.
  • In a large pan, warm up some olive oil over medium to medium-high heat. Add the shallots, carrots, and celery and cook until softened, about 5-7 minutes. Add the zucchini and cook until softened as well, another 4-5 minutes. 
  • Here, I added a splash of white wine because I was getting some burned bits at the bottom of the pan and wanted to deglaze it. This is purely optional. If you're doing this, let it cook down to about 1/3 the amount. 
  • Season with your preferred seasoning and garlic and cook about 30 seconds until you can smell the garlicky goodness. (Mmm, I'm a big fan of garlic. The more, the better, but adjust to your desired garlicky level.) Then, stir in the halved grape (or cherry) tomatoes with the corn and the optional garlic scape, and salt and pepper to taste. Let the tomatoes release their juices and the corn warm through, about a few more minutes. Reduce to low.
  • Using tongs or whatever else you'd like, transfer the cooked spaghetti to the vegetable pan. Add a few spoonfuls of the spaghetti water to help create a sauce. Then throw in as much cheese as you like, I used about a palmful, and let the dish meld together. Serve with shredded basil and cheese on top.


This dish can really be made with any sort of vegetables you like. Use peas instead of corn, add broccoli, swap zucchini for eggplant, whatever you like. Most of my recipes are variations of other recipes I've done, read about, or been told about. It's pretty tough to go wrong with a dish like this!

What's your favorite summer produce to pick up at the farm or the market?


Wednesday, June 13, 2012

Vegetarian Creamy Farmer's Market Polenta

Typically, polenta is hearty and creamy and usually not summer weather fare, but if you mix in some super-fresh produce and herbs, it can definitely be the perfect meal after a trip to the farmer's market.

Where, of course, I had just gone and picked up some grape tomatoes, garlic scapes, zucchini, and fresh basil. So what went into this meal was a complete no-brainer. The polenta was the longest and, well, hottest part so make sure you have plenty of ventilation. If you want to make this go quicker, have all the stuff for the vegetables cut up and ready to go into this vegetarian dish as you stir the polenta.

To make the polenta:

I find that a 1:6 polenta:water ratio makes a really nice creamy consistency. You can use your preferred ratio or do some research to find one that works best for you.

Bring 6 cups of water to a boil in a heavy bottom pot. (It helps prevent burning that may happen with a thin bottomed pot.) Season well with salt. Pour in 1 cup polenta in a nice thin stream while either whisking or stirring with a wooden spoon rapidly to prevent any lumps from forming. (Lumps formed for me so I just pressed them against the side of the pot to break them up, haha.) Then, bring it down to a simmer and stir frequently to prevent sticking. You will need to cook it for about 45 minutes if not more, then read below for the finishing touches.

For the vegetables:

1 tbsp olive oil
1 large leek, washed and chopped
2 carrots sliced into 1/4" pieces
2 celery sliced into 1/4" pieces
2 large zucchini halved and sliced into 1/4" pieces
3 garlic scapes sliced thinly
1/2 pint of grape tomatoes, halved
1 tsp dried oregano
salt and pepper to taste
A few leaves of basil, torn into small pieces

Either before you make the polenta or while you're making it, heat the oil in a large saute pan over medium low heat. Add the leek, carrots, and celery and cook until slightly softened. Then, add in the zucchini, the dried oregano, salt and pepper to taste, and let cook until slightly softened as well. Once's that's done, I throw in the garlic scape, let it saute for 30 seconds, then pour in the grape tomatoes. Let that cook together until the tomatoes have popped and everything is tender, about 10 minutes. Taste and add more seasoning if desired. Set aside until the polenta's done.


When the polenta is nearly done, it will be thick, creamy, and leave the sides of the pot as you stir it. Taste it and season with a little bit of salt and pepper. Pour in about a couple tbsp of olive oil to help keep it soft and loose. Then, while it's still over the heat, pour in the cooked vegetables and stir well.

To serve: Scoop the vegetable and polenta into a bowl, top with a drizzle of yummy olive oil, and garnish with pieces of basil.


Tip: Keep a well oiled casserole dish by to pour your leftovers into. Polenta will harden as it cools so move fast. Then, you can cut slices of it once cool and panfry it with a chunky tomato sauce or a garlic infused olive oil drizzle for the next day.

It was a hit in my house and I hope it becomes a hit in yours! Will you make it? What would you do differently? Write in the comments below, I'd love to hear your take!

As a disclaimer: I cook like most people, by the handfuls and pinches and tasting and adjusting and tasting. The measurements are my best, best, best estimates so you should take this as a canvas for your own preferences. Add more oregano, use an Italian herb mix, switch up the vegetables, use two big tomatoes, whatever you like!

P.S. I just realized that this meal is not only vegetarian, but vegan as well. Although, if you want to add cheese, that's fine by me!