Showing posts with label make it. Show all posts

Wednesday, August 8, 2012

Pieczenia Proziaki: Polish Soda Bread

Pieczenia proziaki is Polish bread made with baking soda rather than yeast. As a result, it's really quick and easy to make with just a very light amount of kneading. It's not even worth getting out the electric mixture for this, it's that simple.


Strangely enough, even though my parents immigrated from Poland, they've never made this when I was growing up. They know of it but not the recipe. It took some stealthy research to come up with one; that and some frequent testing. Though there are several ways to present it, I chose to make the round loaf as opposed to the small round flat breads just because the only directions I could find for it were way too vague. Sadly, I don't speak or read Polish. It's something my mom has berated me forever about though I think it's my parents' fault for not teaching me. Gotta love that old-fashioned Catholic guilt.

Alas, that's the joy of being your parent's child, right? 

Like all breads, it requires your touch and judgement to know the correct proportions. Here are the basic measurements of the ingredients, but as you'll see in the directions, you may need more or less of an ingredient to come out to the same result. You know, bread is like that, but don't let it deter you because this is pretty forgiving no matter what you do.

 Pieczenia Proziaki- Makes one 6" loaf

Gather up:
  • 1 1/2 cup all-purpose flour (I use whole wheat)
  • 1/2 tsp baking soda
  • 1/2 tsp salt
  • 1/2 to 1 cup sour cream
  • 1 tsp honey (or sweetener of your choice: sugar, agave nectar, etc.)
Now, make it:
  • Preheat oven to 425 degrees, prepare a kneading surface by dusting with flour, and prepare a baking pan by dusting with flour as well
  • In a large bowl, sift or whisk together the flour, baking soda, and salt. (I just whisk with a fork.)
  • Create a well in the center of the flour and pour in the sour cream starting with 1/2 cup and honey
  • Using a wooden spatula, slowly mix flour into the sour cream. If it looks a little dry, add a little more sour cream.
  • Once the dough is coming together with about 1/3 to 1/4 of dry flour still loose, dump the dough and flour over the kneading surface and begin to knead gently. Use a light hand and move quickly because unlike yeast, the baking soda can cause the gluten in bread to tighten up too fast and make it tough.
  • Knead to achieve a slightly sticky but elastic dough. You don't want it to be leaving bits of dough on the surface because it's so sticky, but you don't want it to be completely dry. You may need to add more sour cream or more flour as you knead or you may already have the perfect consistency without adding either. (I've been known to use nearly a whole tub of sour cream with good results if that makes you feel better.)
  • Shape into a ball gently and place onto the baking pan. Using a sharp knife, make an X into the surface quickly and decisively. Then, dust the surface with more flour.
  • Bake for 30-40 minutes until golden and the crust is firm. It will sound hollow when tapped. My method is to use two towels to flip the loaf upside down in one hand and to tap the bottom. If it sounds hollow, it's done.
  • Let cool on a rack immediately. 
  • Serve with butter and salted radish slices because well, it's Polish.
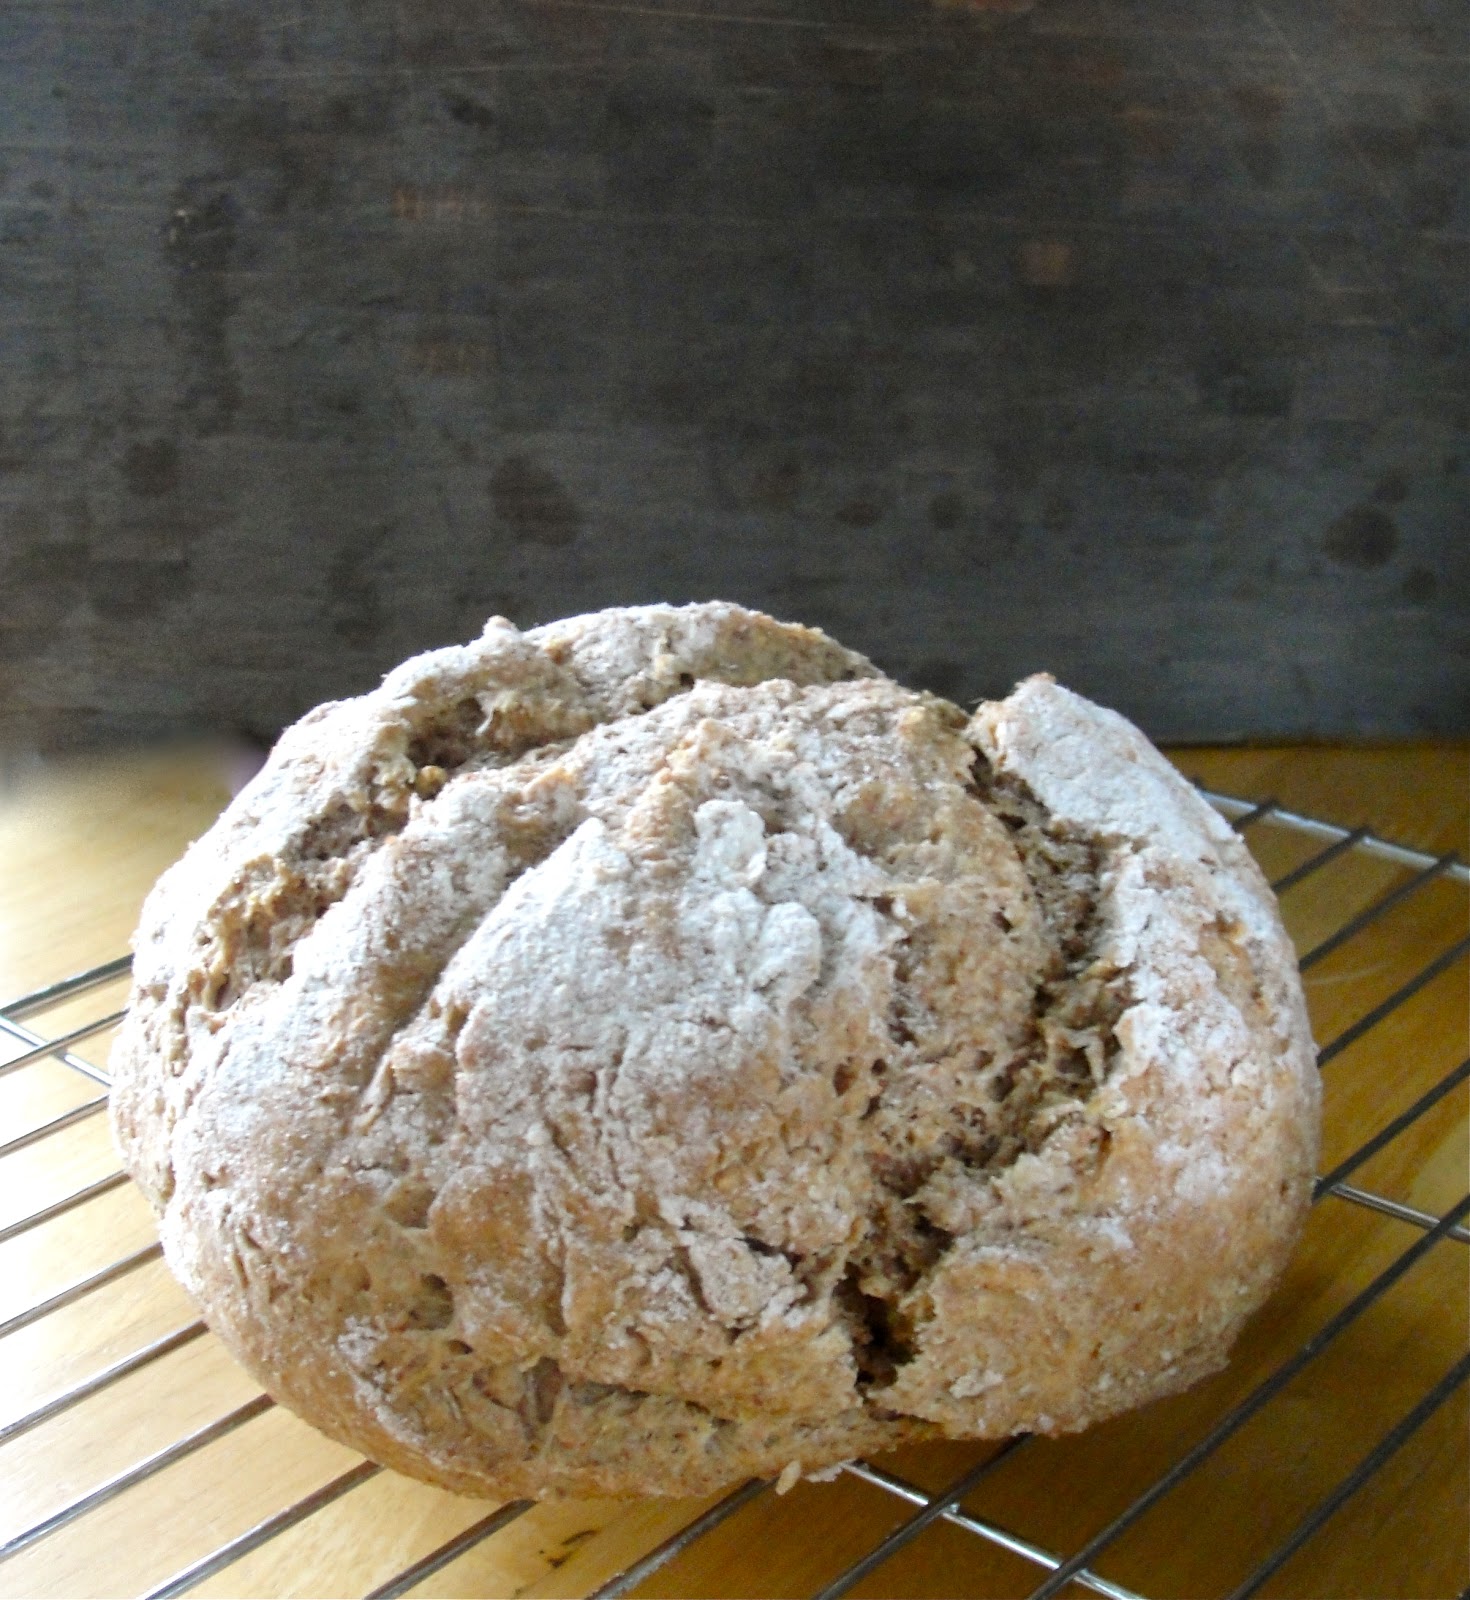
Here's why it's forgiving. If you use too much sour cream, it's okay because it'll still taste good. The slices will be extremely moist and a bit crumbly so use this as a bread for soup and stew. We still use it to make peanut butter toast regardless. If you had more flour than sour cream, you'll have firmer slices that can be toasted and topped with your favorite spread. First, just experiment the way you like then go from there. Don't try to aim for a firm or soft bread on your first try. Test it out as is.

If you don't want to use sour cream, you can use whole yogurt, greek yogurt, or even one of those Activia yogurt drinks in a pinch (been there, done that.) Buttermilk and kefir works as well. Here's why regular milk won't work. The fermented dairy has the acid that baking soda needs to help make the bread rise. I'm eager to try this with creme fraiche or mascarapone cheese for a sweet bread because, man, that sounds good. I would have to whip or soften them first so they can blend into the flour well.

This loaf is magical. Why? Because it pretty much disappears when I'm not looking, (glares at Guitar Boy.) He has been known to take enormous bites out of the loaf itself leaving me with weird crooked slices for my freaking peanut butter toast in the morning. (Glares again.) I really need to make several and freeze them next time. I bet you this can be easily doubled for a larger loaf. Just bake for a little longer.

Next time, I'm going to try and add some flax seeds or chopped herbs. Smacznego!

Tuesday, July 24, 2012

Soy Chorizo Chili with Swiss Chard Sauce

Okay guys, it's recipe time again. This time, I had a "duh" moment and realized that I could put our fan in the kitchen so I wouldn't turn into a sweaty puddle by the time dinner was ready to be served. As much as I love our house, I am despising it with a fierce passion these hot summer days. Even if there's a nice cool breeze outside, these concrete walls manage to trap every last drop of humidity all day long, all day. And for some reason, (read: laziness) we have not yet endeavored to buy an in-window AC unit. I only blame Guitar Boy. (Hee hee.)

So, I decided it was time to make a meal meal. Not dinky little dishes that only last a day. And besides, I had a ton of random produce sitting in the fridge going to waste and as Guitar Boy will contest, I am secretly a communist and refuse to throw any food away. In any case, using those said produce, I made soy chorizo chili topped with cubes of fresh avocados and a bright, citrusy swiss chard sauce. Yep, you read that right.

If you're not familiar with soy chorizo, get thee to a Trader Joe's immediately. If you are nowhere near a Trader Joe's, I feel for you. In moving to Akron, we have effectively moved ourselves one hour away from the nearest one. It sucks. Hugely. But anyway, soy chorizo is just that, vegetarian chorizo. I'm not a huge fan of faux meat but this I make an exception for. It's spicy and earthy and has great texture. It's so packed with spices that I don't even bother adding any spices in other than salt. Less work for me! If you can't get your hands on soy chorizo, seek out a faux ground meat alternative like a "sausage" you can crumble up, MorningStar Meal Starters, or even chop up a few spicy veggie burgers. I've done that. It works. No complaints. (image credit)


The best part is that I used one big pot for each step of the dish. Cuts way down on the dishes you have to hand wash. Like I said before, when you have to hand wash all your dishes, the lengths you go to avoid using a dish suddenly becomes very reasonable.

Make the sauce first, cover tightly, and set aside. Then boil the potatoes, drain, and commence with the chili making.

To make the swiss chard sauce:

Gather up to make about 1 to 1 1/2 cup:
  • Generous 1 lb swiss chard
  • 2 cloves garlic
  • 1 green onion
  • Large handful of cilantro (about 1 cup or more, depending on your preference)
  • 2 limes or more if desired
  • Salt and pepper to taste
Method:
  • Fill a large stock pot about halfway and bring to boil. 
  • Rinse the swiss chard and cut into large strips just to make it manageable. Discard the stems (or put into your giant frozen bag full of veggie discards for a future stock.) Chop the green onion coarsely. 
  • Once the water is boiling, salt and add the swiss chard and cover. Bring to a high simmer and let cook for 5 minutes. They may be pretty soft by then, but we're pureeing them so we're not concerned about texture. 
  • Throw in the green onions and let cook for one more minute. 
  • Remove the vegetables from the water and blanch by running cold water over them in a colander. 
  • Then add to a blender, don't worry if you transfer some of the water into it, you'll need it to puree. 
  • Add in the garlic cloves, cilantro, juice of two limes, and salt and pepper. Puree until very smooth and taste. 
  • Add more lime juice and salt and pepper if needed. Cover tightly and set aside.
To make the chili:

Get together to make about 4 small servings or 2 huge ones:
  • 1 lb small potatoes (white or red, I used the tiny white ones from Trader Joe's.)
  • 1 candy onion, diced (from the farmer's market, milder and sweeter than vidalia onions!)
  • 1 large tomato (think mine was about a pound.)
  • 1 package soy chorizo
  • 1 15 oz. can red kidney beans, drained and rinsed (Goya's dark red kidney beans are amazing.)
  • Salt
  • Sour cream if desired
  • 1 avocado, diced
  • 1 lime or lemon, juiced
Take a deep breath, stand by the fan for a minute, then commence making it:
  • Since I kept the water from boiling the swiss chard in the pot, I just brought it back to a boil and used it to boil the potatoes. Boil until a fork goes through fairly easily, about 10-15 mins. Then drain, removing the water from the pot and set aside.
  • Heat up some olive oil in the pot over medium heat, add the diced onions and cook until translucent.
  • Chop the tomato coarsely and add them to the onions. Let them cook until the cubes are breaking apart with a spoon, about 8-10 minutes.
  • Cut the casings off the soy chorizo and add to the pot. Let cook for a few minutes until warmed through and add 1/4 of water if it looks a little dry. Alternatively, add some more tomatoes if you have some. I didn't.
  • Add in the boiled potatoes and red beans and cover the pot, set on low, and let them warm through again. 
  • Salt if needed.
  • Since the soy chorizo is pretty hot and Guitar Boy has a low tolerance for spicy food, I added about 1/2 cup of sour cream to help combat the heat. You can do this or omit if desired.
  • In a small bowl, combine the avocado cubes and lemon or lime juice with a sprinkling of salt.

Voila. To serve, just mound the chili in a bowl, spoon on some of the swiss chard sauce, and sprinkle with some cubes of avocados. Add another dollop of sour cream if you like.

Thursday, July 19, 2012

The Vegetarian Protein Myth Plus Naan "Pizza" Recipe

I'd like to delve into what I consider one of the most commonly misinformed myths about vegetarianism and veganism. That is protein intake. It wasn't until I was watching the esteemed Dr. Caldwell Esselstyn of the Cleveland Clinic and Dr. Colin T. Campbell in Forks over Knives when I discovered the truth about protein.

Typically the most effort I would make in consciously adding protein is throwing in some beans while cooking and daily slices of peanut butter toast. Since I rarely indulge in dairy items, I do not consider them a reliable source of protein for myself. So just by looking at the big picture, it seems like I'm not getting protein regularly at all. So how the heck am I getting up in the morning and having enough energy to do anything at all? I'll be honest, I had worried a bit about it before, believing I needed to double up my efforts and really pay attention to my nutrition intake. Due to, well, laziness, I never really made any measures to do so. Beans can only go into so many dishes until you decide, "Enough!" (image source)

I had heard someone on Forks over Knives, (can't remember who but suspect I was listening to Rip Esselstyn, Dr. Esselstyn's knowledgable son,) explain that as long as we were consuming the proper amount of calories per day, we were covered on the protein front. Meaning, every whole foods- vegetables and grains- contained protein in varying levels. If I simply ate a good variety of whole foods, I was getting enough protein. Fruits, however, does not have a great amount of protein so rely on them for other nutritional benefits. Especially now in the summer when most of them are at their peak deliciousness.

As for the commonly known belief that vegans have to eat rice and beans in order to gain a "complete" protein, meaning consuming all nine essential amino acids found in the correct proportions so the body can build protein. Well, it's not true. Our bodies are pretty darn smart and they can figure out how to function once given the right tools. So if you consume a variety of foods creating a sort of "amino acid soup," your body will simply dip in, collect what it needs, and go about constructing the important building blocks for staying healthy. (source)

This leads me to our next revelation, meat-eaters as a whole are taking in too much protein. Our bodies weren't meant to eat meat in the large quantities we do today, consuming it multiple times a day at each meal and snack time. Grab a beef jerky once in a while? Chicken snack wraps? Bacon and sausage in the a.m.? Turkey sandwich for lunch? It's easy to forget just how much meat a person can eat in a day when it seems so common in everyday life. Too much animal protein, along with all its saturated fats and cholesterol, can wreak havoc on a human body. With whole plant foods, you're at least eliminating all the harmful components found in animals and reaping the benefits of plants, e.g. fiber, vitamins, minerals, antioxidants, etc.  


"Cleveland Clinic’s nutrition experts say that too much protein in your diet, which can be caused by low carb diets, can cause your body to go into a dangerous metabolic state called ketosis as your body burns fat instead of glucose for energy. During ketosis, the body forms substances known as ketones, which can cause organs to fail and result in gout, kidney stones, or kidney failure. Ketones can also dull a person’s appetite, cause nausea and bad breath. Ketosis is prevented by eating at least 100 grams of carbohydrates a day." It is a contributor to obesity and it has also been shown to increase risk of certain cancers. (source)

In short, your body knows what to do as long as you give it good, healthy, whole foods. If you're wondering, even though all whole plant foods have protein in varying levels, here are a few that are protein powerhouses.
I believe in not telling people what to think and how to eat, but giving them the tools and sources with which they can educate themselves. The information above was found in these sources, as well as the documentary: Forks over Knives. If you are interested in learning more, please visit these links and decide for yourself what is the best lifestyle for you.

Sources:
If you made it through all that, pat yourself on your back! I hope that it didn't come across as too preachy and allowed you to open yourself up to learning more about alternative diets. I just want to inform people and let them make the decisions for themselves. Anywhoo. Onto the recipe!

Tomato and Greens Naan "Pizza" 


I make this "pizza" a lot when I need to make a quick and hot side dish to a salad or any other meal. It's really simple to make and usually ends up being the most delicious thin on your plate. It serves two as a side dish or one as a lunch or light dinner.

Gather up:
  • 1 piece of whole wheat naan (Found in grocery stores in the bread section.)
  • Hummus (I used roasted red pepper but you can use your favorite.)
  • 1 fresh, ripe tomato, sliced
  • Several basil leaves, torn
  • Salt and Pepper to taste
  • Drizzle of olive oil
  • Handful of mixed greens (Lettuce, kale, arugula are all good options.)
  • 1 lemon for juice
To make:
  • Preheat the oven to 425 degrees.
  • Spread the naan edge to edge with a generous amount of hummus. Add slices of tomatoes in a single layer. You may not need the whole tomato because too many can make it watery.
  • Sprinkle with torn basil leaves. Season with salt and pepper and drizzle with olive oil.
  • Transfer to a pan and bake for about 10 - 15 minutes until edges are browned and tomatoes are warm and soft. Check often to prevent burning.
  • While the naan is baking, mix together the salad greens with a hearty squeeze of lemon. Season with a sprinkle of salt and pepper.
  • When the pizza is done, mound the salad greens on top of the pizza and cut into wedges.
  • Serve immediately.
I got the idea of putting salad greens on top of the pizza from my trip to Italy. There, a popular dish is a large pizza simply made with tomatoes and basil and very little cheese, topped with fresh crisp arugula. Delicious and refreshing, perfect for a hot summer day!

Monday, July 9, 2012

Oven-Roasted Tomato Basil Pesto and Ohio City Pasta

So it's finally cooled down in Crackron- I mean, er, Akron, enough to turn on the stove. I was so excited to cook again. No, really, so excited. So I ended up making a semi-elaborate meal to celebrate and spoil Guitar Boy with. 


(Read: elaborate in any incarnation over here means utilizing something other than a chopping board and a skillet to create a dish. Case in point: the Ninja blender finally, finally came out of its box.)

I took the Ninja on it's maiden chopping voyage with a pesto recipe. Well, it's really kind of like a bastardized sorta-kinda-not-really pesto, but still pesto because it looks like pesto, smells like pesto, and acts like pesto. 

And there's the rumble of angry Italian mothers coming and ready to paddle my behind.


And to make them even angrier... there's a weird ingredient in here. Just trust me though.

So I bring you oven-roasted tomato basil pesto. I shall offer this up to appease the angry Italian mothers and tell them it is divine, creamy deliciousness. They'll believe me. I think.

Get together for just over 1/2 cup worth's:
  • 2 roma tomatoes, quartered
  • 4 cloves garlic (more or less to your preference)
  • Heaping tsp peanut butter (You read that right. See below for more information.)
  • 1/4 cup Parmesan cheese or whatever you have in your pantry
  • 3/4 cup to 1 cup fresh basil leaves
  • up to 1/4 cup olive oil plus more for roasting
  • 1/2 lemon, juiced
  • Salt and pepper to taste
Now to make it:
  • Preheat oven to 450 degrees. In a small roasting pan, layer the quartered roma tomatoes skin side down and drizzle olive oil to cover. Sprinkle with salt and pepper. 
  • Take the garlic cloves paper skin-on and place into a square of aluminum foil. Drizzle olive oil to cover and sprinkle with salt and pepper as well. Wrap the garlic up tightly in the foil. 
  • Roast both in the oven for about 15 to 20 minutes until tomatoes are softened and the edges slightly burnt. 
  • Take out and set aside until cooled.
  • Peel the burnt skin off the tomatoes and add to the food processor. Squeeze the garlic out of the papery skin. It's okay if it's not completely softened, we still want a bit of a bite. Add to the processor. Blitz the processor a few times to break up the tomatoes.
  • Add in this order: peanut butter, cheese, and basil leaves. Squeeze the lemon over the top. Begin pureeing.
  • While pureeing, drizzle the olive oil into the processor until it starts to become smooth and easy to puree. Be careful not to add too much that it becomes oily and runny. Stop and check and taste every so often.
  • Taste and add salt and pepper as needed.
  • Voila, you have oven-roasted tomato basil pesto-but-not-pesto.


Now, for those of you who raised an eyebrow at my use of peanut butter. In my defense, I'm not a fan of going out to buy a single ingredient. Besides, pine nuts, the ingredient found in pesto, are expensive. I added a teaspoon of peanut butter just to give the sauce a little bit of body and to add a slightly nutty background flavor. Also, I used the kind that is just dry roasted peanuts with sea salt, no added sugar or flavorings. It's not so much that you can sit there and say, "Oh, I taste peanuts!" because that wouldn't be so good. If you are wary, add a little bit at a time and taste, then add more and taste, you'll see the difference and improvement. However, if you rather be all traditional, by all means, throw some pine nuts in there! It's your dish after all!

I served it with this fabulous, delicious tomato basil pasta from Ohio City Pasta that I got at the farmer's market. I simply sauteed candy onions (find it at the farmer's market!) with mushrooms, then added the linguini with three spoonfuls of the pesto and a little pasta water to thin it out. 

The pizza slices you see on the plate will be another post, or else you'd be reading one uber-long post! Hungry yet?

What's your favorite pesto recipe? Traditional or off-the-wall?

Friday, May 18, 2012

How to Make a Picture Frame with Cardboard and Fabric

One of my biggest irritations in life is finding a great print in a vintage shop and having to find a frame to go with it. Maybe I'm just overly picky, maybe I'm just being really cheap (likely the second one,) but it's just a pain in the butt to know I'll have to shell out an upwards of sixty bucks just so I can hang the damn thing on my wall. 

Now, getting multiple cardboard cuts on my fingers is totally not a pain in the ass. Not in my world, apparently. So you know where I'm going with this...

So, this is a print I found and bought for the bargain price of $6. Yes, six whole dollars. That's music to my small-budget ears. Of course, it's unframed. I had planned to get a real frame since I came across an arsenal of coupons for Joann Fabric and Michael's. The truth is, I really just wanted to make something, so this print became my guinea pig.

So yes, I made this:


All it took was a bunch of tacky glue, fabric remnants, cardboard, and scissors. And measuring tape, I guess. You know, measure twice, cut once, whatever.

Here's how I did it:

First, you cut out a frame out of a big piece of cardboard, measuring (eyeballing) so it's the same width all the way around and slightly overlapping the edge of your print by like, a millimeter. 


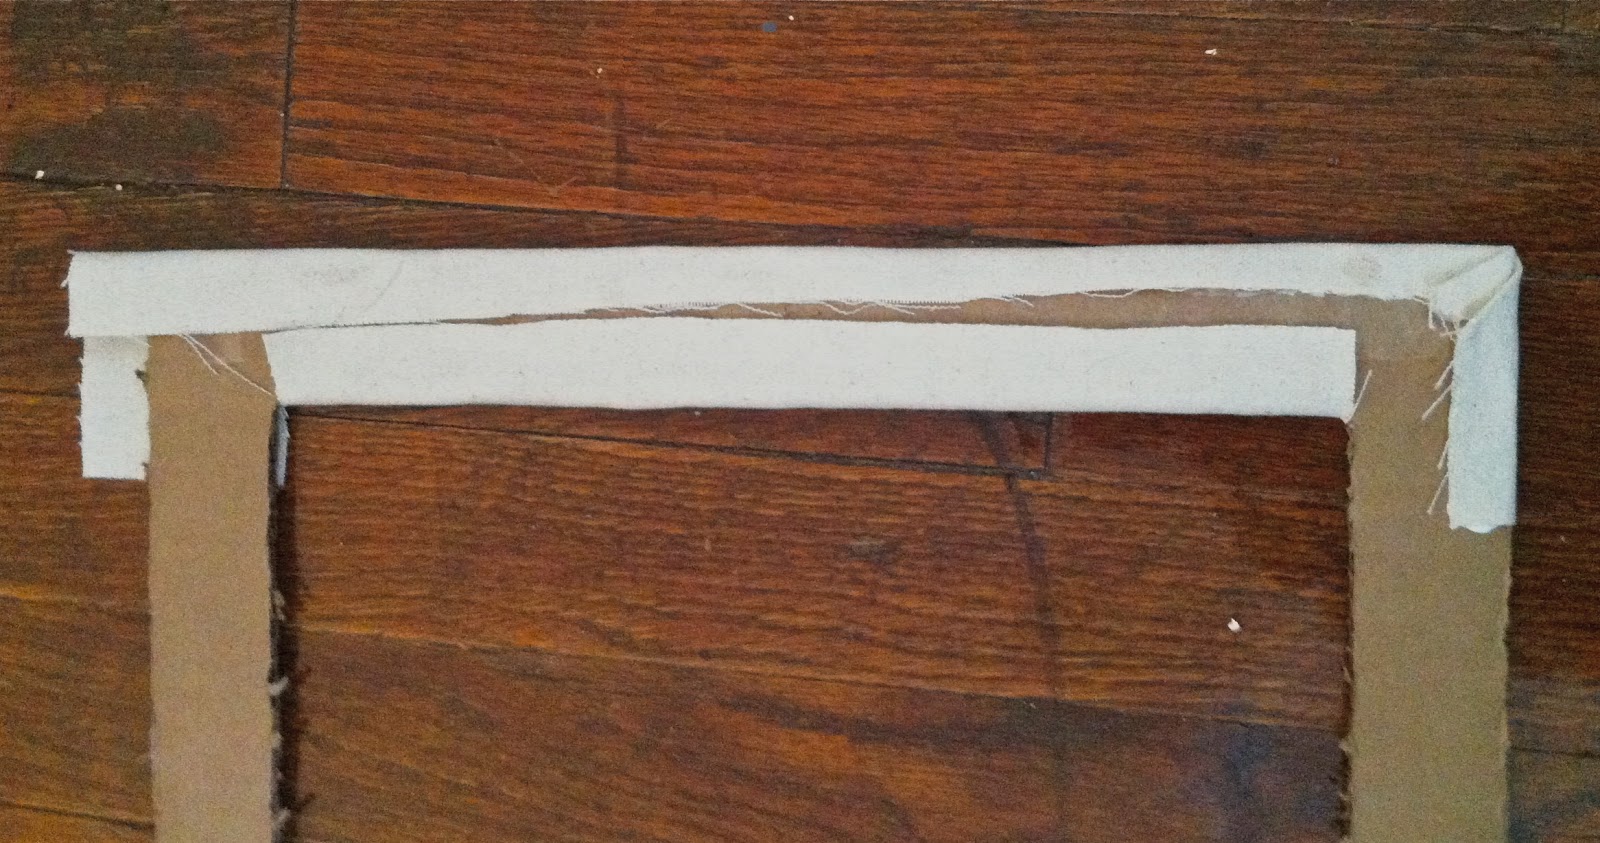
Then, you flip it over and cut out long strips of a light colored canvas-like fabric. I used duck fabric I found in the fabric remnants section. The strips of fabric should be wide enough to fold over to the back and glue down. 

This procedure was done to the two short sides:


You can see I cut the inside corners so I could fold the fabric around the inside edge.

I, then, cut two strips of fabric for the wider sides, but cut them wide enough so I could fold them in a diagonal line from the inside corner to the outside corner shown to the right, and I folded up the bottom, shorter edge and secured it.

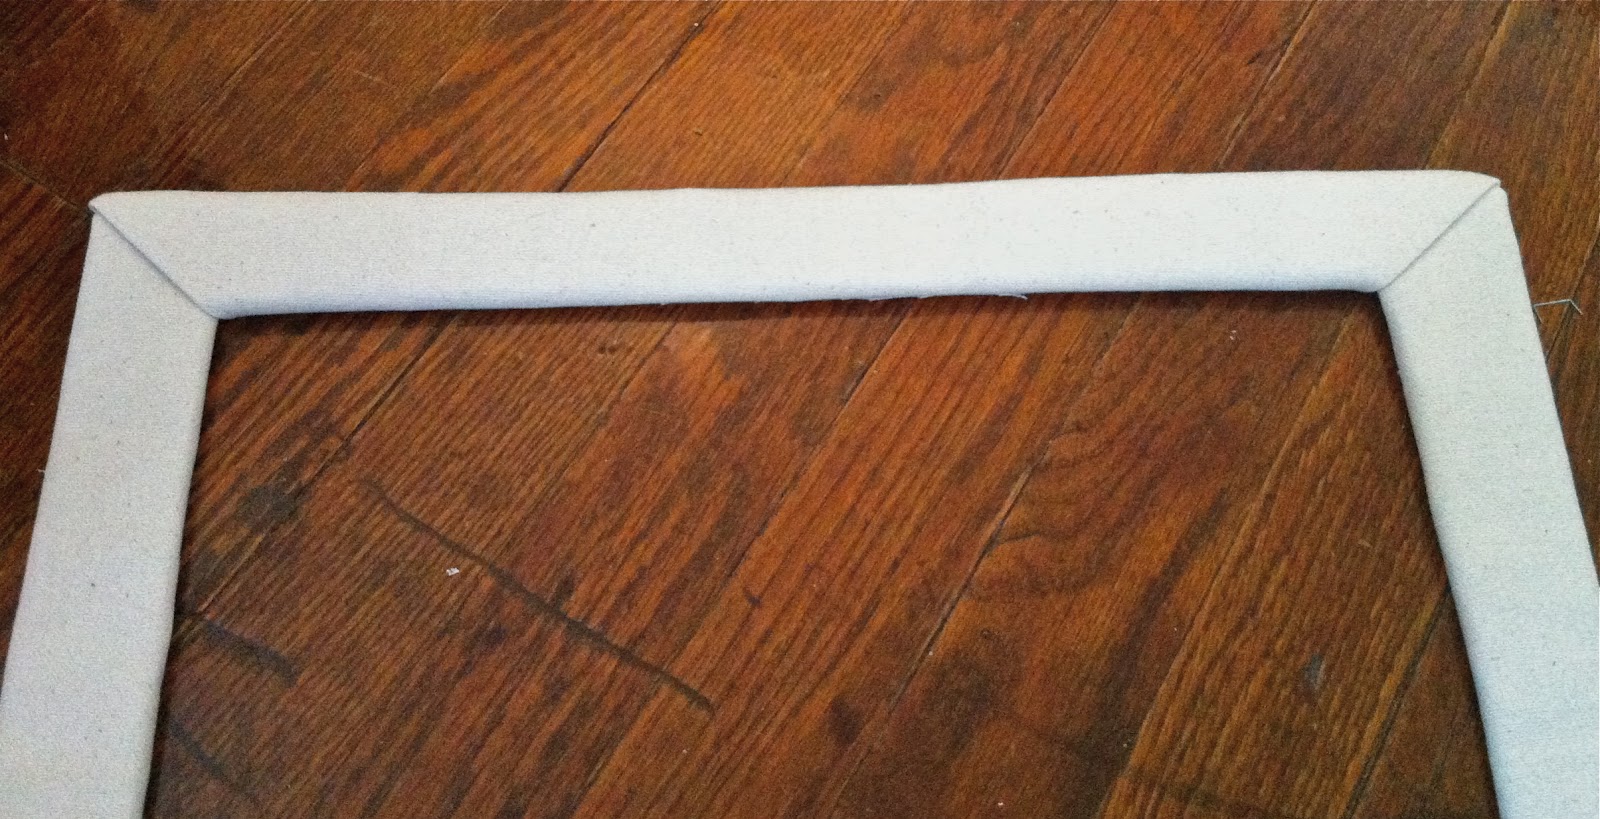
I folded the top excess fabric down and stapled it in place. The staples didn't show through to the other side so I just left it, augmenting it with a bit of glue here and there.
This is what it looks like on the front side:


Once the small frame was done, I cut out another piece of cardboard for the larger part of the frame, overlapping the smaller frame slightly; just like how the smaller frame overlapped the print. Since it was larger, I had to piece together strips of cardboard and staple them together. You probably would have a better looking frame if you were able to find a large piece of cardboard and just cut out a square in the middle. Using a different, contrasting fabric, I repeated the same process I did with the smaller frame. This fabric was a silky dark blue fabric which also provided a visual textural differences as well.

Before covering it with fabric, I stapled, on the back, a twist-tie that will be used as the hanger. It's using common household items at its finest!

Once the larger frame was covered, I put it all together. Typically, one would layer the large frame over the smaller frame over the print. However, when I tested that, I didn't like how it looked. I ended up placing the print underneath the smaller frame, but then, I put the two pieces on top of the larger frame, creating a slight pop-out 3D effect. I literally just taped it all together with packing tape, strategically placing them on corners and at intervals along the sides.

Once it was done, I realized I probably should've ironed the fabric-covered frames before putting it all together. It would eliminate all the folds and creases and evened everything out. Keep that in mind when you're doing this project. 

All in all, the project took me about 2 to 3 hours. It took that long because I kept testing different ways of folding and gluing, so for you, it would probably take a little bit less. The configurations are endless. You can do a single big frame, or make multiple little ones to overlap, or use completely different kinds of fabric. The best part about this is you can make it exactly how you want it and not be limited by the ready-to-hang frames found at the store or feel the pain of emptying your wallet at the custom frame counter.

Will you do this? What would you have done differently? If you do, feel free to share your experience and photos here in the comments or on the Birdcage Bohemia Facebook page!