Showing posts with label cheap. Show all posts

Monday, December 3, 2012

Face Mapping and Nutmeg Dermabraison

Hello there. Winter is coming here. Though it doesn't really feel like it. For as much as I hate snow and winter, if it's going to be this cold and gloomy, it might as well snow. Might as well make it all pretty-like, you know? I'm tired of looking at the corpses of stray dead leaves over my lawn and being paranoid if my yard has gotten too unruly for the neighborhood. At least with a dusting of snow, it can look like a tiny vignette inside of a snow globe and I'll just bitch about the finger-biting cold and not about the finger-biting cold and the drab scenery.

Anyway, rant aside, I wanted to discuss the other fun part of winter: dry skin. My skin pretty much feels like all the moisture has been zapped out of it. My face especially. It's look ashy, a bit puffy, and I'm finding flaky dry spots here and there. Pimples have come out full force all across my forehead so I'm going to have to figure out what to do there. 

By the way, is anyone familiar with the acne face map? It is believed in Chinese medicine that the location of acne on your face is related to various imbalances and upsets in your body and health. I've always known that acne on the jawline is related to hormonal changes, but finding it on my forehead and between my eyes is definitely new. According to this acne face map: for acne between my eyes: I either have a weak heart, I'm drinking too much alcohol, or smoking too much tobacco. Since I don't smoke and I'm pretty sure my heart's going strong, I guess wine might be the culprit. For acne on my forehead: I could be having digestive problems (yep,) small intestine issues, liver issues, irregular sleep schedule (double yep,) too much worrying (triple yep,) too much sugary foods (quadruple yep,) toxin build-up, hair products, bangs, and wearing dirty hats. 

I'm a strong believer that stress and other mental incapacities have a direct effect on one's body and health. For years, I've experienced terrible migraine-like headaches that only grew worse as time went on. I took medicine, went to the doctor, got testing and was concluded that I may or may not have tumor in my pituitary gland. Fun stuff, right? When things in my life changed and I was placed in a situation away from certain people and things that were stressing me out, my headaches melted away. It was pretty close to miraculous. 

So aside from using natural products to wash my face and care for my skin, I really need to ramp down my stress level, quit eating so much sugar (I'm so stressed, cookies look so damn good to me right now,) and reduce the amount of wine I'm drinking. I will also be doing this:

Nutmeg Microdermabrasion Scrub

1 tbsp whole milk (or hemp milk, almond milk, rice milk, but not soy unless it is GMO-free)
1/2 tbsp nutmeg (ground or freshly ground if you can do it)

Mix together well in a little bowl. With clean, dry hands, and preferably a clean face, scoop the mixture up and massage it in little circles on your face. Try to use an upward motion to counteract all that gravity does. Leave on for 2 to 10 minutes depending on whatever floats your boat. Then, rinse well. Moisturize if needed.

Why nutmeg and milk? Nutmeg is similar to honey that it has antibacterial and anti-inflammatory properties which makes it good for oily skin and acne. It's also nourishing which helps dry skin by removing the top dry skin layer and nourishing the new layer beneath. Milk has lactic acid that works as a gentle peel for dead skin that refused to be removed as well as moisturizing benefits. It makes your skin baby-butt soft and helps replenish some of the lost moisture in your skin. So really, this is a great scrub for all skin types.

For some people, they say they feel a burning sensation when they use it. I didn't feel it at all. However, if you do feel it, it's not a bad thing but just leave it in for much less time, obviously. Rinse it right away or just do a minute if it's not burning badly. Do not use cinnamon as it will burn. 

My skin was still a little tight and dry afterwards, but it's just because my skin gets really dry once winter comes around. It was definitely extremely soft. I'm going to try this again with heavy cream to amp up the moisturizing benefits so check back to see my experiences with heavy cream.

Like all scrubs, resist the desire to use it everyday. Just try to keep it to once a week to prevent any irritation. Also, you will experience the desire to bake a pumpkin pie. I don't recommend resisting that desire.

Special thanks to Crunchy Betty for the idea.

Thursday, August 2, 2012

Oil Cleansing Method: Washing Your Face with Oil, Really!

Okay, you know I greatly enjoy watching people's reaction when I tell them I wash my face with honey, but seeing their reaction when I tell them I occasionally wash my face with oil is even better. It's kind of the same as when you tell them the shirt they just gushed over was bought at Walmart. (I don't condone Walmart so my face would be one of sheer horror.)

I have to say, for as strange and totally-against-all-valid-reason as it is spreading sticky oil across your face, the outcome is amazing. It melts off all your makeup and makes your skin glow. You can literally see the difference in just one day. No, really. Don't believe me? Then, you have to try for yourself.

Again, I discovered this through Crunchy Betty's fabulous website. She's pretty much my go-to for any crunchy procedures or questions I might have. But I wanted to give you my experiences and my own tips on how to wash your face with oil. (image source)

Oil Cleansing Method, otherwise known as OCM:

First, you need three things- castor oil, a carrier oil, and a washcloth.

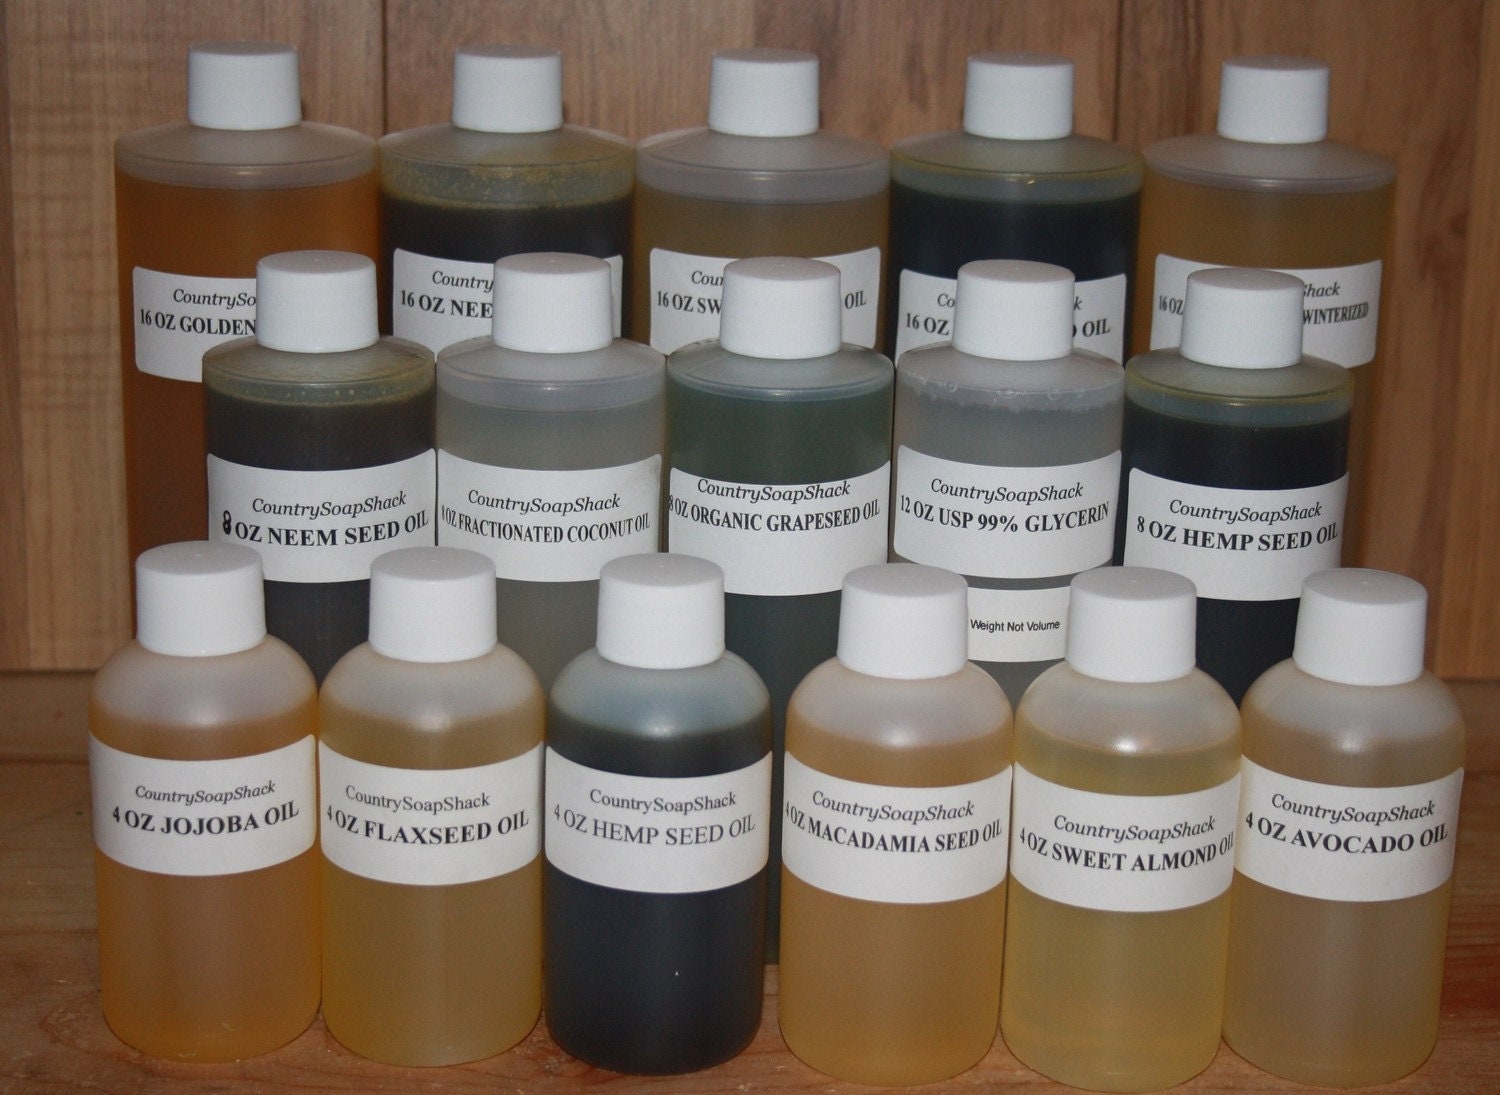
1) Castor oil is the most important part. It's the oil that does the cleansing. I randomly bought this oil through an Etsy seller called CountrySoapShack when I was trying to make my own shampoo so it was kind of like fate that I had this oil on hand. Otherwise, I've heard that they're pretty easily found in Target and the like in the... wait for it... laxative aisle. Don't run away screaming just yet. The whole point is that we should put things on our skin that's pure enough to ingest right? Right? Just try to get past this and get your precious skin-loving oil. 


2) As for carrier oils, it's what it says, but it also adds extra benefits your skin needs. I currently use extra virgin cold pressed olive oil. Cold pressed is generally the purest type of oil since heat pretty much kills a lot of the beneficial properties. (Remember what I wrote about raw honey? Heat is yo' enemy!) You can also use other oils such as this list I've excerpted from Crunchy Betty below:
  • Jojoba (all skin types, but very desirable for acne-prone skin)
  • Sweet almond (all skin types, especially oily)
  • Grapeseed (all skin types, especially oily)
  • Avocado (dry and aging skin)
  • Sunflower Seed (all skin types)
  • Olive (all skin types)
  • Apricot Kernel (dry, aging, and normal skin)
  • Argan (all skin types, especially aging skin … very pricey)
  • Tamanu (all skin types … very pricey)
Now, I've heard rumors that some people may not have the greatest results with olive oil. Jojoba and grapeseed tend to have the best reputations among OCM fans. Luckily, grapeseed oil can be found next to the olive oil in good grocery stores and jojoba, well, there is the magic of the internet. 

3) Washcloth. That's self-explanatory. Get yourself a nice and clean one.

Next is to figure out the ratio best for you. Think in thirds and halves. For normal skin, use equal parts castor and carrier oil. For dry skin, use 1/3 castor oil to 2/3 carrier oil. For oily skin, use 2/3 castor oil to 1/3 carrier oil.

I have have normal skin with the exception of a dry T-zone; so I use about 1/2 and 1/2 using slightly less castor oil. You can experiment and figure out the best ratio for yourself.

Now that all that preliminary information is out of the way, onto the actual method:
  1. With a dry face, makeup and all, mix together the castor and carrier oil in your hands. Massage gently onto your face getting every last bit including eyes and jawline and wherever else you have problem areas. Be sure to take at least a minute to massage it all in.
  2. Hang out for 5 minutes. Here, I'll brush and floss and dilly dally around.
  3. Turn on the faucet to the hottest water you can handle. (I know I said heat is your enemy, but here, it's necessary to help remove the oil.) Wet your washcloth well then wring it out so it doesn't drip. Place it over your face and keep it on until it begins to cool.
  4. Optional: repeat two more times.
  5. Using the wet washcloth, gently scrub the oil and makeup off your face, rinsing and rewetting as needed.
  6. Voila. You have a clean and make-up free face!
  7. Moisturizing is generally not necessary but if you feel tight, use some of the carrier oil if you like.
I like doing the washcloth process three times just because... I don't know, it feels right. Holding the hot washcloth over your face opens up your pores so the oil can get in there and clean out the gunk stuck in there. It's really quite exciting because your blackheads all but disappear when you do this. I do moisturize my T-zone still but I think it's because I've gotten lazy and haven't been as vigilant with my ratios and ended up using more castor oil than I should. I just mix a few drops right in my hand each time I do the OCM. 

Now, do you have to do the OCM every day? Some people do. I don't. I use the honey wash every day and maybe once or twice a week, I'll do the OCM. Usually when I know I have to wash my hair the next day because then I can just be sloppy and get the oil as close to my hairline as possible. I'm pretty positive if I committed to the OCM every day, I would have the skin most people would kill for. In between that and the honey wash though, I think it works out for me. 

Also, when you do the OCM, your skin is going to look so good in the morning, you'll feel just dandy not washing it in the a.m. I think it's better that way too: Less washing, more skin health! (image source)

My bathroom is turning into a kitchen pantry right now and I'm loving it. How about you?

Friday, May 18, 2012

How to Make a Picture Frame with Cardboard and Fabric

One of my biggest irritations in life is finding a great print in a vintage shop and having to find a frame to go with it. Maybe I'm just overly picky, maybe I'm just being really cheap (likely the second one,) but it's just a pain in the butt to know I'll have to shell out an upwards of sixty bucks just so I can hang the damn thing on my wall. 

Now, getting multiple cardboard cuts on my fingers is totally not a pain in the ass. Not in my world, apparently. So you know where I'm going with this...

So, this is a print I found and bought for the bargain price of $6. Yes, six whole dollars. That's music to my small-budget ears. Of course, it's unframed. I had planned to get a real frame since I came across an arsenal of coupons for Joann Fabric and Michael's. The truth is, I really just wanted to make something, so this print became my guinea pig.

So yes, I made this:


All it took was a bunch of tacky glue, fabric remnants, cardboard, and scissors. And measuring tape, I guess. You know, measure twice, cut once, whatever.

Here's how I did it:

First, you cut out a frame out of a big piece of cardboard, measuring (eyeballing) so it's the same width all the way around and slightly overlapping the edge of your print by like, a millimeter. 


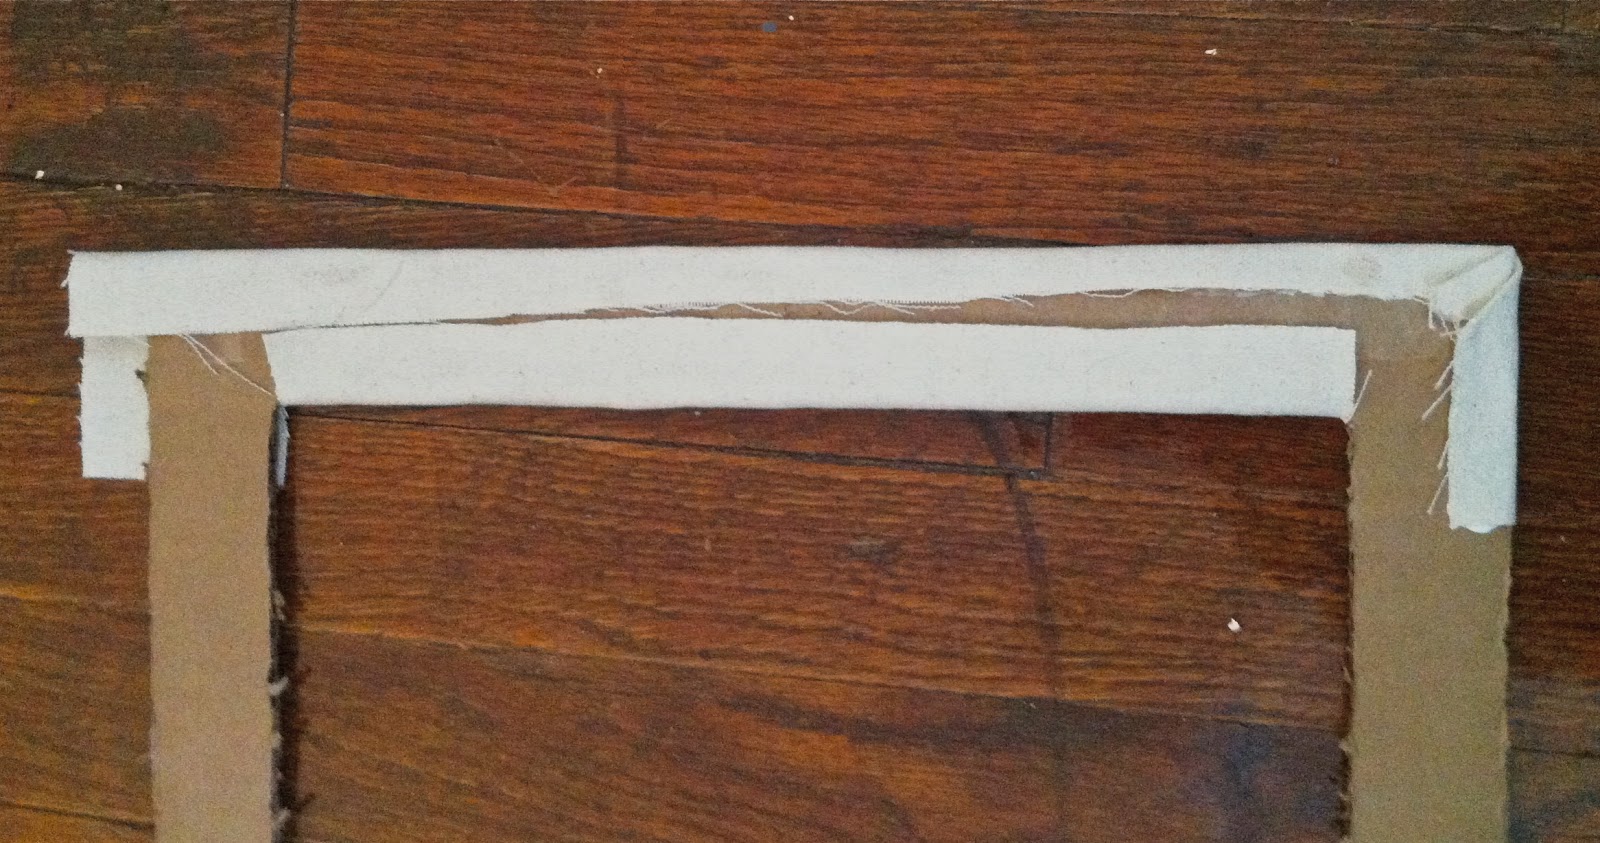
Then, you flip it over and cut out long strips of a light colored canvas-like fabric. I used duck fabric I found in the fabric remnants section. The strips of fabric should be wide enough to fold over to the back and glue down. 

This procedure was done to the two short sides:


You can see I cut the inside corners so I could fold the fabric around the inside edge.

I, then, cut two strips of fabric for the wider sides, but cut them wide enough so I could fold them in a diagonal line from the inside corner to the outside corner shown to the right, and I folded up the bottom, shorter edge and secured it.

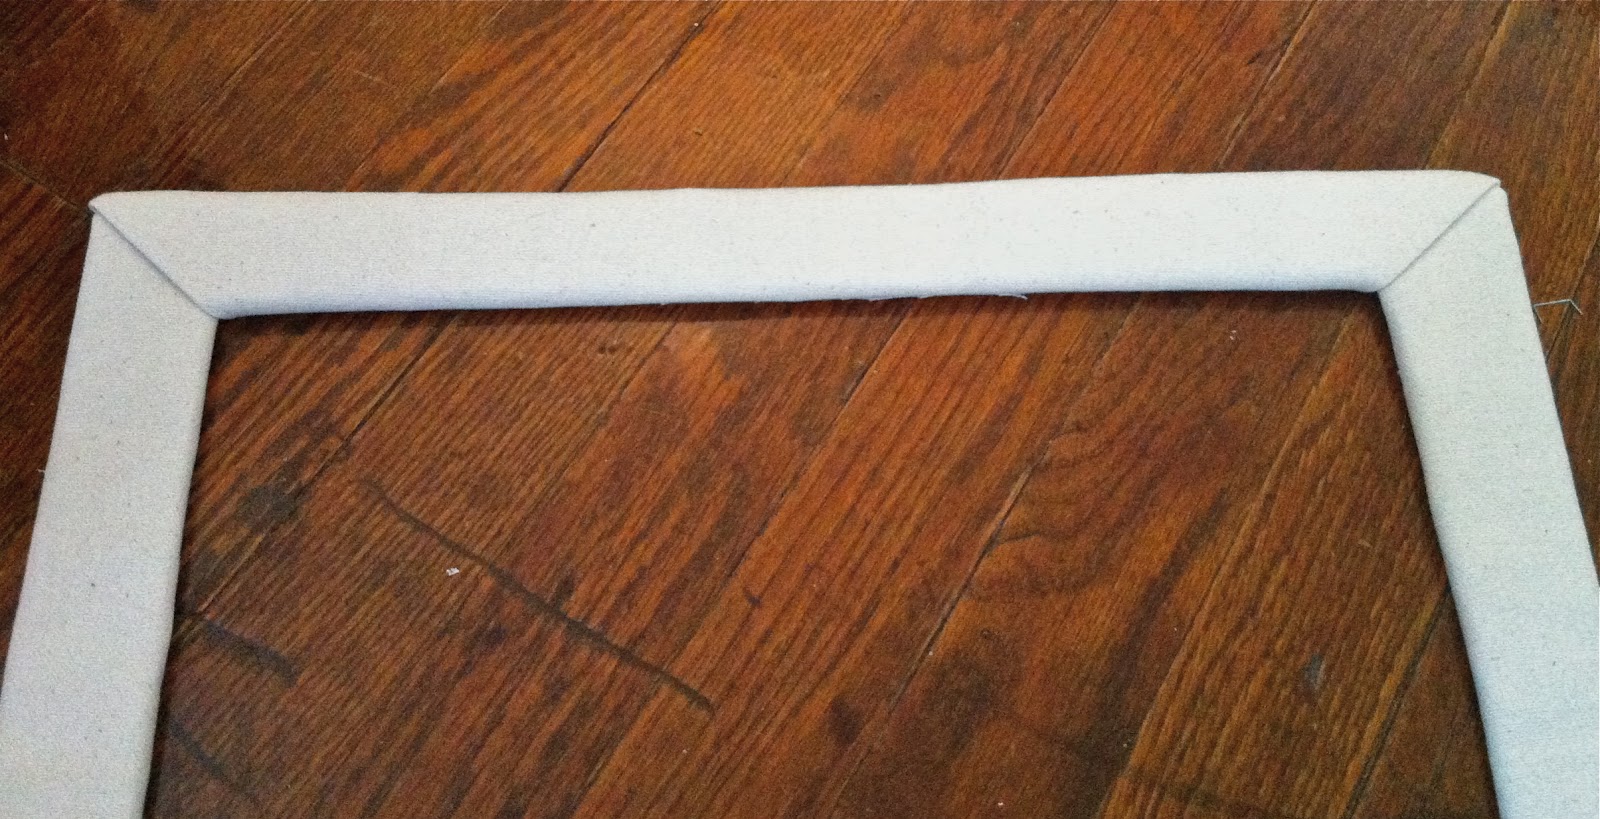
I folded the top excess fabric down and stapled it in place. The staples didn't show through to the other side so I just left it, augmenting it with a bit of glue here and there.
This is what it looks like on the front side:


Once the small frame was done, I cut out another piece of cardboard for the larger part of the frame, overlapping the smaller frame slightly; just like how the smaller frame overlapped the print. Since it was larger, I had to piece together strips of cardboard and staple them together. You probably would have a better looking frame if you were able to find a large piece of cardboard and just cut out a square in the middle. Using a different, contrasting fabric, I repeated the same process I did with the smaller frame. This fabric was a silky dark blue fabric which also provided a visual textural differences as well.

Before covering it with fabric, I stapled, on the back, a twist-tie that will be used as the hanger. It's using common household items at its finest!

Once the larger frame was covered, I put it all together. Typically, one would layer the large frame over the smaller frame over the print. However, when I tested that, I didn't like how it looked. I ended up placing the print underneath the smaller frame, but then, I put the two pieces on top of the larger frame, creating a slight pop-out 3D effect. I literally just taped it all together with packing tape, strategically placing them on corners and at intervals along the sides.

Once it was done, I realized I probably should've ironed the fabric-covered frames before putting it all together. It would eliminate all the folds and creases and evened everything out. Keep that in mind when you're doing this project. 

All in all, the project took me about 2 to 3 hours. It took that long because I kept testing different ways of folding and gluing, so for you, it would probably take a little bit less. The configurations are endless. You can do a single big frame, or make multiple little ones to overlap, or use completely different kinds of fabric. The best part about this is you can make it exactly how you want it and not be limited by the ready-to-hang frames found at the store or feel the pain of emptying your wallet at the custom frame counter.

Will you do this? What would you have done differently? If you do, feel free to share your experience and photos here in the comments or on the Birdcage Bohemia Facebook page!