Wednesday, July 25, 2012

Natural Beauty Products: Why Should We Care?

People seem so aghast when I tell them I wash my face with honey and olive oil and wash my hair with baking soda and apple cider vinegar. It's actually fun. The most interesting part is seeing who is into it and who thinks I'm insane. It turns out that I'm always wrong on my estimation of their reaction. Someone who I thought was a diehard hippie scrunched up her face and say, "eeew." (image source)


No, no "eeew." Don't say that!

Here's the thing, this was my lightbulb moment. My sister came home last summer and told me she switched to natural products. You know, the super-expensive kind from health food stores that make you kind of want to cry. Why, when she could find a pretty good equivalent on the shelves of Target? She introduced me to something called the EWG's Skin Deep Cosmetic Database. It lists many commonly found products along with a rating. 0 for no harmful chemical, substance, or additive, all the way up to 10 which means it has an extremely high amount of harmful toxins. They go through every single unpronounceable ingredient in a product and explain why it's bad for you. Anything rated 0 - 2 is considered ideal. 3 - 6 is okay but it's pushing it. And 7 - 10 is pretty harmful.

That's all good. But why should we still care so much? We're not ingesting it. We're just putting it on our faces and skin. Ah, therein lies the rub. The skin is our body's largest organ. It's also, clearly, the most exposed and abused in a sense. It lies on the outside of our skeletal and muscular structures, keeping stuff like our intestines from falling out and protecting what's inside from outside effects. It is also porous. Technically, even though it's pretty darn water-resistant, it's not a like sturdy piece of plastic keeping out absolutely everything. It's a lot more like a very, very, very heavy-duty sponge.

So we may not be putting this stuff in our mouths, but we are still absolutely, certainly putting them into our bodies through our skin and hair. Imagine day after day of rubbing chemicals all over your skin, it's bound to have adverse reactions deep inside. Imagine rubbing this stuff on a baby's bum! Not to mention, most of these chemicals disrupt our skin cell's natural function. In fact, skin cells view these chemicals as the enemy and rally up to fight against them. Instead of your cells working along side the chemicals to heal your skin, they've turned it into a battlefield. That's why many people tend to experience redness, irritation, or even worsening acne whenever using a product. This is also why many people think they have sensitive skin when in actuality, a very small percentage of people truly have sensitive skin. It's all a result of what we rub on our face and body.

Think of retinol, commonly known as Retin-A. It's an extremely potent substance that is typically prescribed. It's the choice for eliminating acne and wrinkles. It works a lot like a mini chemical-peel by removing a layer of skin whenever you put it on. That's why the side effects include redness and irritation. Instead of letting the skin cells do what it does naturally- replenishing the layer and balancing oil production, it's getting all thrown out of whack because we're bombarding them with a ton of things they don't recognize or can't use. Also, you can't use it while pregnant. Think about that.

However, if you use a natural substance like honey or olive oil or even baking soda and apple cider vinegar, your skin is much more apt to recognize them and view them as friends rather than foes. Your skin biologically knows what it needs to do and adding natural aids just gives them that boost or a few extra "tools" they can actually use. Your body is a great system in itself. If it really needed a ton of weird chemicals and extra toxins to survive, we probably wouldn't have made it all these hundred of years ago.

Natural beauty products can be pricy which is the main reason why I turned to homemade recipes. So far, they have worked fabulously and I have no regrets. In fact, I just want to go tell the whole world they need to convert! However, not everyone has the time or inclination to make their own, but there are options. If you know what to look for, you're already taking a huge step towards improving your beauty care. 

Here's a list of common ingredients to avoid as much as possible. You can read a more in-depth overview on EWG's Skin Deep Top Tips for Safer Products.
  • Benzalkonium chloride: Biocide, preservative and surfactant associated with severe skin, eye, and respiratory irritation and allergies, benzalkonium chloride is a sensitizer especially dangerous for people with asthma or skin conditions like eczema.
  • BHA: The National Toxicology Program classifies butylated hydroxyanisole (BHA) as “reasonably anticipated to be a human carcinogen.” It can cause skin depigmentation. In animal studies, BHA produces liver damage and causes stomach cancers such as papillomas and carcinomas and interferes with normal reproductive system development and thyroid hormone levels.
  • DMDM hydantoin & bronopol (2-Bromo-2-nitropropane-1,3-diol): Cosmetics preservatives that decompose and release formaldehyde, which the International Agency on Research on Cancer lists as a known human carcinogen. The preservatives and their decomposition products, including formaldehyde, can trigger allergic reactions.
  • Formaldehyde: A potent preservative considered a known human carcinogen by the International Agency on Research on Cancer. Formaldehyde, also an asthmagen, neurotoxicant and developmental toxicant.
  • Fragrance: It may help sell products from face cream to laundry detergent, but do you know what’s in it? Fragrances are in everything from shampoo to deodorant to lotion. Federal law doesn’t require companies to list on product labels any of the chemicals in their fragrance mixture. Recent research from EWG and the Campaign for Safe Cosmetics found an average of 14 chemicals in 17 name brand fragrance products, none of them listed on the label. Fragrances can contain hormone disruptors and are among the top 5 allergens in the world. Our advice? Buy fragrance free.
  • Hydroquinone: A skin bleaching chemical that can cause a skin disease called ochronosis, with blue-black lesions that in the worst cases become permanent black caviar-size bumps. In animal studies, hydroquinone has caused tumor development
  • Methylisothiazolinone and methylchloroisothiazolinone: Preservatives, commonly used together in personal care products, among the most common irritants, sensitizers and causes of contact allergy Lab studies on mammalian brain cells suggest that methylisothiazolinone may be neurotoxic.
  • Oxybenzone: Sunscreen agent and ultraviolet light absorber, found in nearly all Americans, according to the U.S. Centers for Disease Control and Prevention. In human epidemiological studies, oxybenzone has been linked to irritation, sensitization and allergies.
  • Parabens (Propyl, Isopropyl, Butyl, and Isobutylparabens): Parabens are estrogen-mimicking preservatives, found in breast cancer tumors of 19 of 20 women studied. Longer chain parabens like propyl and butyl paraben and their branched counterparts, isopropyl and isobutylparabens, may disrupt the endocrine system and cause reproductive and developmental disorders.
  • PEG/Ceteareth/Polyethylene compounds: These synthetic chemicals are frequently contaminated with 1,4-dioxane, which the U.S. government considers a probably human carcinogen and which readily penetrates the skin. Cosmetics makers could easily remove 1,4-dioxane from ingredients, but tests documenting its common presence in products show that they often don’t.
  • Petroleum distillates: Petroleum-extracted cosmetics ingredients, commonly found in mascara. They may cause contact dermatitis and are often contaminated with cancer-causing impurities. They are produced in oil refineries at the same time as automobile fuel, heating oil and chemical feedstocks.
  • Phthalates: A growing number of studies link this chemical to male reproductive system disorders. Pregnant women should avoid nail polish containing dibutyl phathalate.
  • Resorcinol: Common ingredient in hair color and bleaching products; skin irritant, toxic to the immune system and frequent cause of hair dye allergy. In animal studies, resorcinol can disrupt normal thyroid function.
  • Retinyl palmitate and retinol (Vitamin A): Vitamin A is an essential nutrient, but excessive amounts can cause severe birth defects if women are exposed during pregnancy New evidence shows that when applied to sun-exposed skin, for instance, in sunscreens, lip products and daytime moisturizers, these compounds can break down and produce toxic free radicals that can damage DNA and cause skin cancer.
  • Triclosan & Triclocarban: Antimicrobial pesticides in liquid soap (triclosan) or soap bars (triclocarban), very toxic to the aquatic environment. often found as contaminants in people due to widespread use of antimicrobial cleaning products. Triclosan disrupts thyroid function and reproductive hormones. 
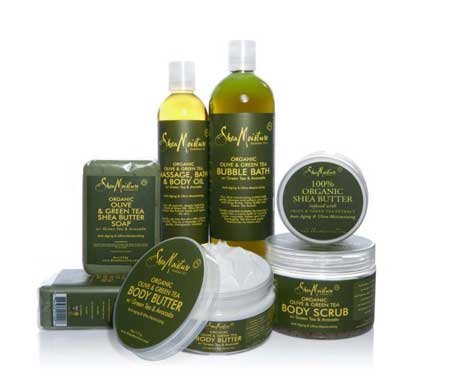
I know it's overwhelming. But thanks to growing education and demand among people, there are more and more products coming out without most of these harmful ingredients. My favorite product is Shea Moisture Olive Oil and Green Tea Lotion with Avocado. I splurged on it after a day in the sun and my skin was feeling sensitive and tight. It was the best decision I made. The entire Shea Moisture line is great and avoids many of these harmful toxins. You can find them at Walgreen's or Target or online. (image source)

If you made it all the way down here, thank you! I know it was long but I hope it was informative for you. If you did one thing to change your beauty routine to make it safer, you're making a huge difference already. It's one less harmful product being bought and one more good thing you can do for yourself. Between you and me, we can really help change the face of beauty care!

Tuesday, July 24, 2012

Soy Chorizo Chili with Swiss Chard Sauce

Okay guys, it's recipe time again. This time, I had a "duh" moment and realized that I could put our fan in the kitchen so I wouldn't turn into a sweaty puddle by the time dinner was ready to be served. As much as I love our house, I am despising it with a fierce passion these hot summer days. Even if there's a nice cool breeze outside, these concrete walls manage to trap every last drop of humidity all day long, all day. And for some reason, (read: laziness) we have not yet endeavored to buy an in-window AC unit. I only blame Guitar Boy. (Hee hee.)

So, I decided it was time to make a meal meal. Not dinky little dishes that only last a day. And besides, I had a ton of random produce sitting in the fridge going to waste and as Guitar Boy will contest, I am secretly a communist and refuse to throw any food away. In any case, using those said produce, I made soy chorizo chili topped with cubes of fresh avocados and a bright, citrusy swiss chard sauce. Yep, you read that right.

If you're not familiar with soy chorizo, get thee to a Trader Joe's immediately. If you are nowhere near a Trader Joe's, I feel for you. In moving to Akron, we have effectively moved ourselves one hour away from the nearest one. It sucks. Hugely. But anyway, soy chorizo is just that, vegetarian chorizo. I'm not a huge fan of faux meat but this I make an exception for. It's spicy and earthy and has great texture. It's so packed with spices that I don't even bother adding any spices in other than salt. Less work for me! If you can't get your hands on soy chorizo, seek out a faux ground meat alternative like a "sausage" you can crumble up, MorningStar Meal Starters, or even chop up a few spicy veggie burgers. I've done that. It works. No complaints. (image credit)


The best part is that I used one big pot for each step of the dish. Cuts way down on the dishes you have to hand wash. Like I said before, when you have to hand wash all your dishes, the lengths you go to avoid using a dish suddenly becomes very reasonable.

Make the sauce first, cover tightly, and set aside. Then boil the potatoes, drain, and commence with the chili making.

To make the swiss chard sauce:

Gather up to make about 1 to 1 1/2 cup:
  • Generous 1 lb swiss chard
  • 2 cloves garlic
  • 1 green onion
  • Large handful of cilantro (about 1 cup or more, depending on your preference)
  • 2 limes or more if desired
  • Salt and pepper to taste
Method:
  • Fill a large stock pot about halfway and bring to boil. 
  • Rinse the swiss chard and cut into large strips just to make it manageable. Discard the stems (or put into your giant frozen bag full of veggie discards for a future stock.) Chop the green onion coarsely. 
  • Once the water is boiling, salt and add the swiss chard and cover. Bring to a high simmer and let cook for 5 minutes. They may be pretty soft by then, but we're pureeing them so we're not concerned about texture. 
  • Throw in the green onions and let cook for one more minute. 
  • Remove the vegetables from the water and blanch by running cold water over them in a colander. 
  • Then add to a blender, don't worry if you transfer some of the water into it, you'll need it to puree. 
  • Add in the garlic cloves, cilantro, juice of two limes, and salt and pepper. Puree until very smooth and taste. 
  • Add more lime juice and salt and pepper if needed. Cover tightly and set aside.
To make the chili:

Get together to make about 4 small servings or 2 huge ones:
  • 1 lb small potatoes (white or red, I used the tiny white ones from Trader Joe's.)
  • 1 candy onion, diced (from the farmer's market, milder and sweeter than vidalia onions!)
  • 1 large tomato (think mine was about a pound.)
  • 1 package soy chorizo
  • 1 15 oz. can red kidney beans, drained and rinsed (Goya's dark red kidney beans are amazing.)
  • Salt
  • Sour cream if desired
  • 1 avocado, diced
  • 1 lime or lemon, juiced
Take a deep breath, stand by the fan for a minute, then commence making it:
  • Since I kept the water from boiling the swiss chard in the pot, I just brought it back to a boil and used it to boil the potatoes. Boil until a fork goes through fairly easily, about 10-15 mins. Then drain, removing the water from the pot and set aside.
  • Heat up some olive oil in the pot over medium heat, add the diced onions and cook until translucent.
  • Chop the tomato coarsely and add them to the onions. Let them cook until the cubes are breaking apart with a spoon, about 8-10 minutes.
  • Cut the casings off the soy chorizo and add to the pot. Let cook for a few minutes until warmed through and add 1/4 of water if it looks a little dry. Alternatively, add some more tomatoes if you have some. I didn't.
  • Add in the boiled potatoes and red beans and cover the pot, set on low, and let them warm through again. 
  • Salt if needed.
  • Since the soy chorizo is pretty hot and Guitar Boy has a low tolerance for spicy food, I added about 1/2 cup of sour cream to help combat the heat. You can do this or omit if desired.
  • In a small bowl, combine the avocado cubes and lemon or lime juice with a sprinkling of salt.

Voila. To serve, just mound the chili in a bowl, spoon on some of the swiss chard sauce, and sprinkle with some cubes of avocados. Add another dollop of sour cream if you like.

Thursday, July 19, 2012

The Vegetarian Protein Myth Plus Naan "Pizza" Recipe

I'd like to delve into what I consider one of the most commonly misinformed myths about vegetarianism and veganism. That is protein intake. It wasn't until I was watching the esteemed Dr. Caldwell Esselstyn of the Cleveland Clinic and Dr. Colin T. Campbell in Forks over Knives when I discovered the truth about protein.

Typically the most effort I would make in consciously adding protein is throwing in some beans while cooking and daily slices of peanut butter toast. Since I rarely indulge in dairy items, I do not consider them a reliable source of protein for myself. So just by looking at the big picture, it seems like I'm not getting protein regularly at all. So how the heck am I getting up in the morning and having enough energy to do anything at all? I'll be honest, I had worried a bit about it before, believing I needed to double up my efforts and really pay attention to my nutrition intake. Due to, well, laziness, I never really made any measures to do so. Beans can only go into so many dishes until you decide, "Enough!" (image source)

I had heard someone on Forks over Knives, (can't remember who but suspect I was listening to Rip Esselstyn, Dr. Esselstyn's knowledgable son,) explain that as long as we were consuming the proper amount of calories per day, we were covered on the protein front. Meaning, every whole foods- vegetables and grains- contained protein in varying levels. If I simply ate a good variety of whole foods, I was getting enough protein. Fruits, however, does not have a great amount of protein so rely on them for other nutritional benefits. Especially now in the summer when most of them are at their peak deliciousness.

As for the commonly known belief that vegans have to eat rice and beans in order to gain a "complete" protein, meaning consuming all nine essential amino acids found in the correct proportions so the body can build protein. Well, it's not true. Our bodies are pretty darn smart and they can figure out how to function once given the right tools. So if you consume a variety of foods creating a sort of "amino acid soup," your body will simply dip in, collect what it needs, and go about constructing the important building blocks for staying healthy. (source)

This leads me to our next revelation, meat-eaters as a whole are taking in too much protein. Our bodies weren't meant to eat meat in the large quantities we do today, consuming it multiple times a day at each meal and snack time. Grab a beef jerky once in a while? Chicken snack wraps? Bacon and sausage in the a.m.? Turkey sandwich for lunch? It's easy to forget just how much meat a person can eat in a day when it seems so common in everyday life. Too much animal protein, along with all its saturated fats and cholesterol, can wreak havoc on a human body. With whole plant foods, you're at least eliminating all the harmful components found in animals and reaping the benefits of plants, e.g. fiber, vitamins, minerals, antioxidants, etc.  


"Cleveland Clinic’s nutrition experts say that too much protein in your diet, which can be caused by low carb diets, can cause your body to go into a dangerous metabolic state called ketosis as your body burns fat instead of glucose for energy. During ketosis, the body forms substances known as ketones, which can cause organs to fail and result in gout, kidney stones, or kidney failure. Ketones can also dull a person’s appetite, cause nausea and bad breath. Ketosis is prevented by eating at least 100 grams of carbohydrates a day." It is a contributor to obesity and it has also been shown to increase risk of certain cancers. (source)

In short, your body knows what to do as long as you give it good, healthy, whole foods. If you're wondering, even though all whole plant foods have protein in varying levels, here are a few that are protein powerhouses.
I believe in not telling people what to think and how to eat, but giving them the tools and sources with which they can educate themselves. The information above was found in these sources, as well as the documentary: Forks over Knives. If you are interested in learning more, please visit these links and decide for yourself what is the best lifestyle for you.

Sources:
If you made it through all that, pat yourself on your back! I hope that it didn't come across as too preachy and allowed you to open yourself up to learning more about alternative diets. I just want to inform people and let them make the decisions for themselves. Anywhoo. Onto the recipe!

Tomato and Greens Naan "Pizza" 


I make this "pizza" a lot when I need to make a quick and hot side dish to a salad or any other meal. It's really simple to make and usually ends up being the most delicious thin on your plate. It serves two as a side dish or one as a lunch or light dinner.

Gather up:
  • 1 piece of whole wheat naan (Found in grocery stores in the bread section.)
  • Hummus (I used roasted red pepper but you can use your favorite.)
  • 1 fresh, ripe tomato, sliced
  • Several basil leaves, torn
  • Salt and Pepper to taste
  • Drizzle of olive oil
  • Handful of mixed greens (Lettuce, kale, arugula are all good options.)
  • 1 lemon for juice
To make:
  • Preheat the oven to 425 degrees.
  • Spread the naan edge to edge with a generous amount of hummus. Add slices of tomatoes in a single layer. You may not need the whole tomato because too many can make it watery.
  • Sprinkle with torn basil leaves. Season with salt and pepper and drizzle with olive oil.
  • Transfer to a pan and bake for about 10 - 15 minutes until edges are browned and tomatoes are warm and soft. Check often to prevent burning.
  • While the naan is baking, mix together the salad greens with a hearty squeeze of lemon. Season with a sprinkle of salt and pepper.
  • When the pizza is done, mound the salad greens on top of the pizza and cut into wedges.
  • Serve immediately.
I got the idea of putting salad greens on top of the pizza from my trip to Italy. There, a popular dish is a large pizza simply made with tomatoes and basil and very little cheese, topped with fresh crisp arugula. Delicious and refreshing, perfect for a hot summer day!

Monday, July 16, 2012

FAQs about Vegetarian Diet and Cooking

I've had a few questions about my diet and the recipes I posted and the way I cook, so I thought I'd answer the most frequently asked ones here so everyone can learn a little bit more about the blog.

What is your diet?

I like to tell people I'm a pescatarian with a vegetarian diet. It means I'll eat seafood and fish once a month or so if even that, but the rest of my meals are vegetarian or vegan (though not on purpose.) I do consume dairy such as milk, cheese, and eggs, but pretty rarely.


What do you prefer to cook with?

Most of my meals turn out to be vegan simply because I choose not to cook with butter, cream, or cheese. I made that choice because I wanted to cut the overall calories and to really amp up the benefits of all the veggies in my dish. Alternatively, I'll use olive oil, citrus fruits, and tons of spices and herbs to flavor and give my dishes a freshness that really, well, can't be beat. A variety of vegetables really punches up the overall meal because you're experiencing so many different flavors on a single plate. 

Are your recipes low in calories or fat? Can I find the ingredients you use?

The recipes I post are healthy, cheap, and easy dishes that anyone can make. Since I cut out a lot of saturated fat found in dairy products, and try to bulk up with vegetables and legumes, they are almost always low in calories and very low in fat aside from the olive oil used in cooking. (Olive oil is a good fat! So is avocados, yum!) Most of my ingredients can be found in your kitchen or at the grocery store and farmer's market with little effort; and since I've been pretty upfront about my tiny budget, they are all affordable. One caveat, since I just cook for myself and Guitar Boy, most of the dishes yield enough for two people, though doubling the recipes should be simple in all cases.

Why should I be a vegetarian?

I'm not here to lecture you about the merits of vegetarianism. Although, I would like to educate you on the points of the diet if you are open to learning more. After all, you can simply close out of my blog if you don't agree with my views. However, I do hope that you will give it a chance if you are not already a vegetarian and see the other side of eating well. As for why I believe someone should be a vegetarian, there's a long, long list that many people like me all agree on. While I did initially stop eating meat because I couldn't bear to know that I was eating a cow or a pig, I learned many more things about the positive effects of vegetarianism that only cemented my belief in it. Other benefits of vegetarianism:
  • Environmentally friendly: It takes significantly less energy to produce a crop of vegetables than it does to raise livestock.
  • Health: It reduces risk of heart disease, stroke, cancer, and extends life length.
  • Affordable: Cutting out meat adds more buck to your bank
  • Reduce toxins in your body from hormones and antibiotics found in livestock.
  • It's easier than ever now to be a vegetarian!
There's tons of more reasons and I will delve deeper into the benefits of vegetarianism individually so more people can at least see the two sides of eating meat and not eating meat. Your best tool for yourself is education. Educate yourself and only then will you be able to make the best choice.

Have you seen Food Inc., Forks over Knives, Food Matters, etc.?

Yes, yes, yes! All wonderful and extremely informative documentaries. Remember what I said about education? This is a great start. If you are interested in learning more about the food industry, Food Inc. is a must. A good follow up to Food Inc. is The Vanishing of the Bees. They both expose the darker sides of the food industry, government involvement (or disinvolvement, rather,) and pesticide use. Forks over Knives is a well-researched, easy-to-watch documentary on the benefits of a plant based diet. Full of scientific studies and carefully researched facts and advice, this is a credible look at plant based diets. Food Matters is another great one if you are still learning more about plant based diets and their effects on diseases. (image credit)


Anything else? If you have any questions for me, feel free to comment below or send an email to me at Beatrice@BirdcageBohemia.com 

I love hearing from people, so don't hesitate to write me!


Friday, July 13, 2012

Center Yourself with Cat-Cow Yoga Vinyasa Poses

Vinyasa means synchronizing your movements to your breath. Inhale- move to one asana or pose, exhale- move to another. It's calming to your mind and relaxing to your body. When I'm going through a routine, breathing in and out, I just close my eyes and lose myself in my body. It has never failed to rejuvenate me.

The Cat-Cow sequence is a stress-relieving and emotionally balancing vinyasa routine. I do this whenever I have a free moment and want to stretch out my spine and center myself. Other benefits include: strengthening your spine and neck, stretching your lower torso (e.g. hips, belly, and back,) stimulating organs in your abdomen, and improving your overall balance and posture.

You begin in Tabletop pose. Stand on your hands and knees with your wrists and elbows directly below your shoulders and your knees directly below your hips. Stretch and space out your fingers so you feel very grounded through your hands. Point your toes back throughout the sequence. Keep your spine flat in a "neutral" position and relax and elongate your neck, looking at down at the floor. (image credit)

As you inhale, move into the Cow pose. Arch your back, lowering your belly towards the floor, and lifting your tailbone upwards while pressing your chest forward and up. Face towards the ceiling. Relax your shoulders from your ears. Try to do most of the movement in your upper back, allowing the rest of your body to follow suit. As always, keep your shoulders and jaw relaxed so you avoid tension and continue breathing. (image credit)


Then, when you exhale, move into the Cat pose seen below. Round your back upwards, allowing your chin to drop towards your chest- but do not force it. Let your head drop to the floor. Tuck in your tailbone and gaze towards your bellybutton. Keep your shoulders relaxed and in place as well as your hips. (image credit)

Continue to slowly and gently move into the Cow pose with each inhale, then the Cat pose with each exhale. Breathe deep into your lower lungs and belly. Try to extend your belly out as you breathe in, imagining it filling up with air, then pull your belly in as you exhale, as if you're deflating all the air out of it. Continue for 5 - 20 breaths depending on how long you want to do it then return to the neutral Tabletop pose to finish.

Don't worry if you're not getting the pose exactly right or if you're not following the deep belly breathing technique I described above. As long as you synchronize the inhales and exhales to the Cow and Cat poses and you feel a change in your body, you're doing yoga. Do not push yourself into poses, just breathe yourself into it and let your body relax and take over.

If you do yoga, what poses do you like to relax yourself when you have a minute in the day? If you don't do yoga, will you try this? If you do, how did you like it? You can answer in the comments below!

Note: I am not a doctor or any type of medical/physical professional. My advice is given because it works for me, not because a doctor or professional said so. If you have any questions about your physical ability, please check with your doctor or physician first for all matters. 

Wednesday, July 11, 2012

Wash Your Face with Honey, Sweetie

I've mentioned before in my Meet Beatrice video and Facebook that I've been washing my face with honey. Yes, I am secretly crunchy granola. Hear that sound? That's the sound of a stereotype being broken. Kaboom! But really. I like putting food on my face... and in my mouth... and that's where it ends so don't get too excited. 

And I like that if I accidentally lick my lips, I get a taste of yummy honey and not some chemical-laden cream that requires me to brush my teeth thoroughly. (image credit)


So if you're interested in trying out a honey wash, let me introduce you to my face washing routine. I first learned about the honey wash when I read Crunchy Betty's Honey Challenge post. It intrigued me because it seemed like a miracle wash. Here's a snippet from Crunchy Betty about the properties and benefits of washing your face with honey:
  1. It is antibacterial and antimicrobial. It will get off any lingering nastiness that’s thinking about setting up camp on your face and creating pimples.
  2. It is slightly drying which means it helps soak up any pimples or oiliness.
  3. It is also incredibly moisturizing. Seems like a double standard, doesn’t it? But it’s true. Honey sinks into your skin and moisturizes like you wouldn’t believe. (Remember Cleopatra and her honey baths to look young?)
  4. It imparts all kinds of beneficial enzymes that work at scrubbing your face for you, as well as perform a little anti-aging action.
  5. It’s great for acne, aging skin, normal skin, dry skin … honey loves EVERY SKIN TYPE.
  6. It is healing and helps repair acneic sores and scars.
  7. It’s 100%, absolutely, positively natural, great for your skin, and such a SIMPLE addition to your routine!
How would you say no after reading all that? The one caveat is that it needs to be a make-up free face. It works for me because I use just mascara and eyeliner. (Another secret, I'm completely clueless about make-up.) However, she posted another tip on how to remove eye make-up which was perfect for me. So here's what I do to wash my face at night:
  1.  I pour a dab of cold-pressed extra virgin olive oil into a cotton pad and swipe it over my eyes to remove all the mascara and eyeliner. I love that it doesn't irritate my eyes and I can open my eyes without getting blinded. Bonus: Doing this every night has made my eye area super soft and supple and it has strengthened, thickened, and aided in the growth of my eyelashes.
  2. Optional: Gently tissue off the oil with a soft tissue. I don't do this because I need the moisture and it hasn't impeded my ability to rinse off the wash. It may for you so leave the oil on for your first try and use your judgement for your next attempt.
  3. With slightly damp hands, pour a dab of honey, about under 1/2 tsp, into your hands and rub together. Then massage it into your face all over. All over means all over. I go over my eyes and I make sure to get my jawline because I get quite a few breakouts there.
  4. Let it sit for a little bit. It can be as little as 30 seconds or as long as 5 or 10 minutes. I let mine it while I brush and floss my teeth, so about 5-7 minutes.
  5. Rinse off in warm water. You're done.
Important: The honey can't just be any run-of-the-mill honey. It needs to be as unprocessed as possible, meaning it should be labeled raw. Why? Heat destroys the beneficial properties in honey. Most honey is pasteurized which means it's heated. Raw honey is not heated and therefore retains everything that makes it good. Your best bet is the farmer's market where you can ask the beekeeper how the honey is processed, or a well-stocked grocery store. Just read the label. Since you use so little of it at a time, you can definitely stretch what seems to be a pricy bottle of honey for a far longer time than a pricy tube of top-of-the-line chemically cleanser. Besides, it never ever spoils. If it crystallizes or hardens, just place the bottle in a bowl of warm water to soften. Don't microwave, heat is your enemy! (Right: raw honey I use. Found at HomeGoods of all places!)

I've done this for about two months now. The first couple weeks were magical for me. I loved my skin, it was clearing up and glowed. Then, when I hit the one-month mark, my skin had gotten really dry on my forehead and my skin tone was very ashy and rough. I discovered that I was rinsing with water that was way too hot and that I was washing my face too much. At first, I did the honey-wash every morning and night. Now I just wash my face at nights.

It sounds weird and frankly, dirty, to not wash your face in the morning, but if you think about it, it makes a lot of sense not to. You sleep all night. You're not going out there getting dirt and dust into your pores. You're not eating food. You're not doing anything but resting your face gently against your pillow for hours. So when I started just rinsing my face in warm water followed by a cold water splash in the a.m., my face underwent a transformation. It made a huge difference in the dryness and oil production and now I am much more balanced.

Other tips on the honey-wash: The original method said you could apply the honey directly to a dry face. I hated this because it just pulled at my delicate skin. Adding a bit of water made it go on a lot smoother. Try not to use hot water to rinse, it dries out your skin. I moisturize by smoothing a dab of olive oil around my eyes and my dry spots which are my forehead, around my nostrils, and the corners of my lips. 

Another bonus I've noticed with the honey-wash and olive oil. I had a bit of redness on my nose and cheeks after spending all day in the sun at the beach. There's no solid proof, but I swear on my vegetarian cookbooks that the honey and olive oil (I applied it to the red areas) soothed and dissipated the redness. I've gotten red twice, it seems to have worked twice. Just food for thought. (Hehe, get it?)

I also intersperse my routine with something called the Oil Cleansing Method (OCM,) but as vital as it is, it deserves it's own post so check back soon on my experiences with OCM! Read all about my OCM experience! (image credit)


Would you give this a try? If you do, let me know what you think in the comments!

Monday, July 9, 2012

Oven-Roasted Tomato Basil Pesto and Ohio City Pasta

So it's finally cooled down in Crackron- I mean, er, Akron, enough to turn on the stove. I was so excited to cook again. No, really, so excited. So I ended up making a semi-elaborate meal to celebrate and spoil Guitar Boy with. 


(Read: elaborate in any incarnation over here means utilizing something other than a chopping board and a skillet to create a dish. Case in point: the Ninja blender finally, finally came out of its box.)

I took the Ninja on it's maiden chopping voyage with a pesto recipe. Well, it's really kind of like a bastardized sorta-kinda-not-really pesto, but still pesto because it looks like pesto, smells like pesto, and acts like pesto. 

And there's the rumble of angry Italian mothers coming and ready to paddle my behind.


And to make them even angrier... there's a weird ingredient in here. Just trust me though.

So I bring you oven-roasted tomato basil pesto. I shall offer this up to appease the angry Italian mothers and tell them it is divine, creamy deliciousness. They'll believe me. I think.

Get together for just over 1/2 cup worth's:
  • 2 roma tomatoes, quartered
  • 4 cloves garlic (more or less to your preference)
  • Heaping tsp peanut butter (You read that right. See below for more information.)
  • 1/4 cup Parmesan cheese or whatever you have in your pantry
  • 3/4 cup to 1 cup fresh basil leaves
  • up to 1/4 cup olive oil plus more for roasting
  • 1/2 lemon, juiced
  • Salt and pepper to taste
Now to make it:
  • Preheat oven to 450 degrees. In a small roasting pan, layer the quartered roma tomatoes skin side down and drizzle olive oil to cover. Sprinkle with salt and pepper. 
  • Take the garlic cloves paper skin-on and place into a square of aluminum foil. Drizzle olive oil to cover and sprinkle with salt and pepper as well. Wrap the garlic up tightly in the foil. 
  • Roast both in the oven for about 15 to 20 minutes until tomatoes are softened and the edges slightly burnt. 
  • Take out and set aside until cooled.
  • Peel the burnt skin off the tomatoes and add to the food processor. Squeeze the garlic out of the papery skin. It's okay if it's not completely softened, we still want a bit of a bite. Add to the processor. Blitz the processor a few times to break up the tomatoes.
  • Add in this order: peanut butter, cheese, and basil leaves. Squeeze the lemon over the top. Begin pureeing.
  • While pureeing, drizzle the olive oil into the processor until it starts to become smooth and easy to puree. Be careful not to add too much that it becomes oily and runny. Stop and check and taste every so often.
  • Taste and add salt and pepper as needed.
  • Voila, you have oven-roasted tomato basil pesto-but-not-pesto.


Now, for those of you who raised an eyebrow at my use of peanut butter. In my defense, I'm not a fan of going out to buy a single ingredient. Besides, pine nuts, the ingredient found in pesto, are expensive. I added a teaspoon of peanut butter just to give the sauce a little bit of body and to add a slightly nutty background flavor. Also, I used the kind that is just dry roasted peanuts with sea salt, no added sugar or flavorings. It's not so much that you can sit there and say, "Oh, I taste peanuts!" because that wouldn't be so good. If you are wary, add a little bit at a time and taste, then add more and taste, you'll see the difference and improvement. However, if you rather be all traditional, by all means, throw some pine nuts in there! It's your dish after all!

I served it with this fabulous, delicious tomato basil pasta from Ohio City Pasta that I got at the farmer's market. I simply sauteed candy onions (find it at the farmer's market!) with mushrooms, then added the linguini with three spoonfuls of the pesto and a little pasta water to thin it out. 

The pizza slices you see on the plate will be another post, or else you'd be reading one uber-long post! Hungry yet?

What's your favorite pesto recipe? Traditional or off-the-wall?

Thursday, July 5, 2012

Yoga Detox Poses to Help Overindulgence

I'm pretty sure most of you overindulged yesterday amidst loved ones, food, and celebration. I know I have! So when I'm feeling heavier or slower than usual, instead of just trying to slog my way through the day and eating only salads, I turn to yoga to help me get back to my usual self. (image credit)


I focus on specific poses that help detox my body and relax myself. Yoga Journal describes explains how "[t]he heating and twisting sequences designed for [detox] can help move toxins from your tissues through your lymphatic and digestive systems so that they can be eliminated from the body" which is extremely helpful if you've imbibed a bit too much alcohol or ate one too many servings of mayo-laden potato salad.  

So how does the body detox? Kate Hanley of Gaiam Life describes it well: "There are three main systems of the body that play a crucial role in the elimination of wastes — circulatory, digestive and lymph. The circulatory system pumps blood throughout the body, delivering oxygen to and carrying waste products away from cells. The digestive system processes the food we eat, separating nutrients from waste and eliminating anything the body doesn’t need. And the lymphatic system collects intracellular fluid from throughout the body and transports it to the lymph nodes where anything harmful (such as bacteria or other contaminants) can be removed before the lymphatic fluid is returned to the bloodstream." 

Our body is well-set up to do this already, but sometimes we beat it up and we need to offer a helping hand. Most types of vigorous exercise will help rev up your body's detoxification system, but yoga offers a unique method involving stretching and compressing that helps in very specific ways.

I tend to lean towards twists whether it's sitting, laying on my back, or standing in either chair position or lunge position. I guess I can say these are my favorite poses. These poses offer the benefits of improving digestion so I find myself doing a few of these at night before going to bed. Twists are a great example of a compression technique that helps with detoxes. View this page for variations on twists and step-by-step instructions. (image credit)


 Another great detox pose is the downward dog. I know most people hate this, even I dislike it most of the time. However, it's incredibly beneficial to our bodies which is why we find it time and time again in yoga routines. In getting your heart higher than your head, you reverse the gravitational blood flow and shake up the circulation of your blood and lymphatic system. It also slightly tones and strengthened your abs so digestion is improved as well. Click here to read and view a video of step-by-step instructions on how to do the downward dog.

Legs up the wall is another great pose that I've actually have not taken the time to do very much. Gaiam Life explains that this pose "[b]athes the abdomen in fresh blood, stimulating the digestive organs. Soothes the nervous system, allowing your body to shift its attention from warding off stress to daily bodily functions, including detox." It sounds kind of freaky, I know, but never underestimate the power of what simple poses can do for your physical and mental well-being. Click here to read step-by-step instructions on how to do this pose on the left.


What do you do to help your body recover from a day of overindulgence? Would you do these yoga poses? If you do, let me know how you felt afterwards!

Note: I am not a doctor or any type of medical/physical professional. My advice is given because it works for me, not because a doctor or professional said so. If you have any questions about your physical ability, please check with your doctor or physician first for all matters. 

Tuesday, July 3, 2012

Spicy Lemon Ginger Vegetable Stir Fry

I didn't care about buying a wok when we moved and had to stock our kitchen from scratch. However, Guitar Boy was obsessed with finding one. It had to be a big one and it absolutely had to have a glass lid "so I can see what's cooking inside," he said to me every time we looked at one. Every time. I cared more about getting an immersion blender.

Well, we have a wok thanks to Bed Bath and Beyond and their coupons. And I still don't have an immersion blender. Though the wok has been nice, I still think an immersion blender would've been a better buy, but alas, I make do. (See my tomato soup recipe for my ingenious, if I may say, use of a potato masher.)


Dinner last night was a quick and healthy stir fry. Typically we use vegetarian oyster and mushroom sauce or just a run-of-the-mill stir fry sauce from the Asian market but they can be packed with sodium, sugar, and god knows what else. I wanted to avoid using them this time just because we had been eating pretty crappy the day before (read: two giant doughnuts each and pizza and cheese and much too sweet Ohio wine and crap and more crap and more crap.) So I really amped up the spices and flavors in this one to make up for the lack of that ooey gooey deliciously overly processed sauce.

Also, you don't absolutely need a wok for this recipe. Woks are nice for having a ton of surface area that can cook all the vegetables all at once, but a large skillet over high heat will do just as well.

Also, again, you can use your favorite vegetables. I used whatever I had on hand, but you can switch it up with your favorite add-ins. The ingredients in bold is what makes up the flavor and sauce so they shouldn't be swapped out.


Get together for 2 main dish or 4 side dish servings:
  • 1 onion, sliced thinly
  • 3 carrots, sliced in half-moons
  • 1 large Hungarian sweet pepper, chopped coarsely
  • 1 small (8 oz?) box of sliced baby bella mushrooms
  • Splash of dry white or rice wine (optional)
  • 2 tomatoes, chopped coarsely
  • 3/4 to 1 tbsp ginger, minced
  • 3/4 to 1 tbsp garlic, minced
  • Pinch or dash or heaping spoonful of cayenne pepper (whatever floats your boat)
  • 1/2 lb swiss chard, rolled up and sliced into 1/2 inch strips
  • Enough Rice or Pad Thai noodles for two large servings, prepared 
  • 2 or 3 packets or 2 or 3 tbsp of your favorite soy sauce (add more or less to your preference)
  • 1 lemon, juiced
  • 5 or 6 large basil leaves, torn
  • Salt to taste
Other vegetables you can use: broccoli, peas, corn, snow peas, water chestnuts (not a veg, I know,) bell peppers, red onions, shallots, cauliflower, kale, collard greens, napa cabbage, broccolini, portobella mushrooms, celery, eggplant (Japanese or traditional,) and anything else that strikes your fancy. Just eyeball the amount and go for it.

And to make it:

It's best to have everything all chopped and prepared in advance because stirfry cooking is over high heat and fast.
  • Prepare the noodles according to package directions.
  • Heat up sesame oil over medium high to high heat in the wok. Peanut and canola oil work too. Do not use olive oil. Add in the onions, carrots, and pepper and let cook a minute or two until soft and onions become slightly translucent. Then, throw in the mushrooms and stir and let cook for a few more minutes.
  • Optional: Add a splash of dry white or rice wine to deglaze or just flavor, let it reduce down.
  • Add in the tomatoes, ginger, garlic, cayenne pepper, and swiss chard and let it simmer and cook down slightly- about 3 minutes.
  • Continue cooking until the swiss chard (or your favorite green) is tender, tasting and adding more cayenne pepper if desired. 
  • Lower the heat to low, stir in the noodles and season with soy sauce and lemon juice starting with 1/2 a lemon. Taste and add more lemon juice, soy sauce and/or salt if needed. (Soy sauce has sodium so salt by tasting.)
  • Sprinkle basil over the top and serve!
 Do you make stir fry a lot? What's your go-to set of ingredients? When we're low on prep time, we turn to frozen broccoli, peas, and mixed vegetables to make a fast and healthy dinner.


The Truth About Salt and How to Salt Food

Okay, this is about salt. Salt is a vital part of cooking. It always has been, it always will, and it always should be, every time. (Image Credit)


I know there will be an argument that some people can't have salt due to high blood pressure. However, according to Health.org, "75 percent of the sodium we consume is hidden in processed foods like tomato sauce, soups, condiments, canned foods and prepared mixes." That's a lot of sodium that we don't have control over. Imagine that, just 15% of the average intake comes from salting at our own discretion. 

The truth is, the amount of salt we add to our dishes can't even reach the level of sodium found in most processed foods. A can of tomato soup can have several times more sodium than the amount you would throw into a pot of homemade soup. Just keep in mind, the recommended healthy daily intake given by LiveStrong.com for sodium is 1,500 mg (2,300 mg being the max) "or less than 600 mg per serving size. For instance, 1 cup of Campbell's split pea soup contains 779 mg of sodium. On the other hand, a 2-cup serving of a homemade split pea soup from "The Mayo Clinic Williams-Sonoma Cookbook" contains 364 mg of sodium."

My point is, when you salt while cooking, use a generous hand and rest easy that you won't be pushing the limits of what's healthy and what's not.

That said, I want to explain how I salt in my cooking. I picked this tip up from one of Michael Symon's cookbook. (You know, back before he became a bacon-and-pork-loving caricature of himself. I'll just leave it at that. Go Zack Bruell!) Anyway, he said that we should salt our food in stages so that in the end, we're not dumping a handful of salt in our pots. "It's too late by then," he says. The dish develops flavors aided by salt throughout the cooking process. And salting your dish after it's hit the dining room table? Way too late.

Salt isn't meant to make food salty. Its properties help draw out the flavors that already exists in the ingredients. It brightens the essence and makes it bolder, more stand out. It also helps melds the ingredients together into a single savory, sweet, tart piquancy. So no, salting your dish isn't to make it salty, it's to make it flavorful. So when you're tasting, you're looking for the taste of what went into the dish. Is it stronger, brighter, or even milder in case of onions, garlic, and other pungent ingredients? (Image Credit)
 
Even though my recipes I've posted so far say to salt to taste somewhere near the end of the method, I wanted to take the time to explain how I do it so you can choose the way you like best. I begin the salting process at the very beginning. Most dishes start with onions and sometimes celery, carrots, and/or peppers. I let the vegetables hit the hot olive oil and give a good shake of salt over it- just enough that it flavors the vegetables in the pan already. After each step or two, I'll give it another shake of salt, being sure to taste it often to make sure the seasoning doesn't become too much.

In the case of using vegetable stock or bullion cubes, I am a little less liberal with my salt since these two ingredients tend to have a bit of sodium already. I make a point to buy low-sodium versions where I find them too.

Just think about it though, you've seen chefs on television demonstrating a recipe. Take the time to notice just how much salt they throw in. It's usually quite a bit, a palmful or handful nearly every time. These chefs know what they're doing and trust me, they're not cooking special occasion dishes, this is how they cook everyday.

The type of salt I use? Sea salt. As for the differences between table, kosher, and sea salt, I'll go over that in another post so you're not completely overwhelmed. I just threw a bunch of information at you already, but I hope that you're looking at how you salt your food a lot differently now. I don't know about you, but I'm suddenly craving a bit of salt right now!